we ship to:
Shipping to AustraliaShipping to AustriaShipping to BelgiumShipping to BulgariaShipping to CanadaShipping to ColombiaShipping to Costa RicaShipping to CroatiaShipping to Czech RepublicShipping to DenmarkShipping to EstoniaShipping to FinlandShipping to France, MetropolitanShipping to GermanyShipping to GreeceShipping to IndiaShipping to IrelandShipping to ItalyShipping to JapanShipping to LatviaShipping to LithuaniaShipping to MexicoShipping to NetherlandsShipping to New ZealandShipping to NorwayShipping to PolandShipping to PortugalShipping to RomaniaShipping to Saudi ArabiaShipping to SingaporeShipping to Slovak RepublicShipping to SloveniaShipping to SpainShipping to SwedenShipping to SwitzerlandShipping to TurkeyShipping to United Kingdom
https://macnest.com/image/cache/catalog/Blogs/A1534-top-case-replacement/a1534-top-case-replacement-guide-1920x1080.jpg

MacBook A1534 Keyboard (Upper Case) Replacement

Posted By Volodymyr Chubei | 08 Dec 2023

Table of Contents


MacBook's users may encounter a situation when they need to replace the keyboard, which in newer models is a part of the upper part of the case. You can do it yourself if you follow the step-by-step guide for the MacBook A1534 keyboard replacement that we provide in this article.

You should use only genuine parts to repair or upgrade your MacBook. Otherwise, there is a high risk of experiencing problems with the device operation. You can find a wide selection of various original parts at favorable prices on the Apple Parts website.

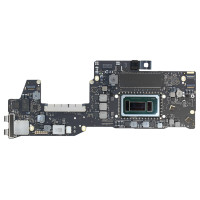
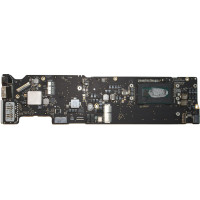
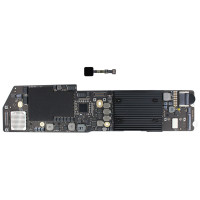
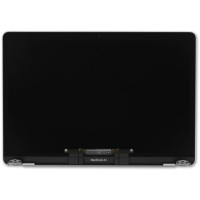
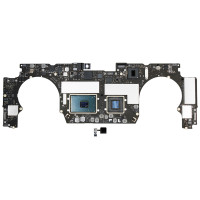
For your Apple MacBook Retina 12" A1534 2015 keyboard replacement, you'll need:

  1. Upper case with MacBook 12" Retina keyboard (early 2015).
  2. USB-C to USB-A 2.0 cable.
  3. Screwdrivers: Phillips #00, P5 Retina MacBook Pro and Air, Torx T3 and T5, Y00.
  4. The iOpener-a case-opening kit.
  5. Spudger and tweezers.
  6. Battery blocker.

10 steps on how to replace MacBook A1534 keyboard

To replace the Apple MacBook Retina 12" A1534 2015 yourself, prepare a working surface - you can use a table covered with a tablecloth. Next, follow the step-by-step guide and follow the sequence of actions exactly.

1. Case preparation

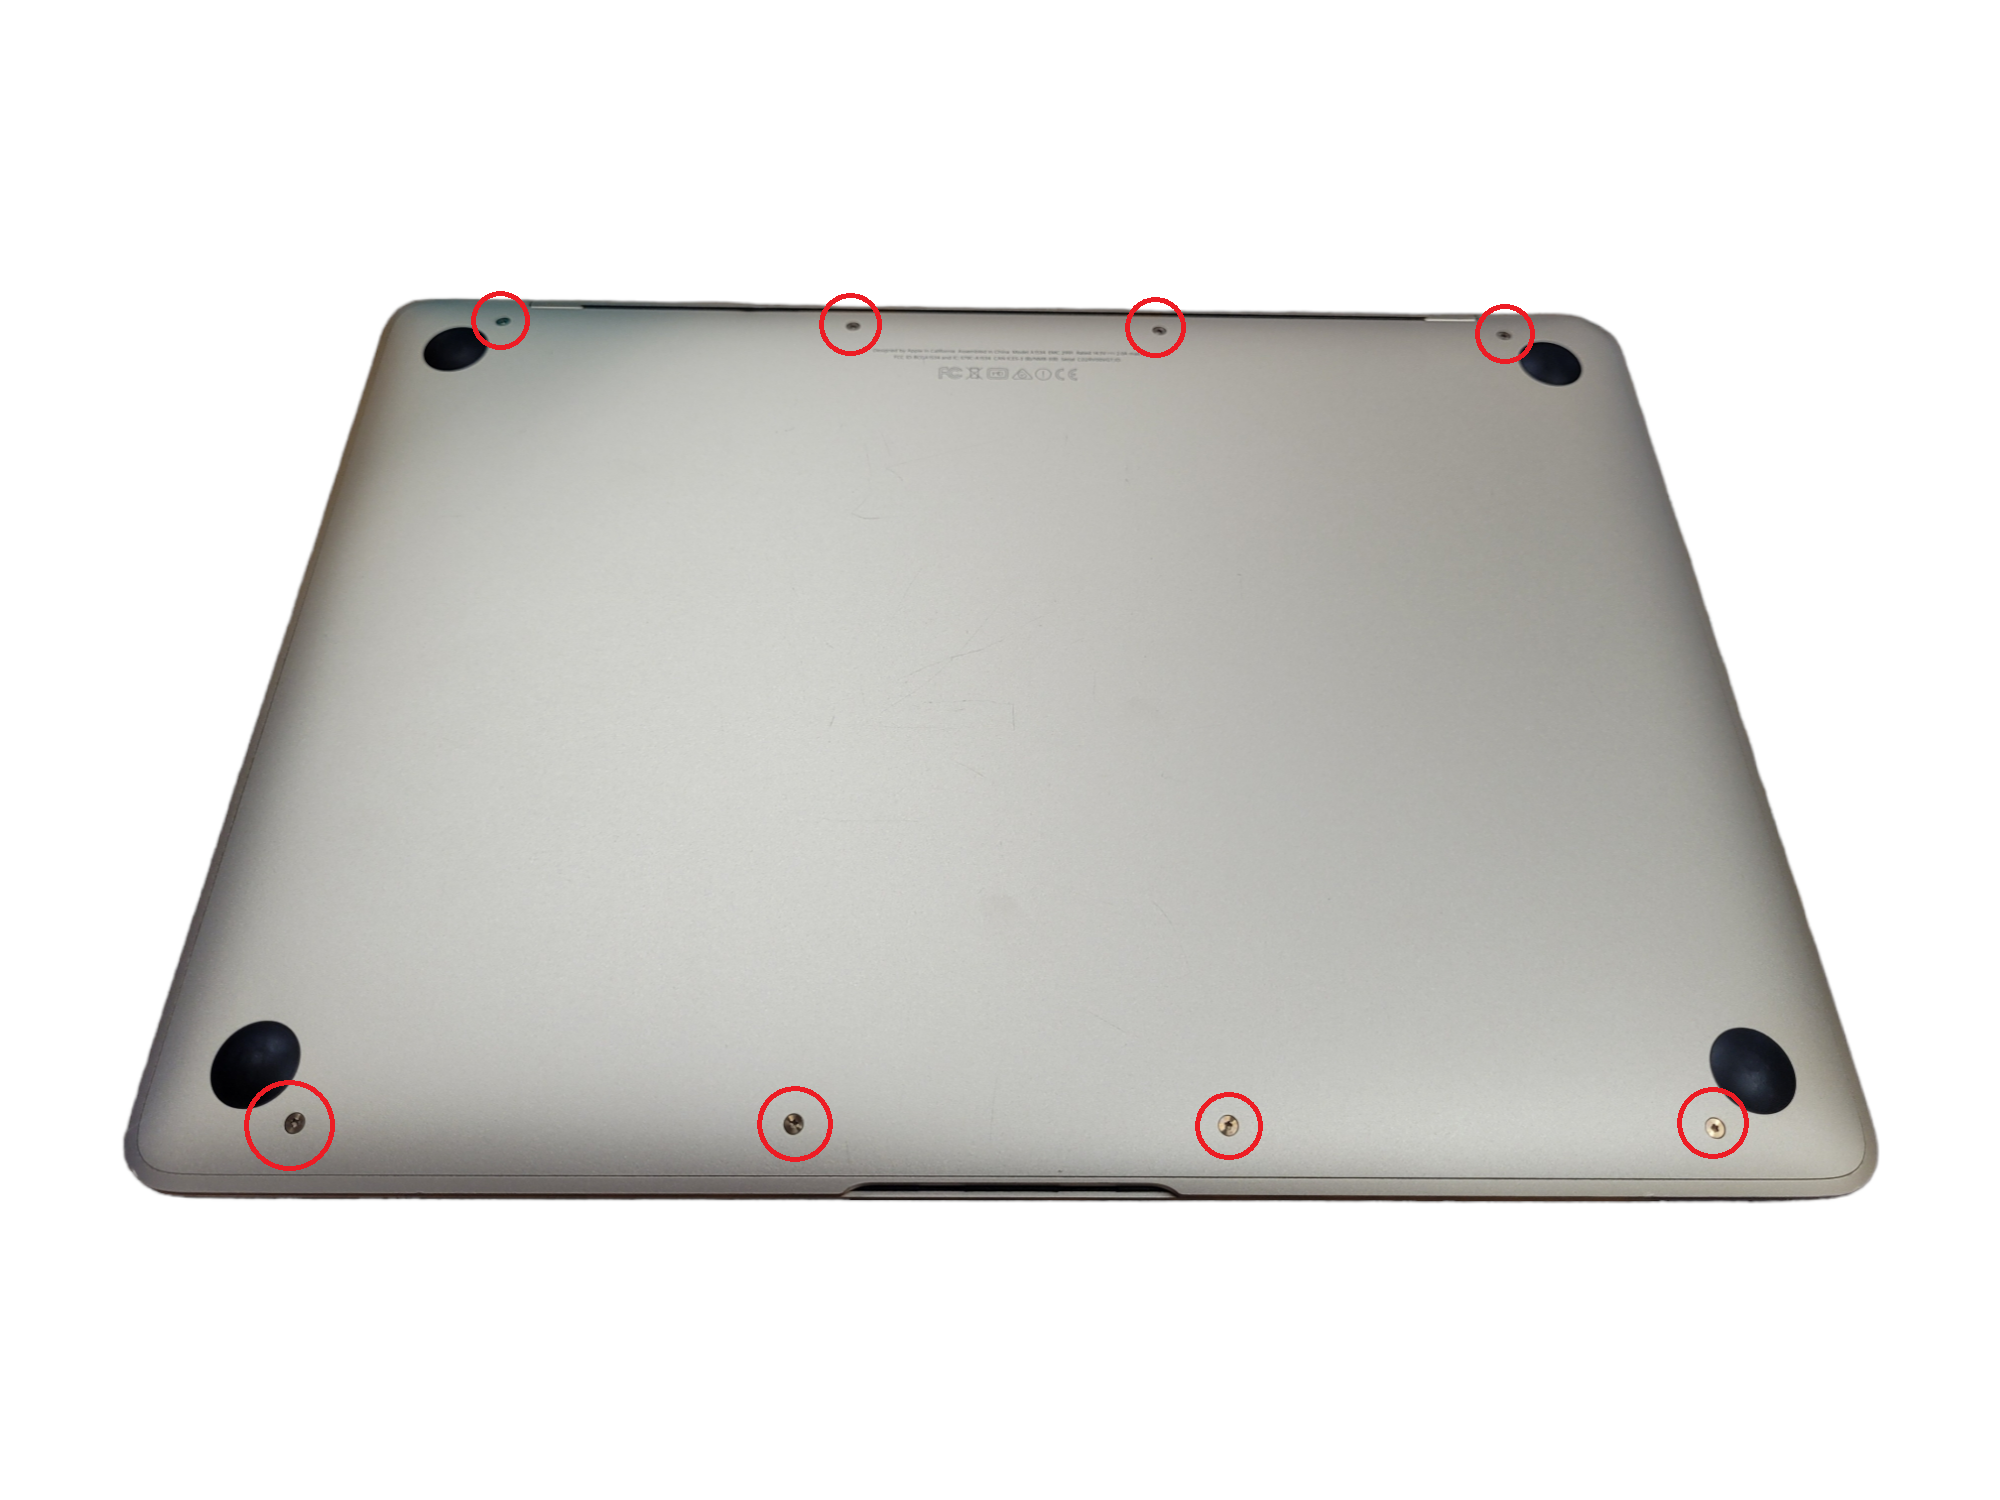
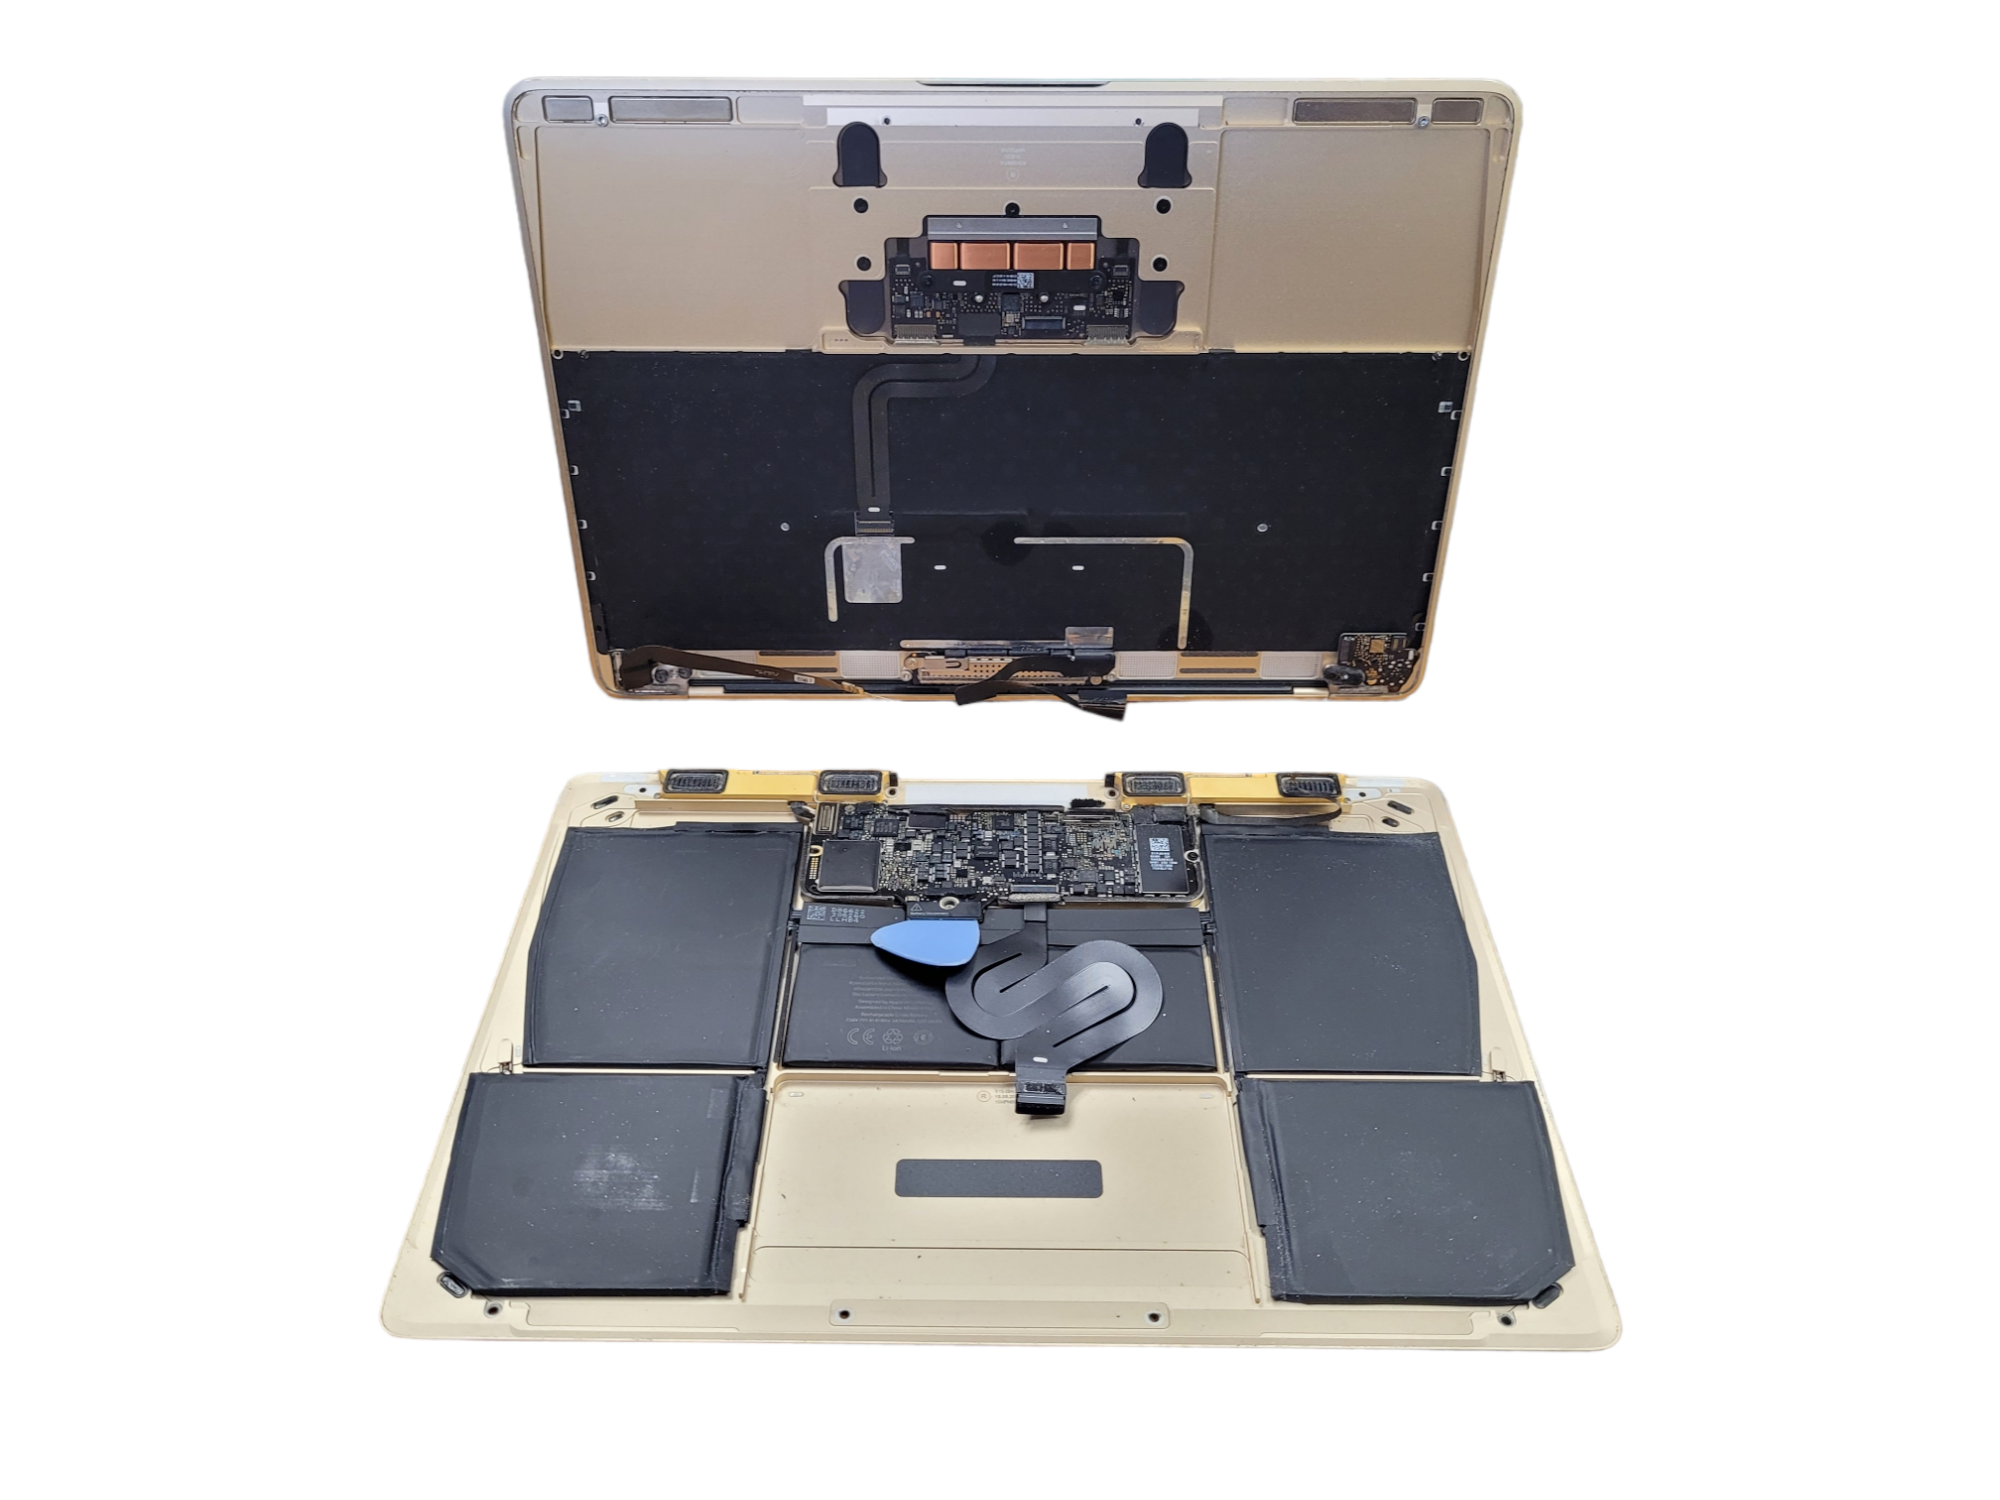
Turn off your MacBook, close it and flip it bottom side up, and then:

  1. Remove the eight screws that secure the bottom side and remember where they come from. s.
  2. Insert your fingers from behind between both parts of the housing in the hinge area.
  3. Lift the bottom part carefully. Move around the perimeter until the top and bottom of the housing are completely detached. Take care not to accidentally damage anything when opening.

If necessary, a plastic card or a spatula can be used to release the fixing clips. When reassembling, press the sides of the lower housing until a distinctive click is heard.


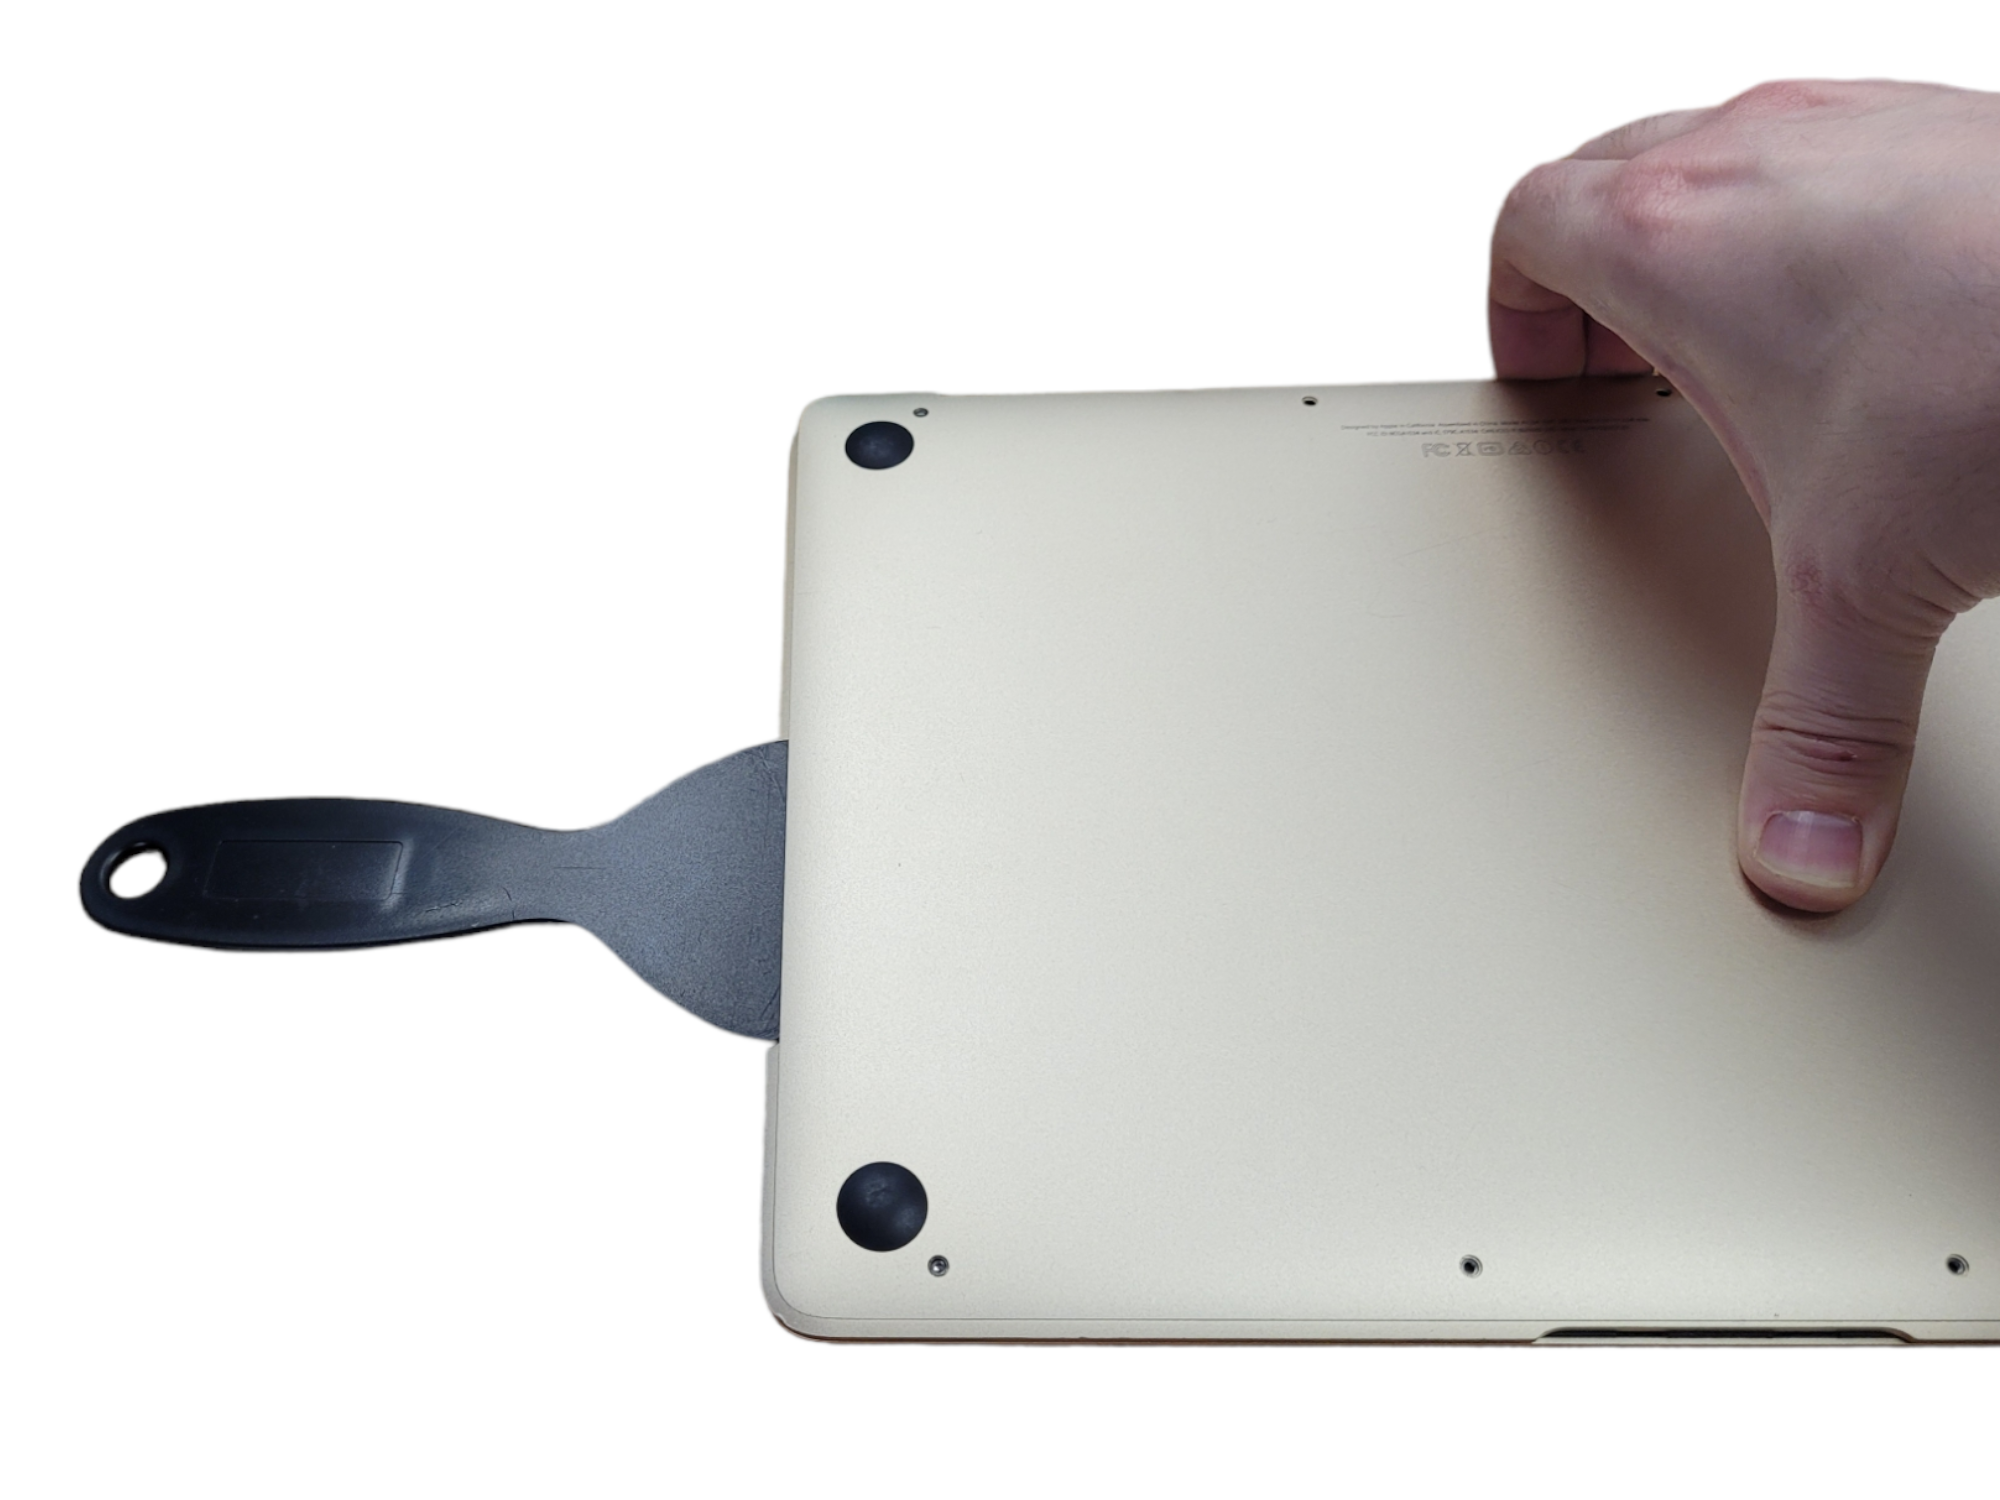
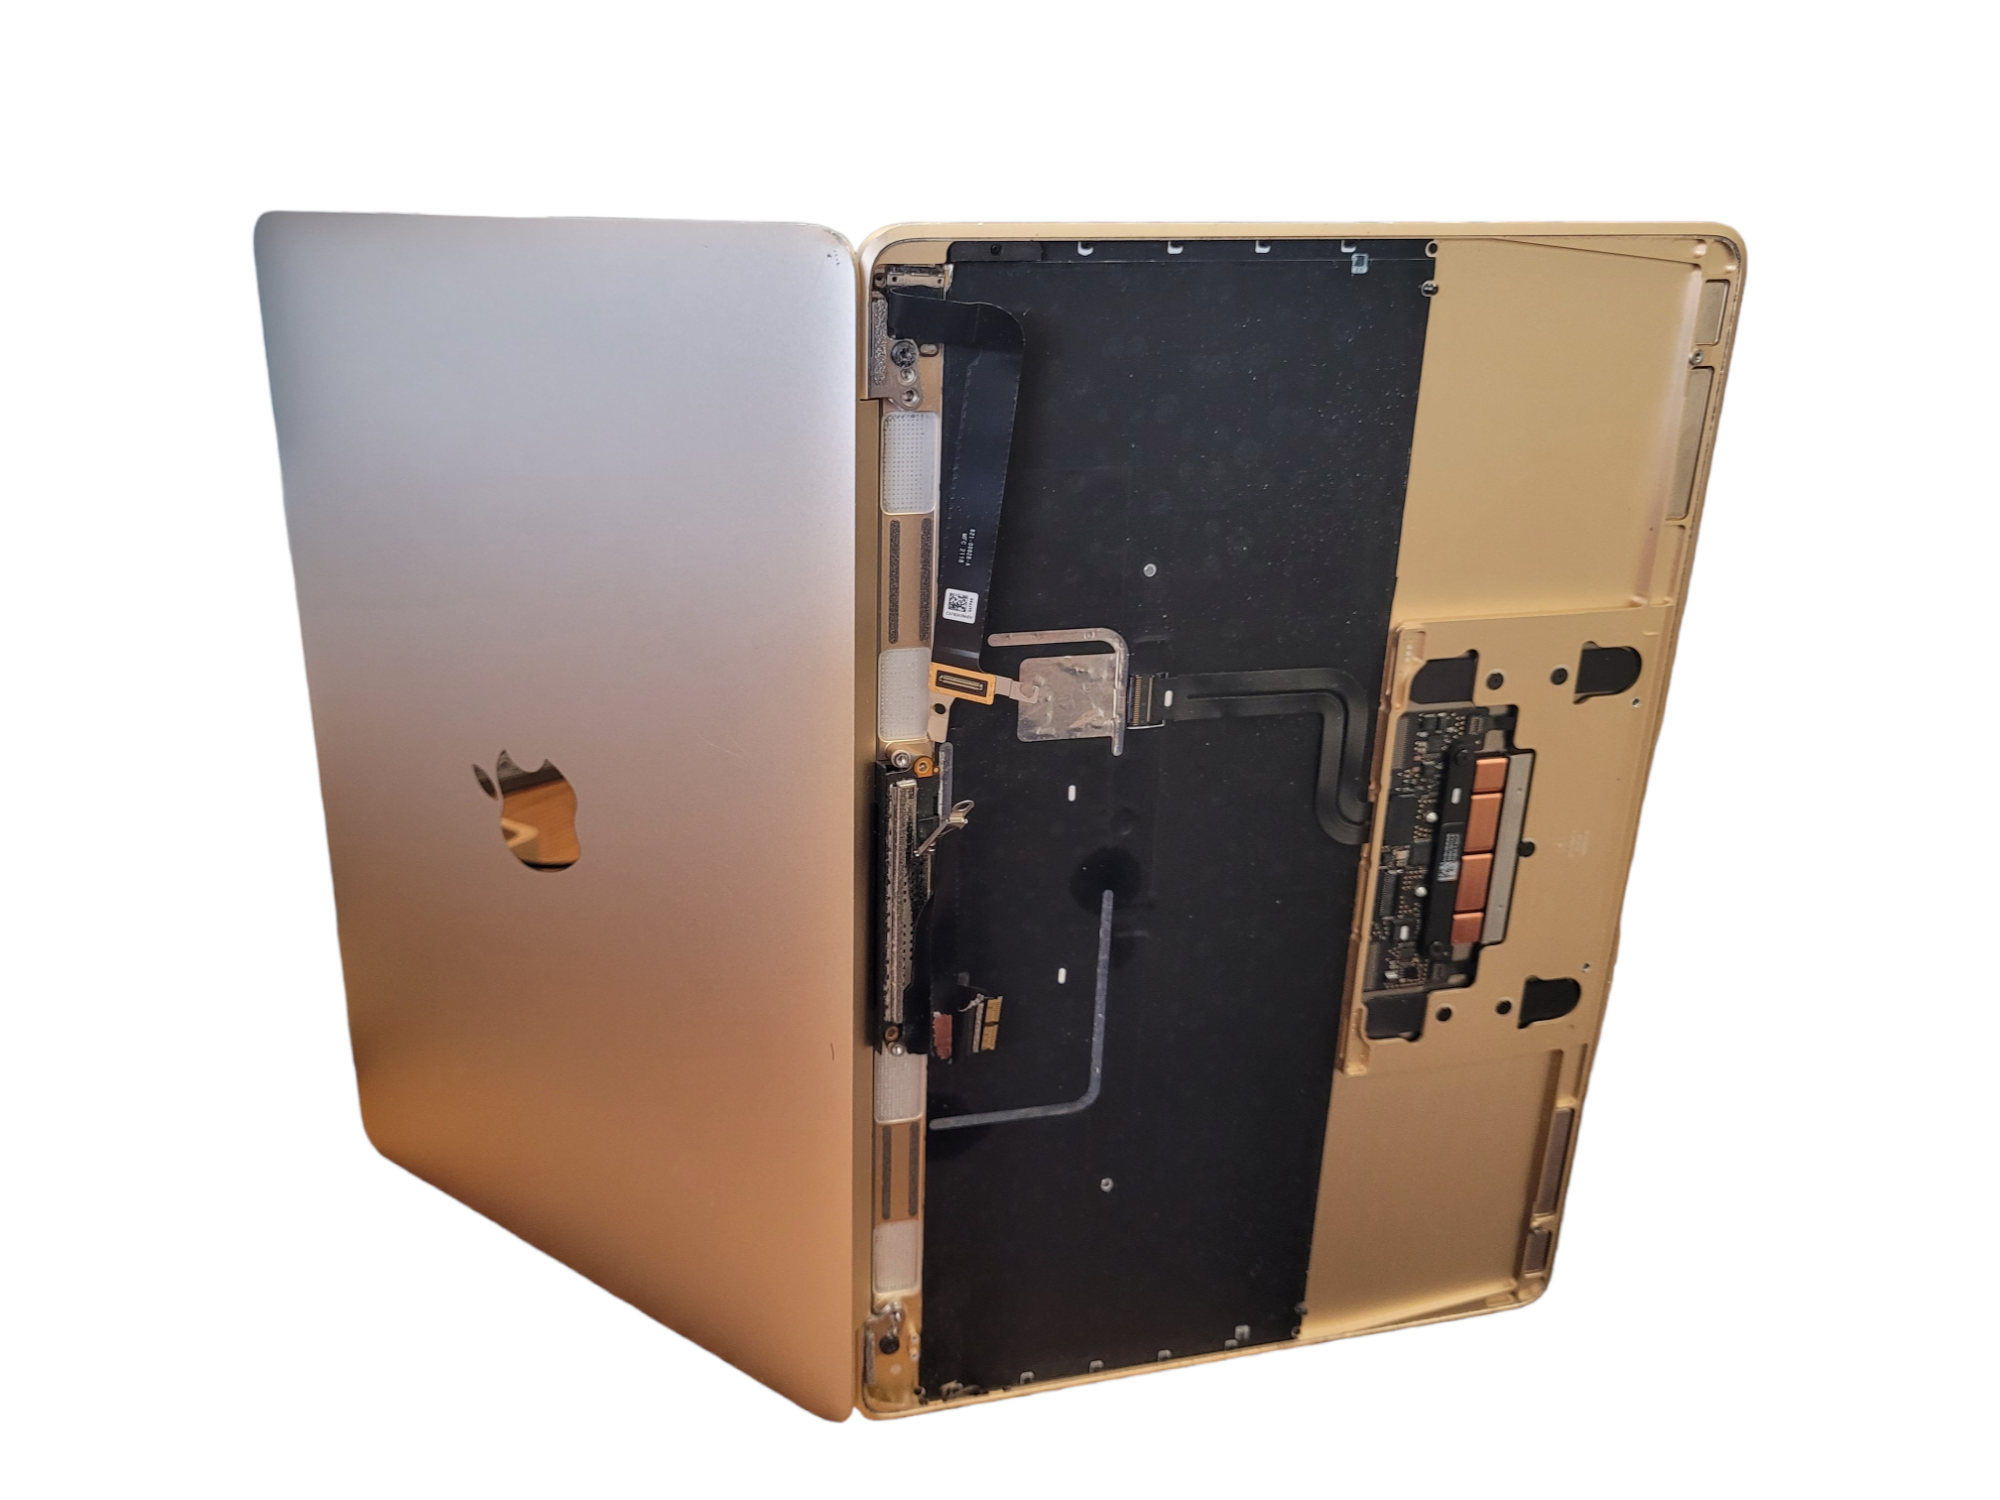
In the next step, hold the bottom part and flip the device with the Apple logo facing up. Open the top cover at an angle of about 45˚.


2. Trackpad disabling and battery locking

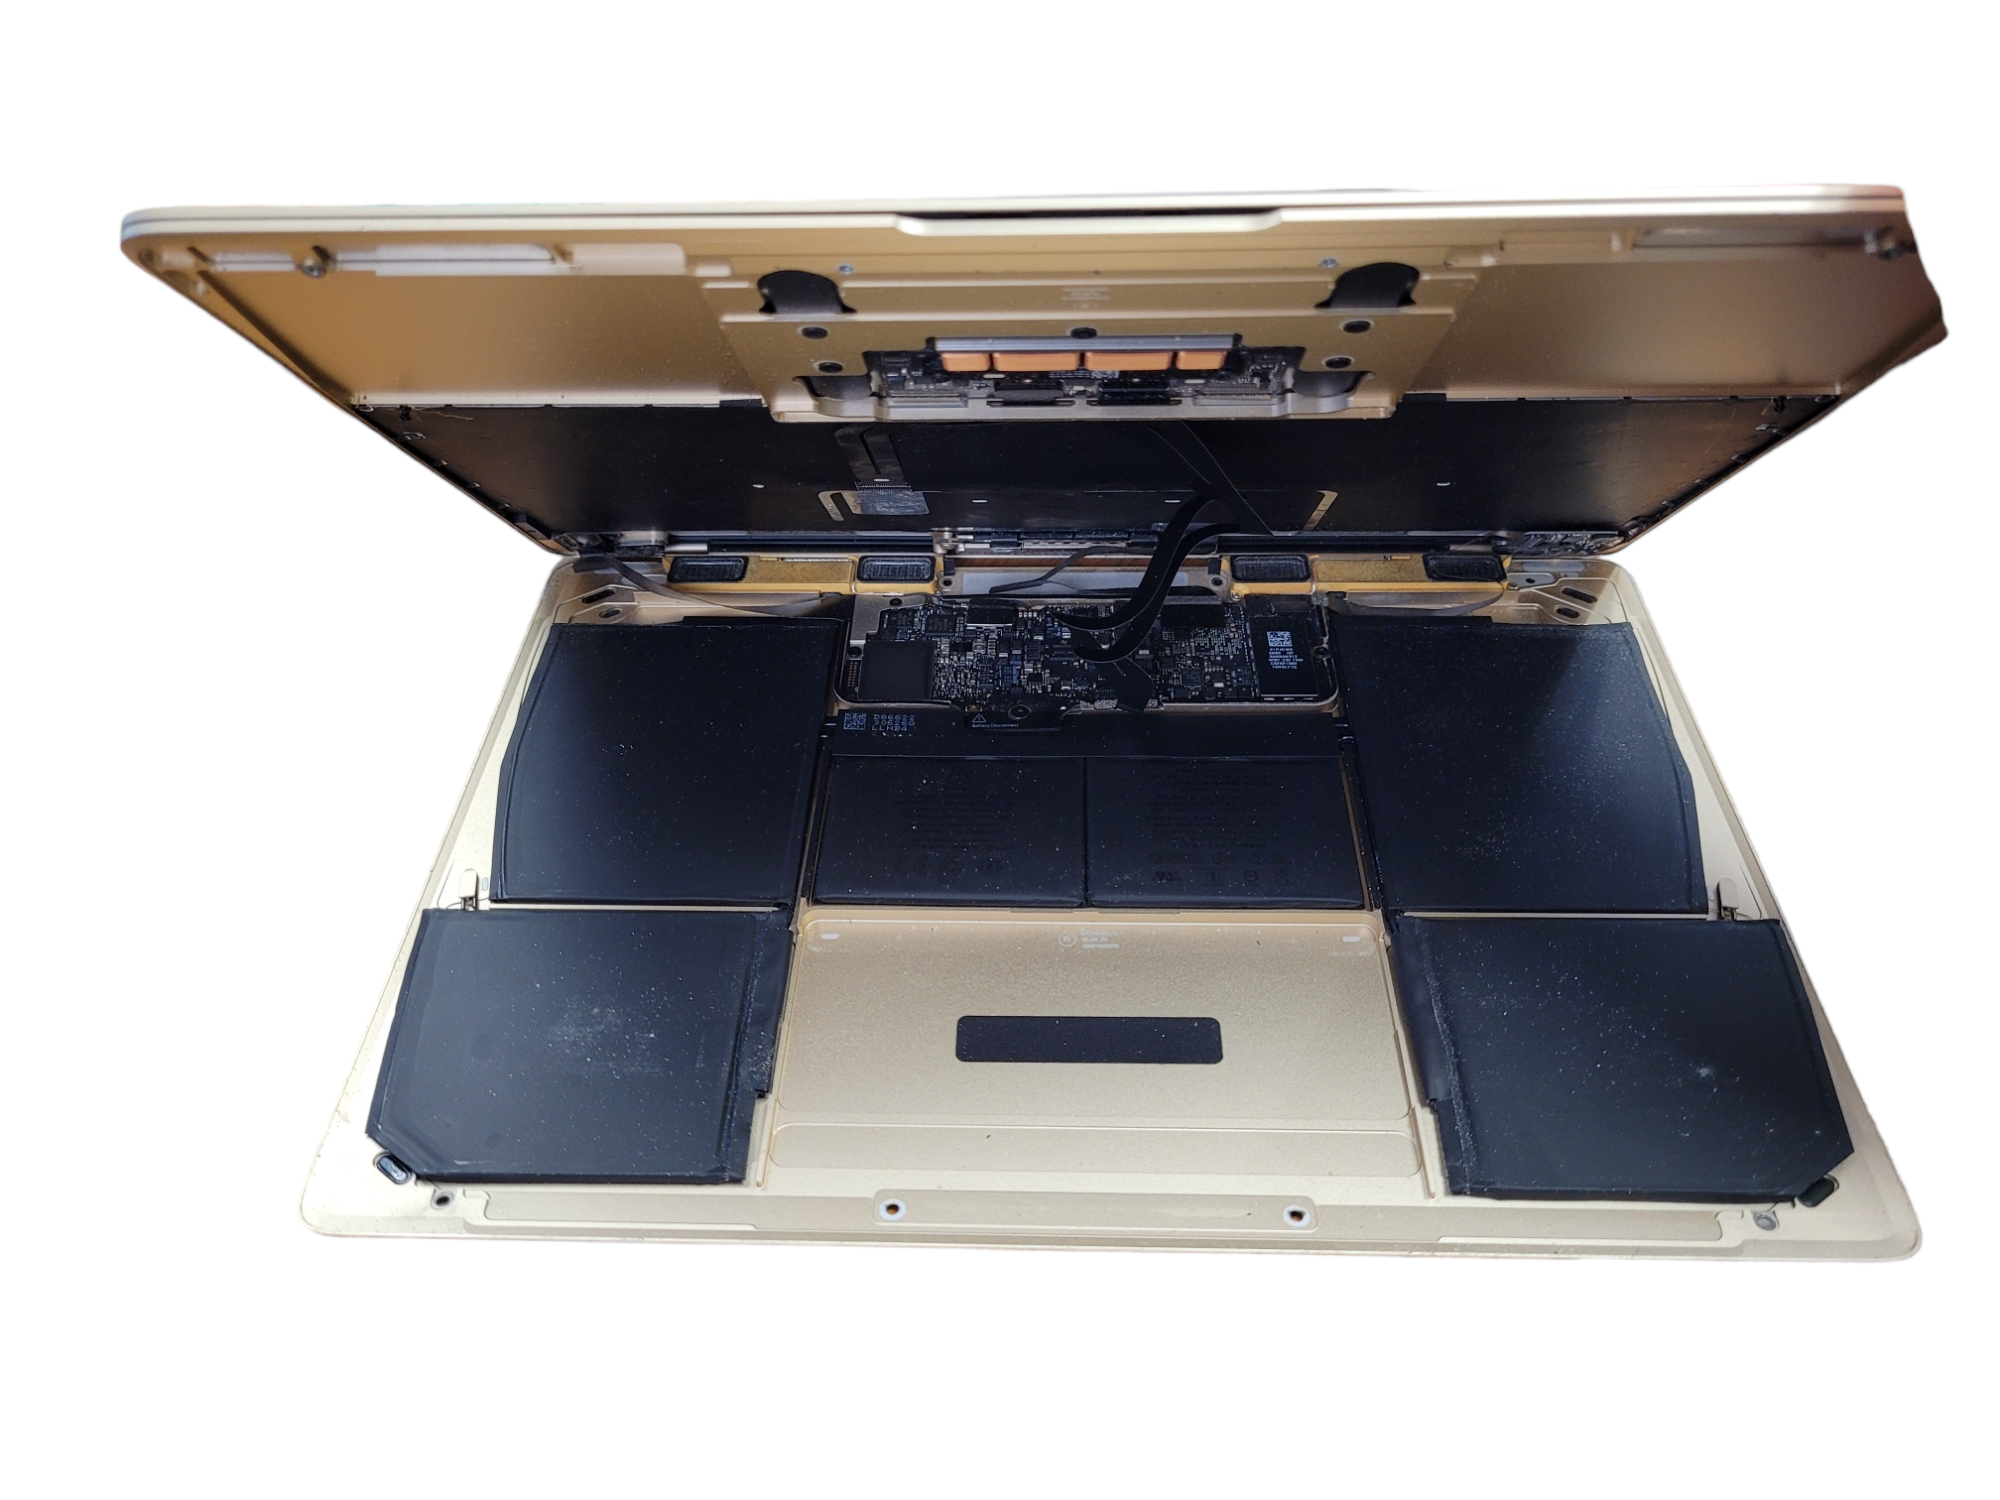
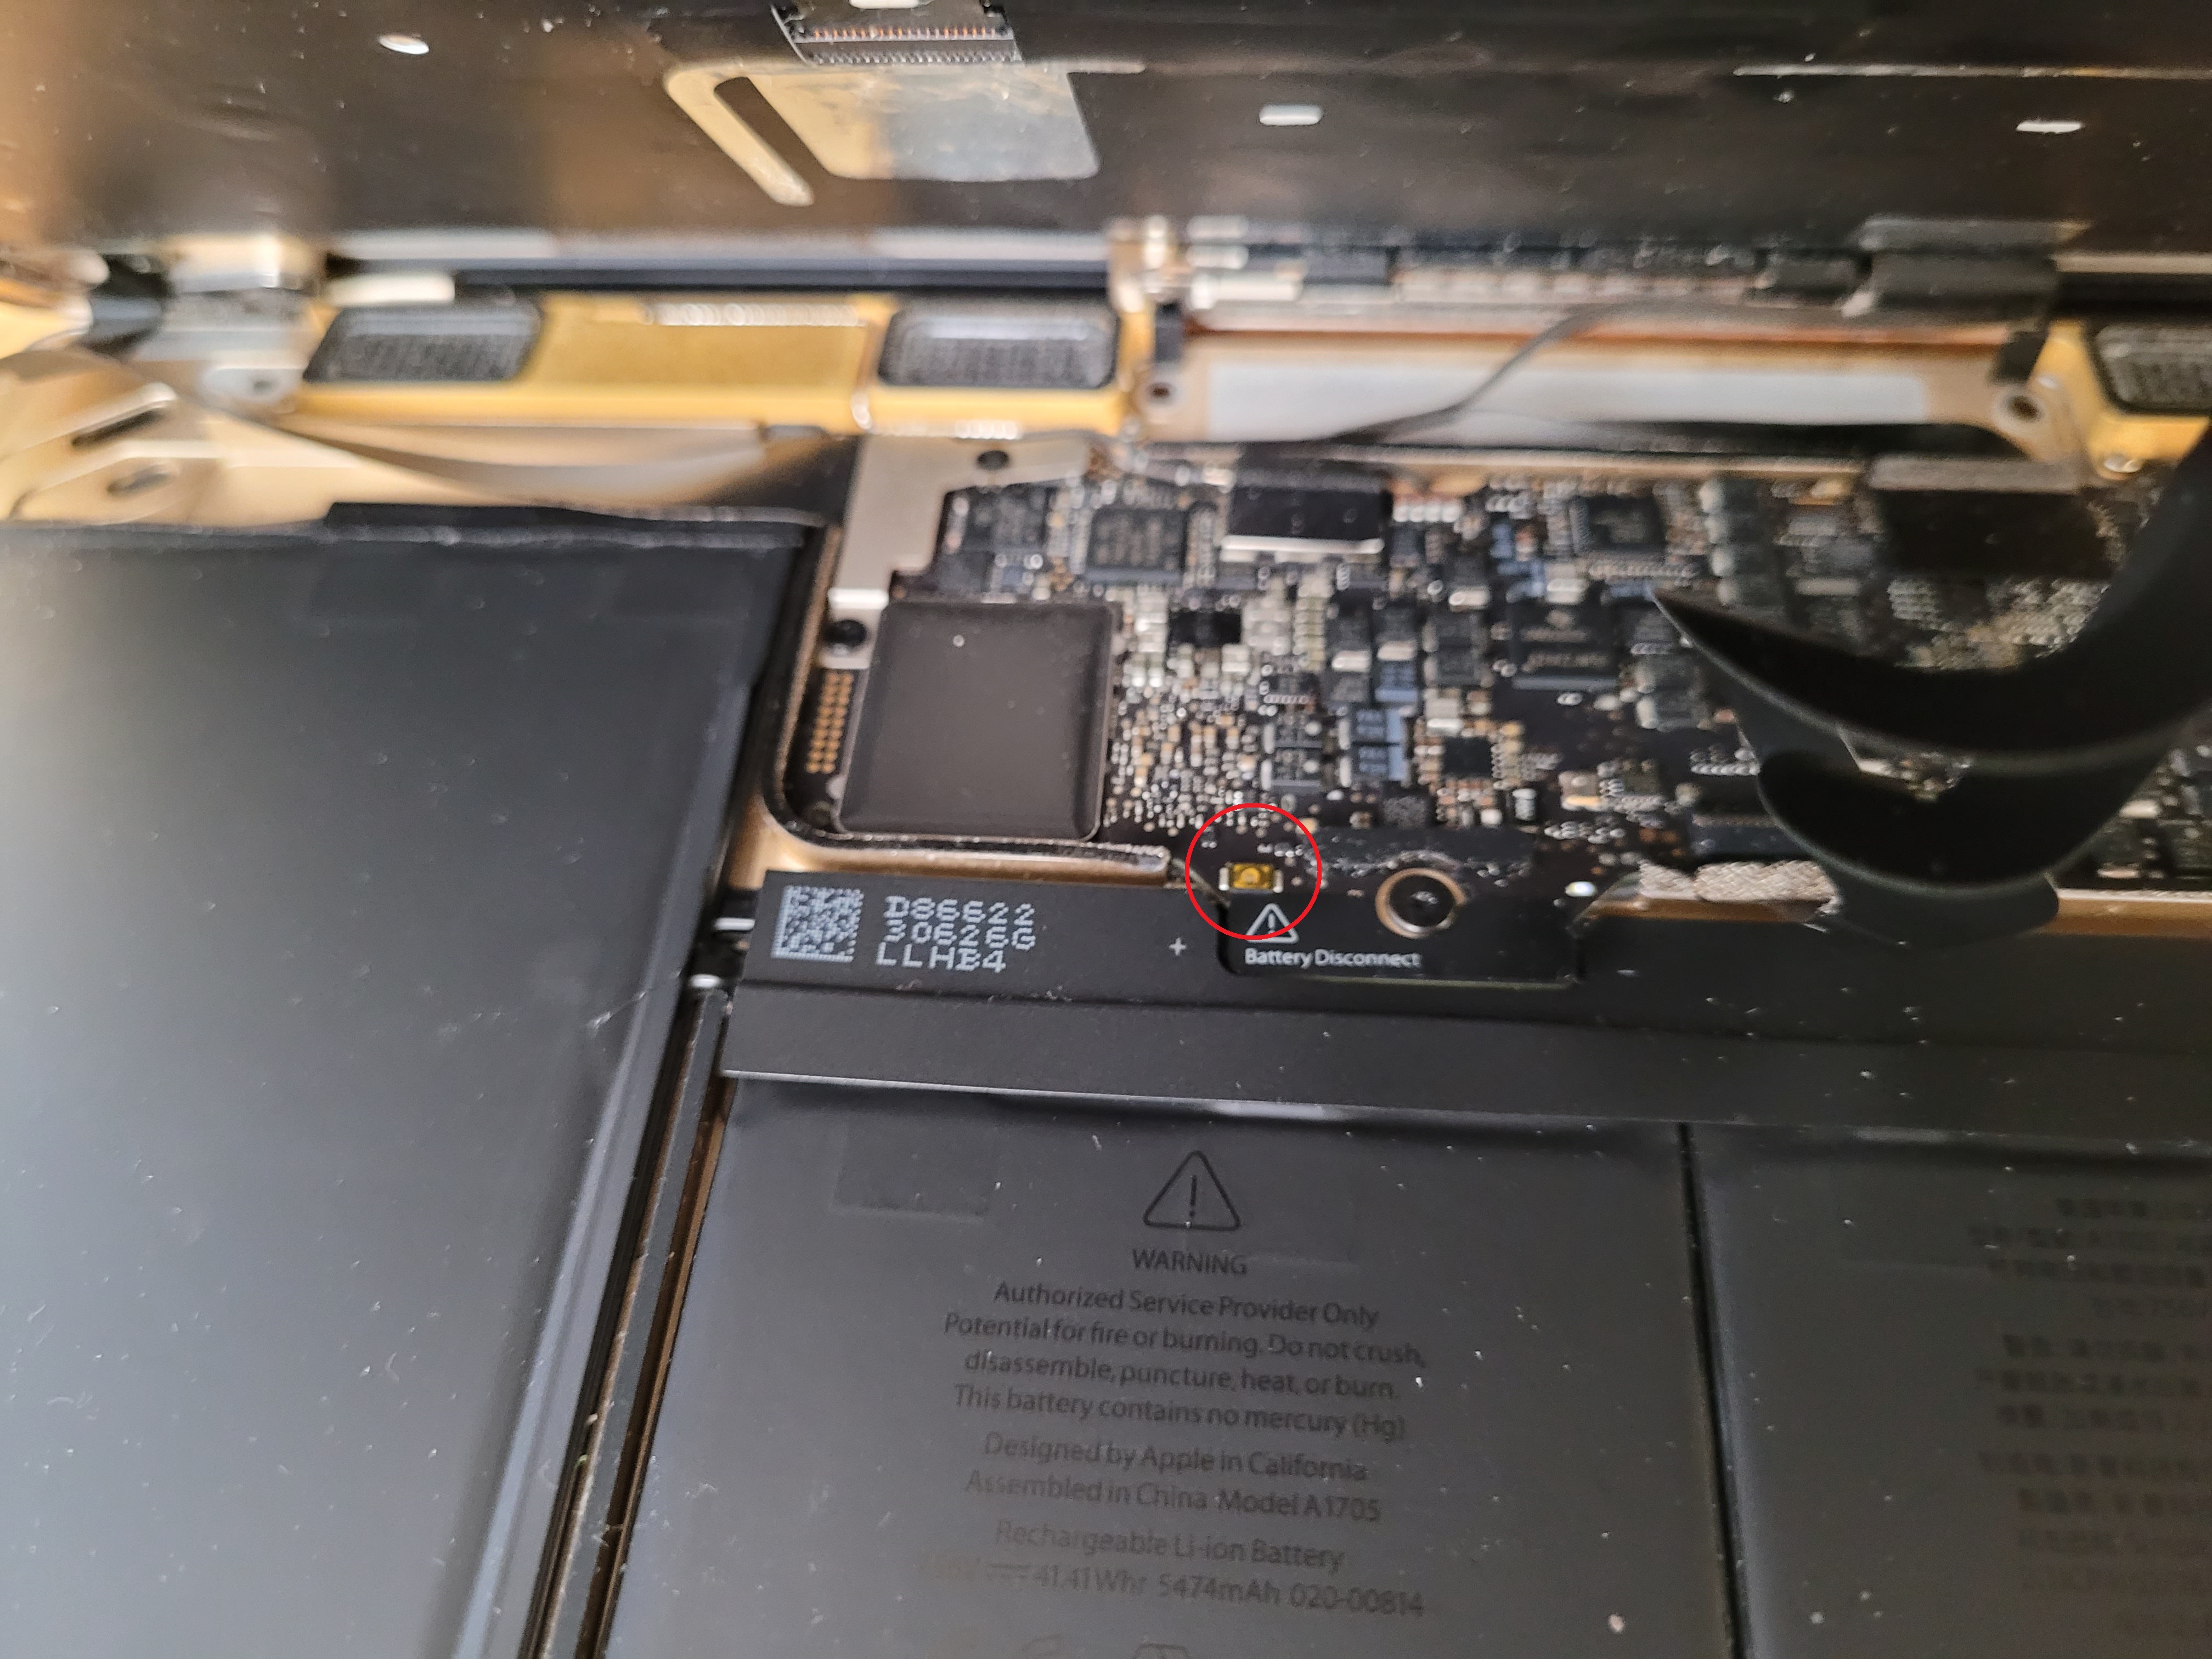
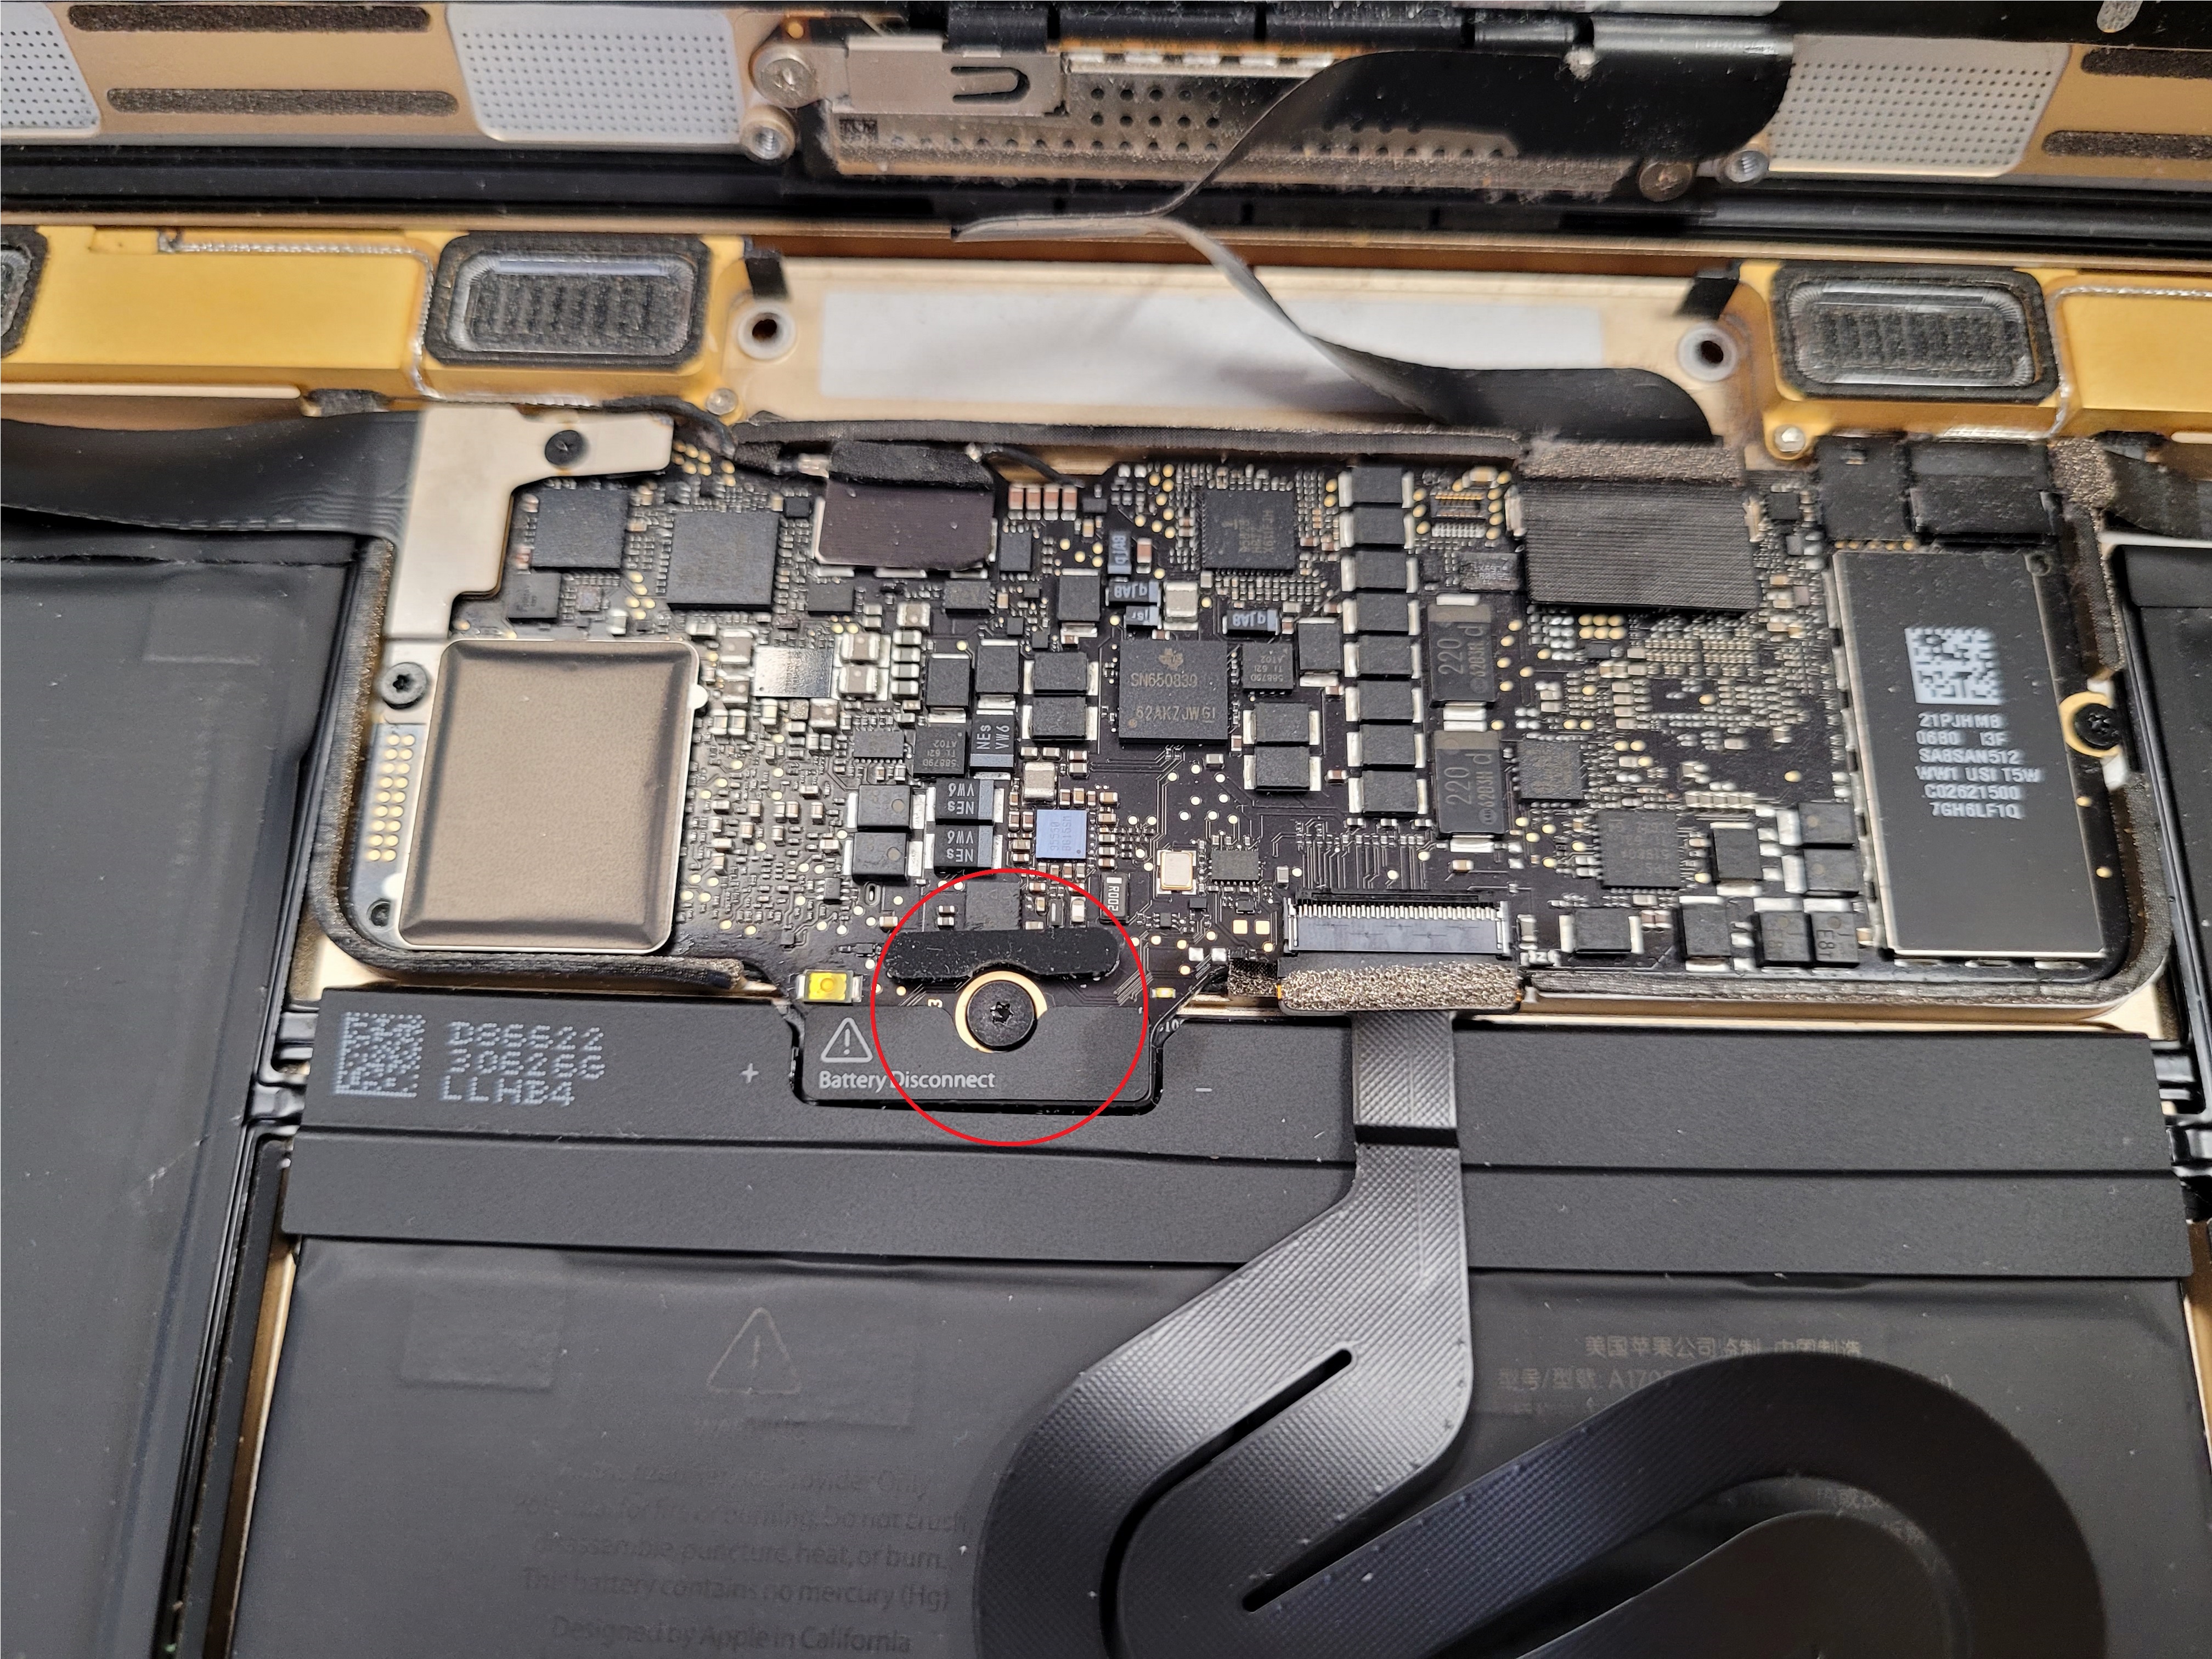
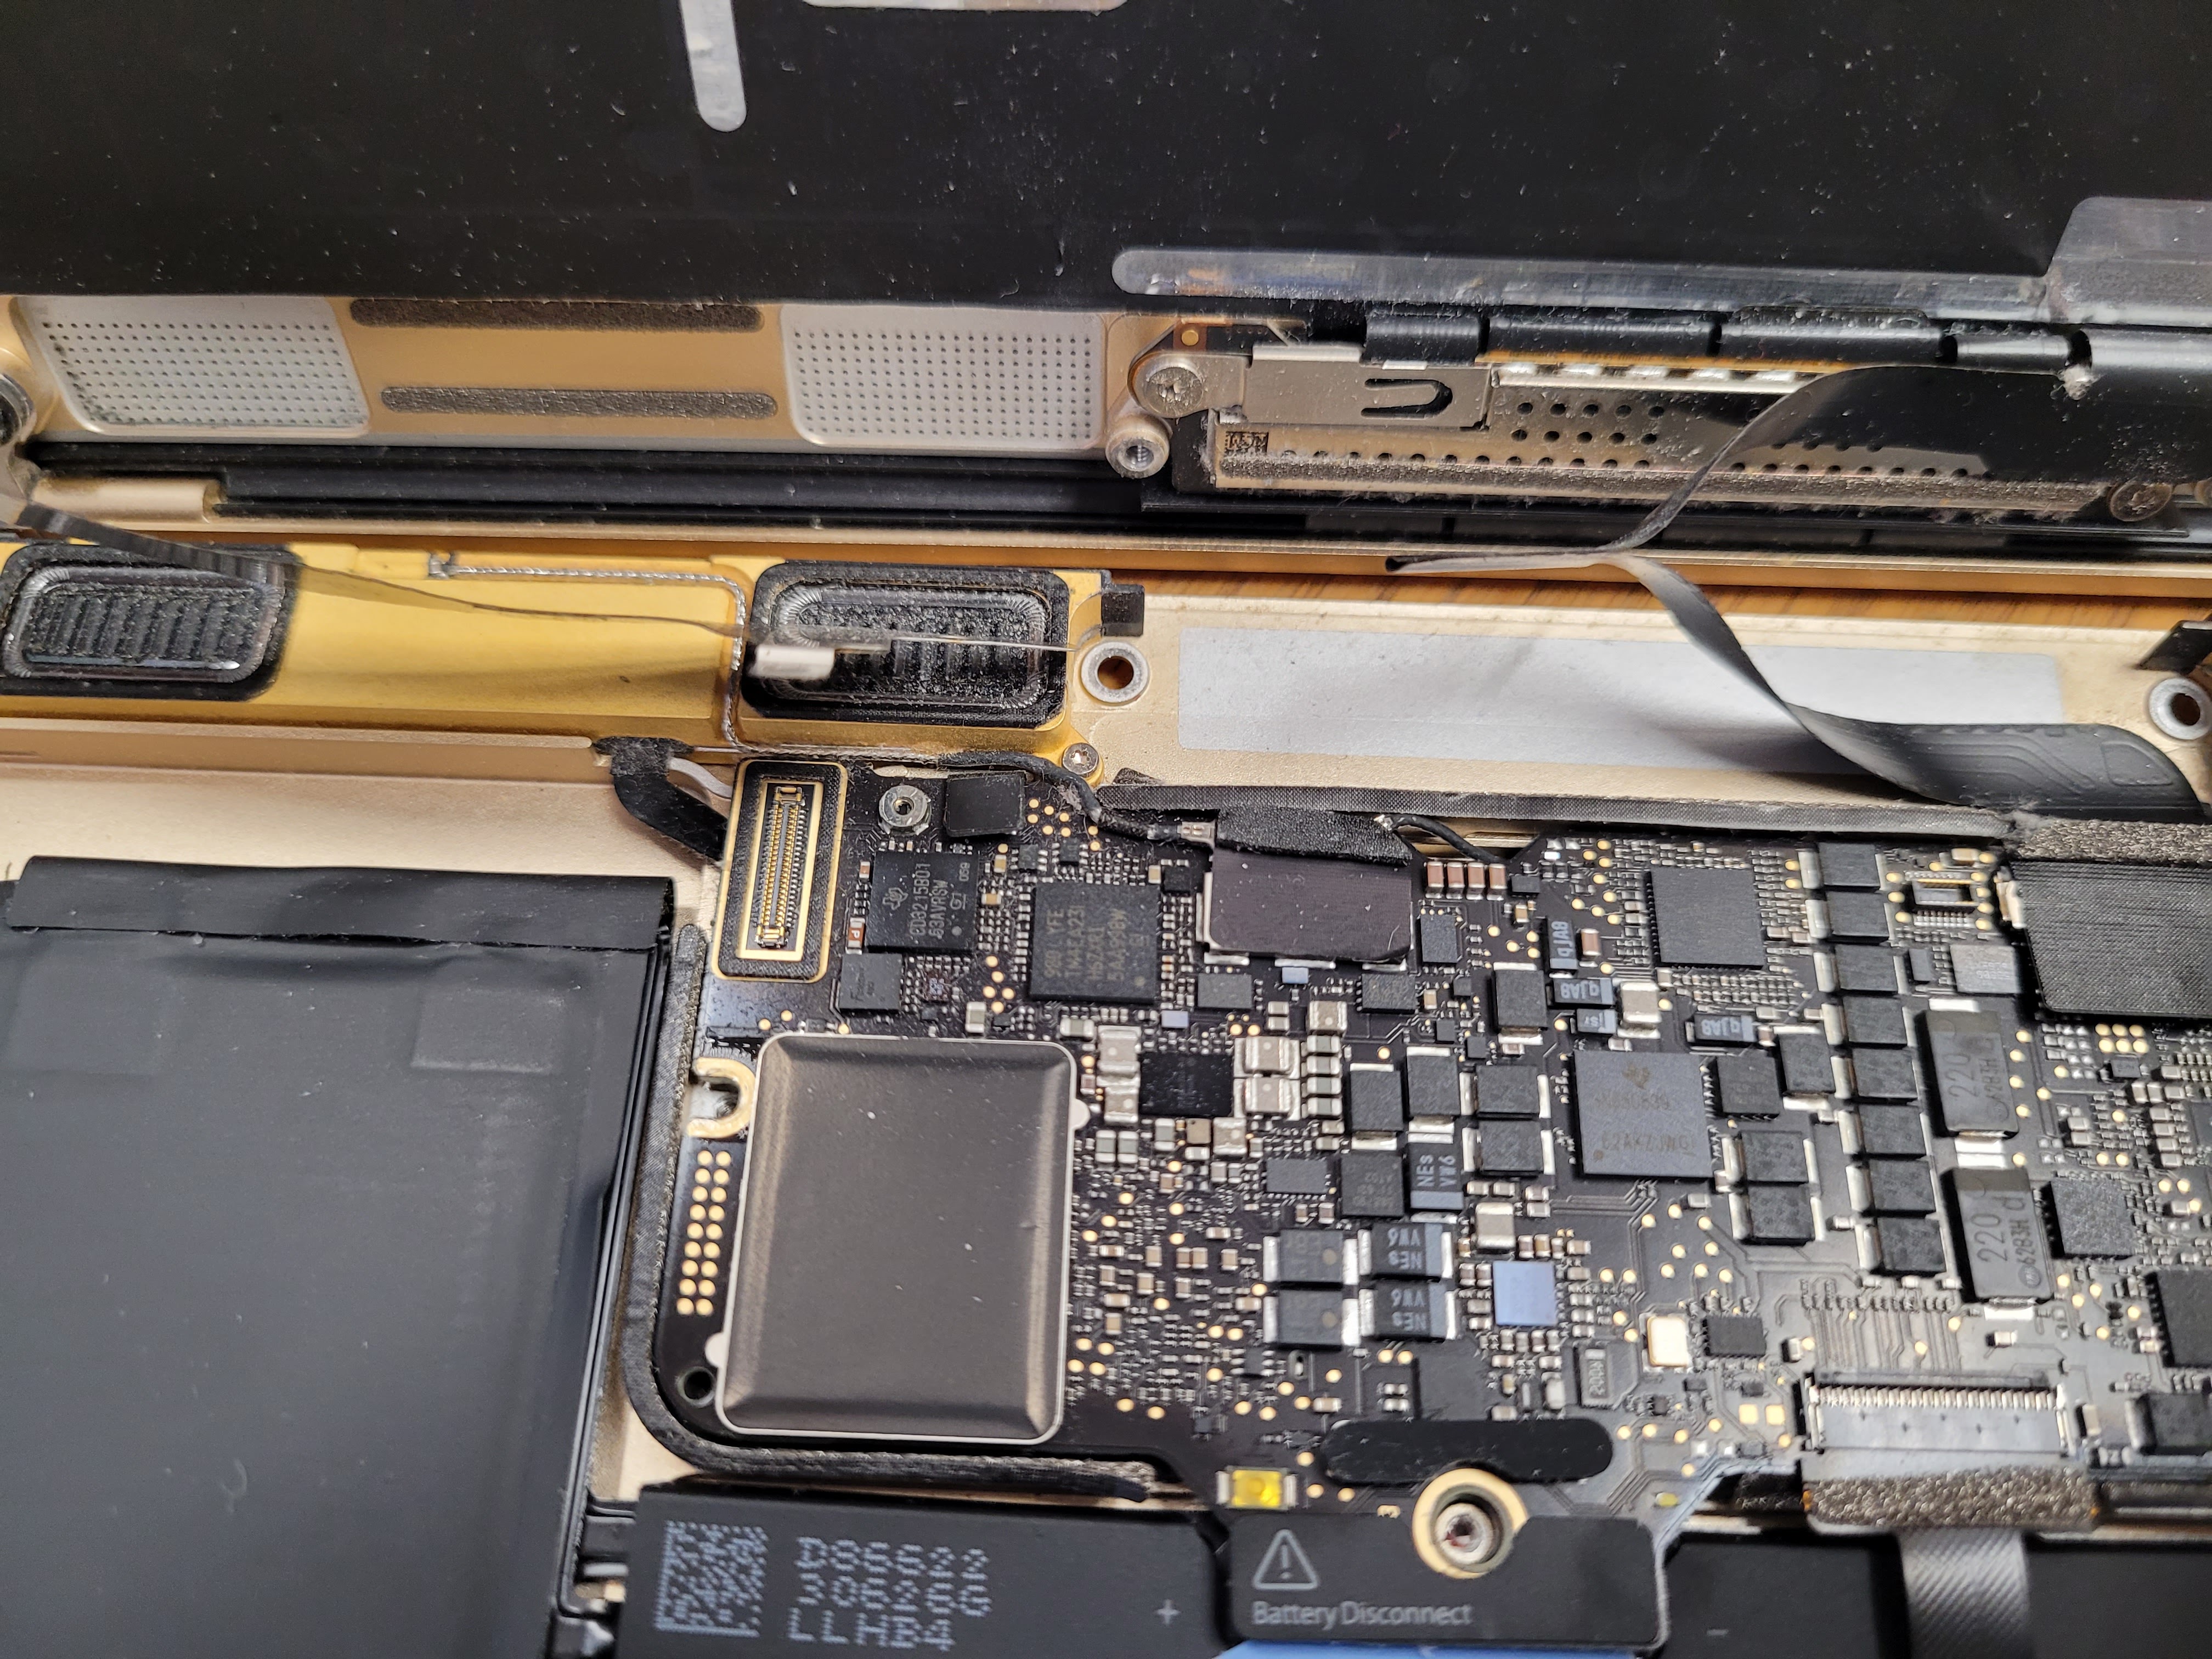
You must completely turn off your MacBook to continue working. With the flat end of the spudger, press and hold the gold-colored battery disconnect button. If the power LED does not turn off, continue to hold the button. Sometimes you need to hold the button for about 10–12 seconds to turn it off. Proceed as follows:

  1. Close and turn the unit over.
  2. Carefully remove the tape that covers the trackpad cable connector.
  3. Use a spudger to lift the locking plate on the ZIF connector.
  4. Disconnect the cable from the trackpad, and gently pull it out through the slot.
  5. Turn your MacBook over, lift the top at a right angle, and lean it against something that you do not have to hold with your hands. You can use duct tape to secure it better.
  6. Remove the Torx T5 screw that secures the battery connector to the motherboard. On 2015 models, there is a grounding clip with two foam pads under this screw that may come loose, so it must be properly installed during assembly if necessary.
  7. Disconnect the battery using the blocking device that must be inserted between the motherboard and the battery connector.


3. Disconnecting the display cable

At this stage, it will be necessary to follow the exact order of actions:

  1. Remove the two screws that hold the USB-C port cable bracket.
  2. Use the flat end of the spudger to disconnect it from the motherboard.
  3. Using a spatula, open the cover on the ZIF connector of the board cable and disconnect the audio connector very carefully.
  4. Use tweezers to remove the tape that covers the display cable socket, and use the flat end of the spudger to open the cover.
  5. Insert the flat end of the spatula under the display cable to remove the fixing adhesive layer.
  6. Disconnect the display cable by gently pulling it out of the connector.

Also: MacBook Air 13 A2337 Screen Replacement: how-to guide


4. Removing the audio jack board

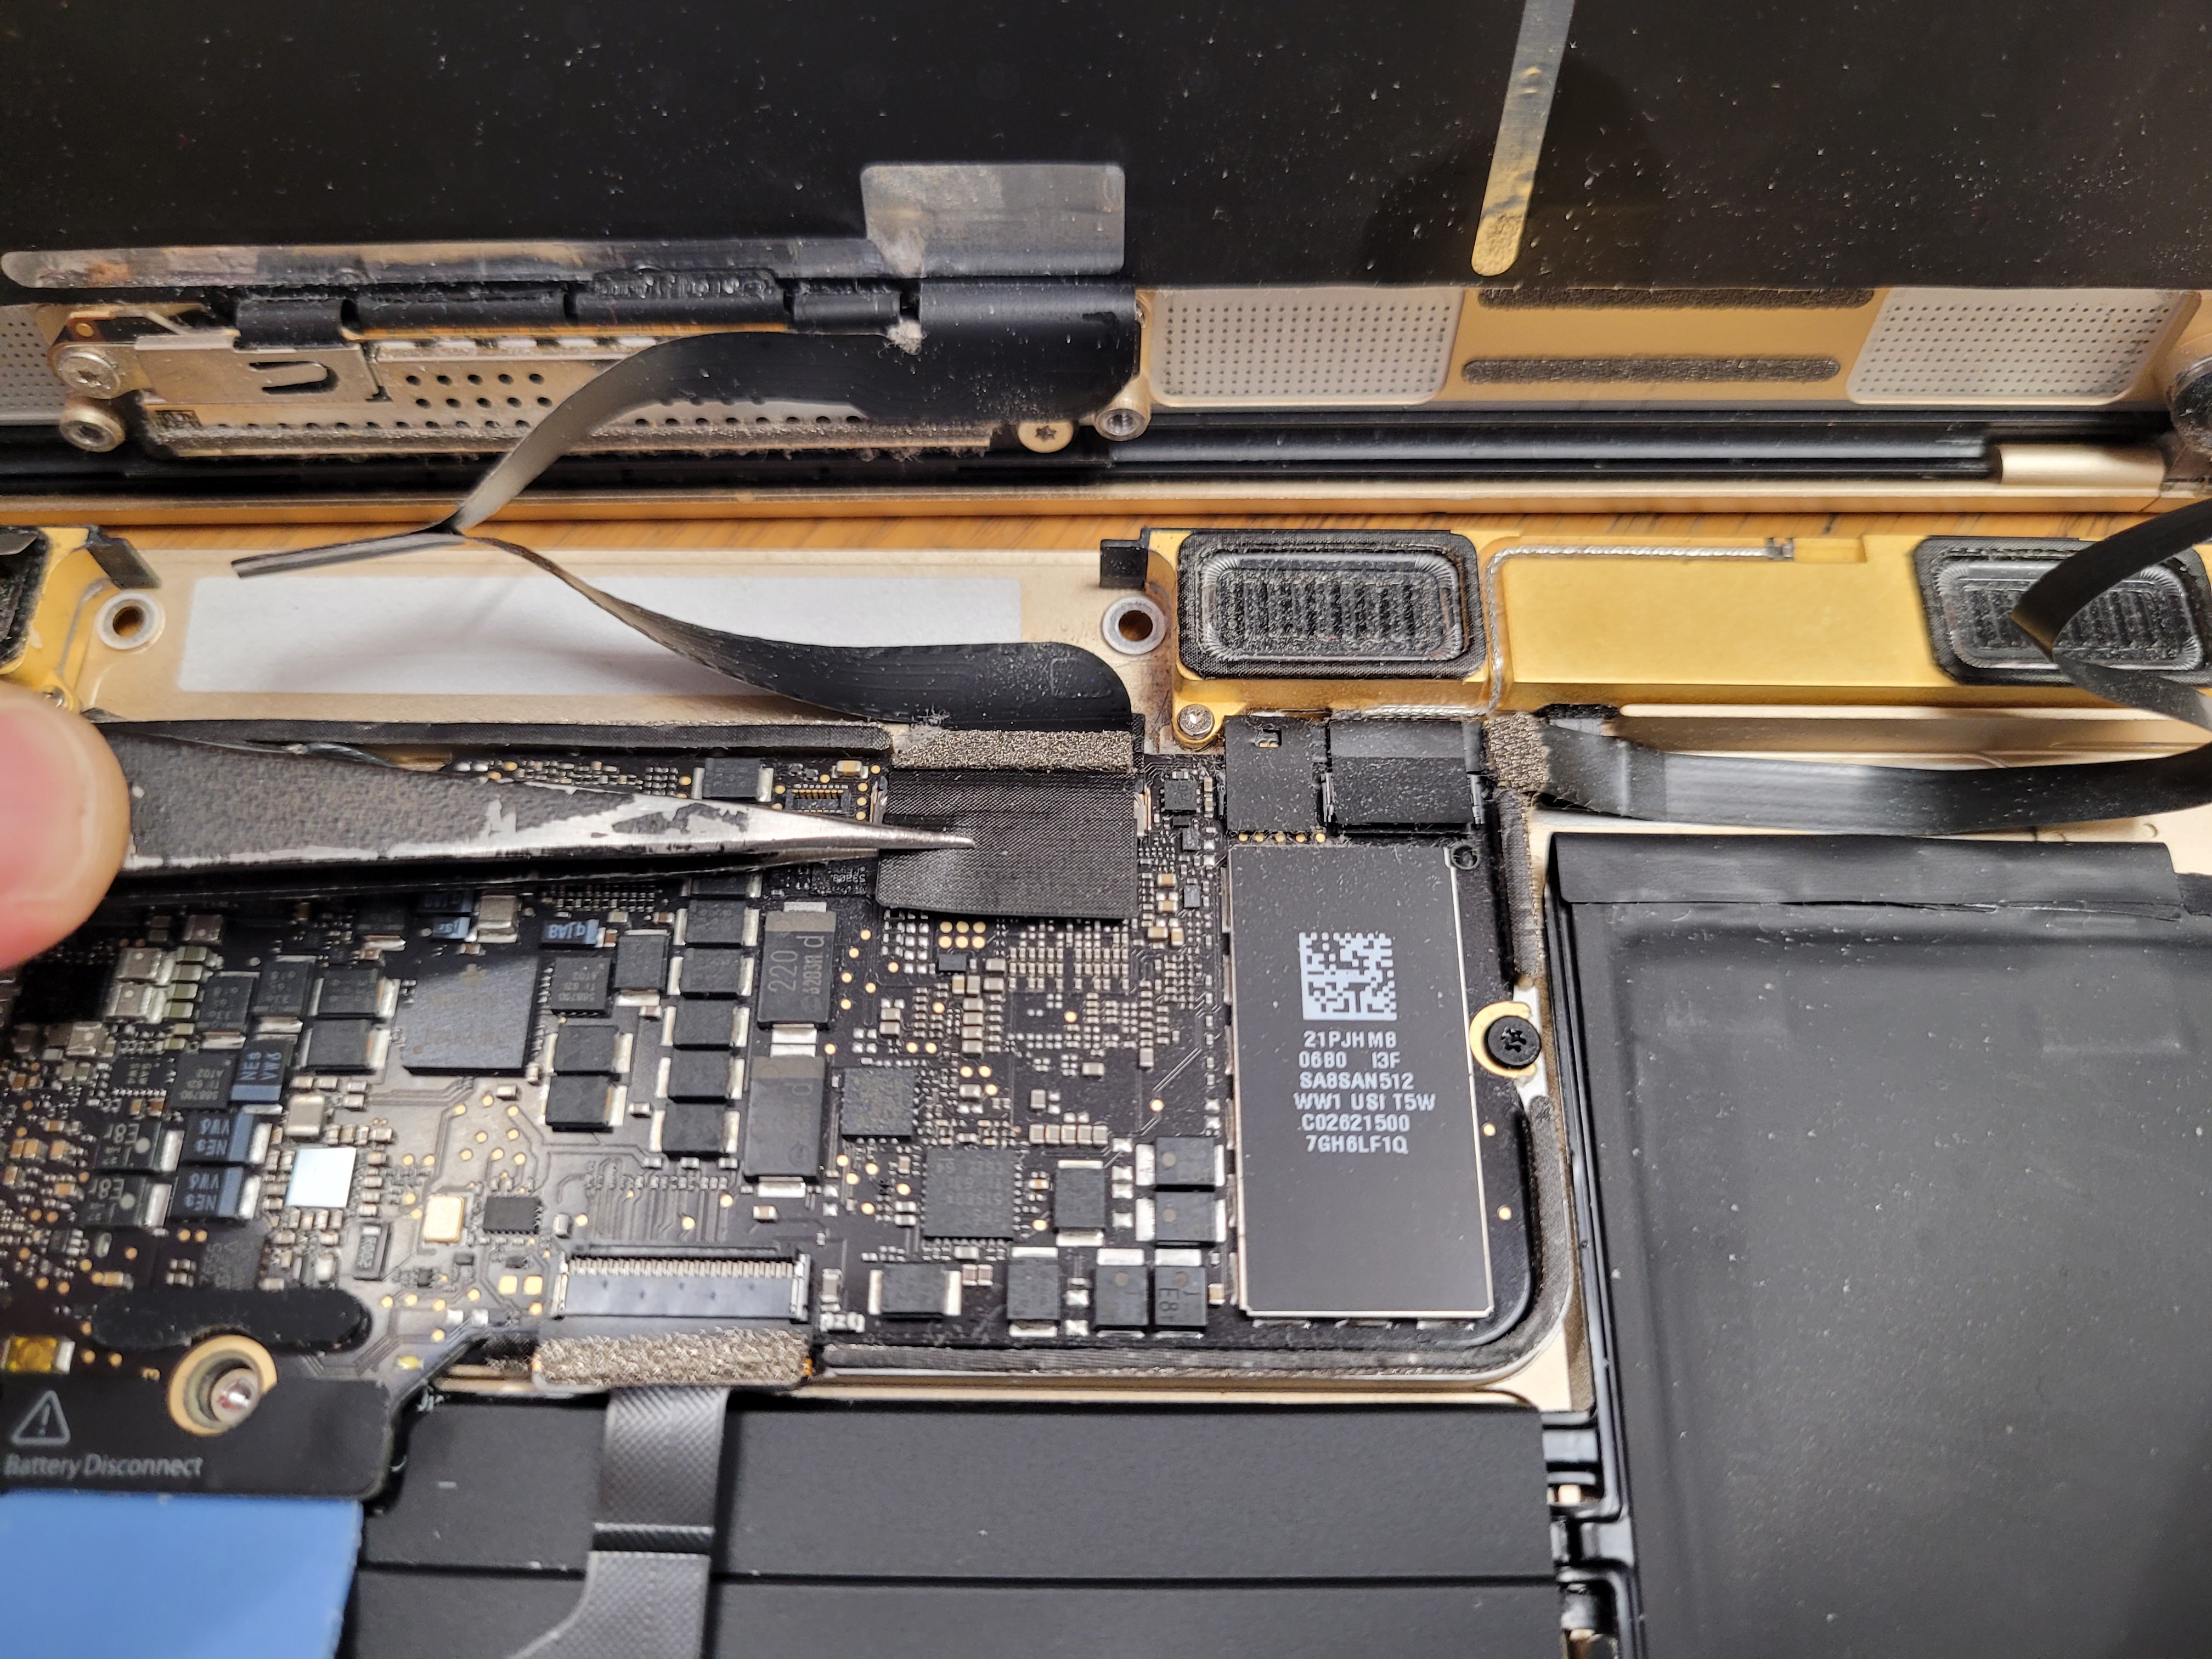
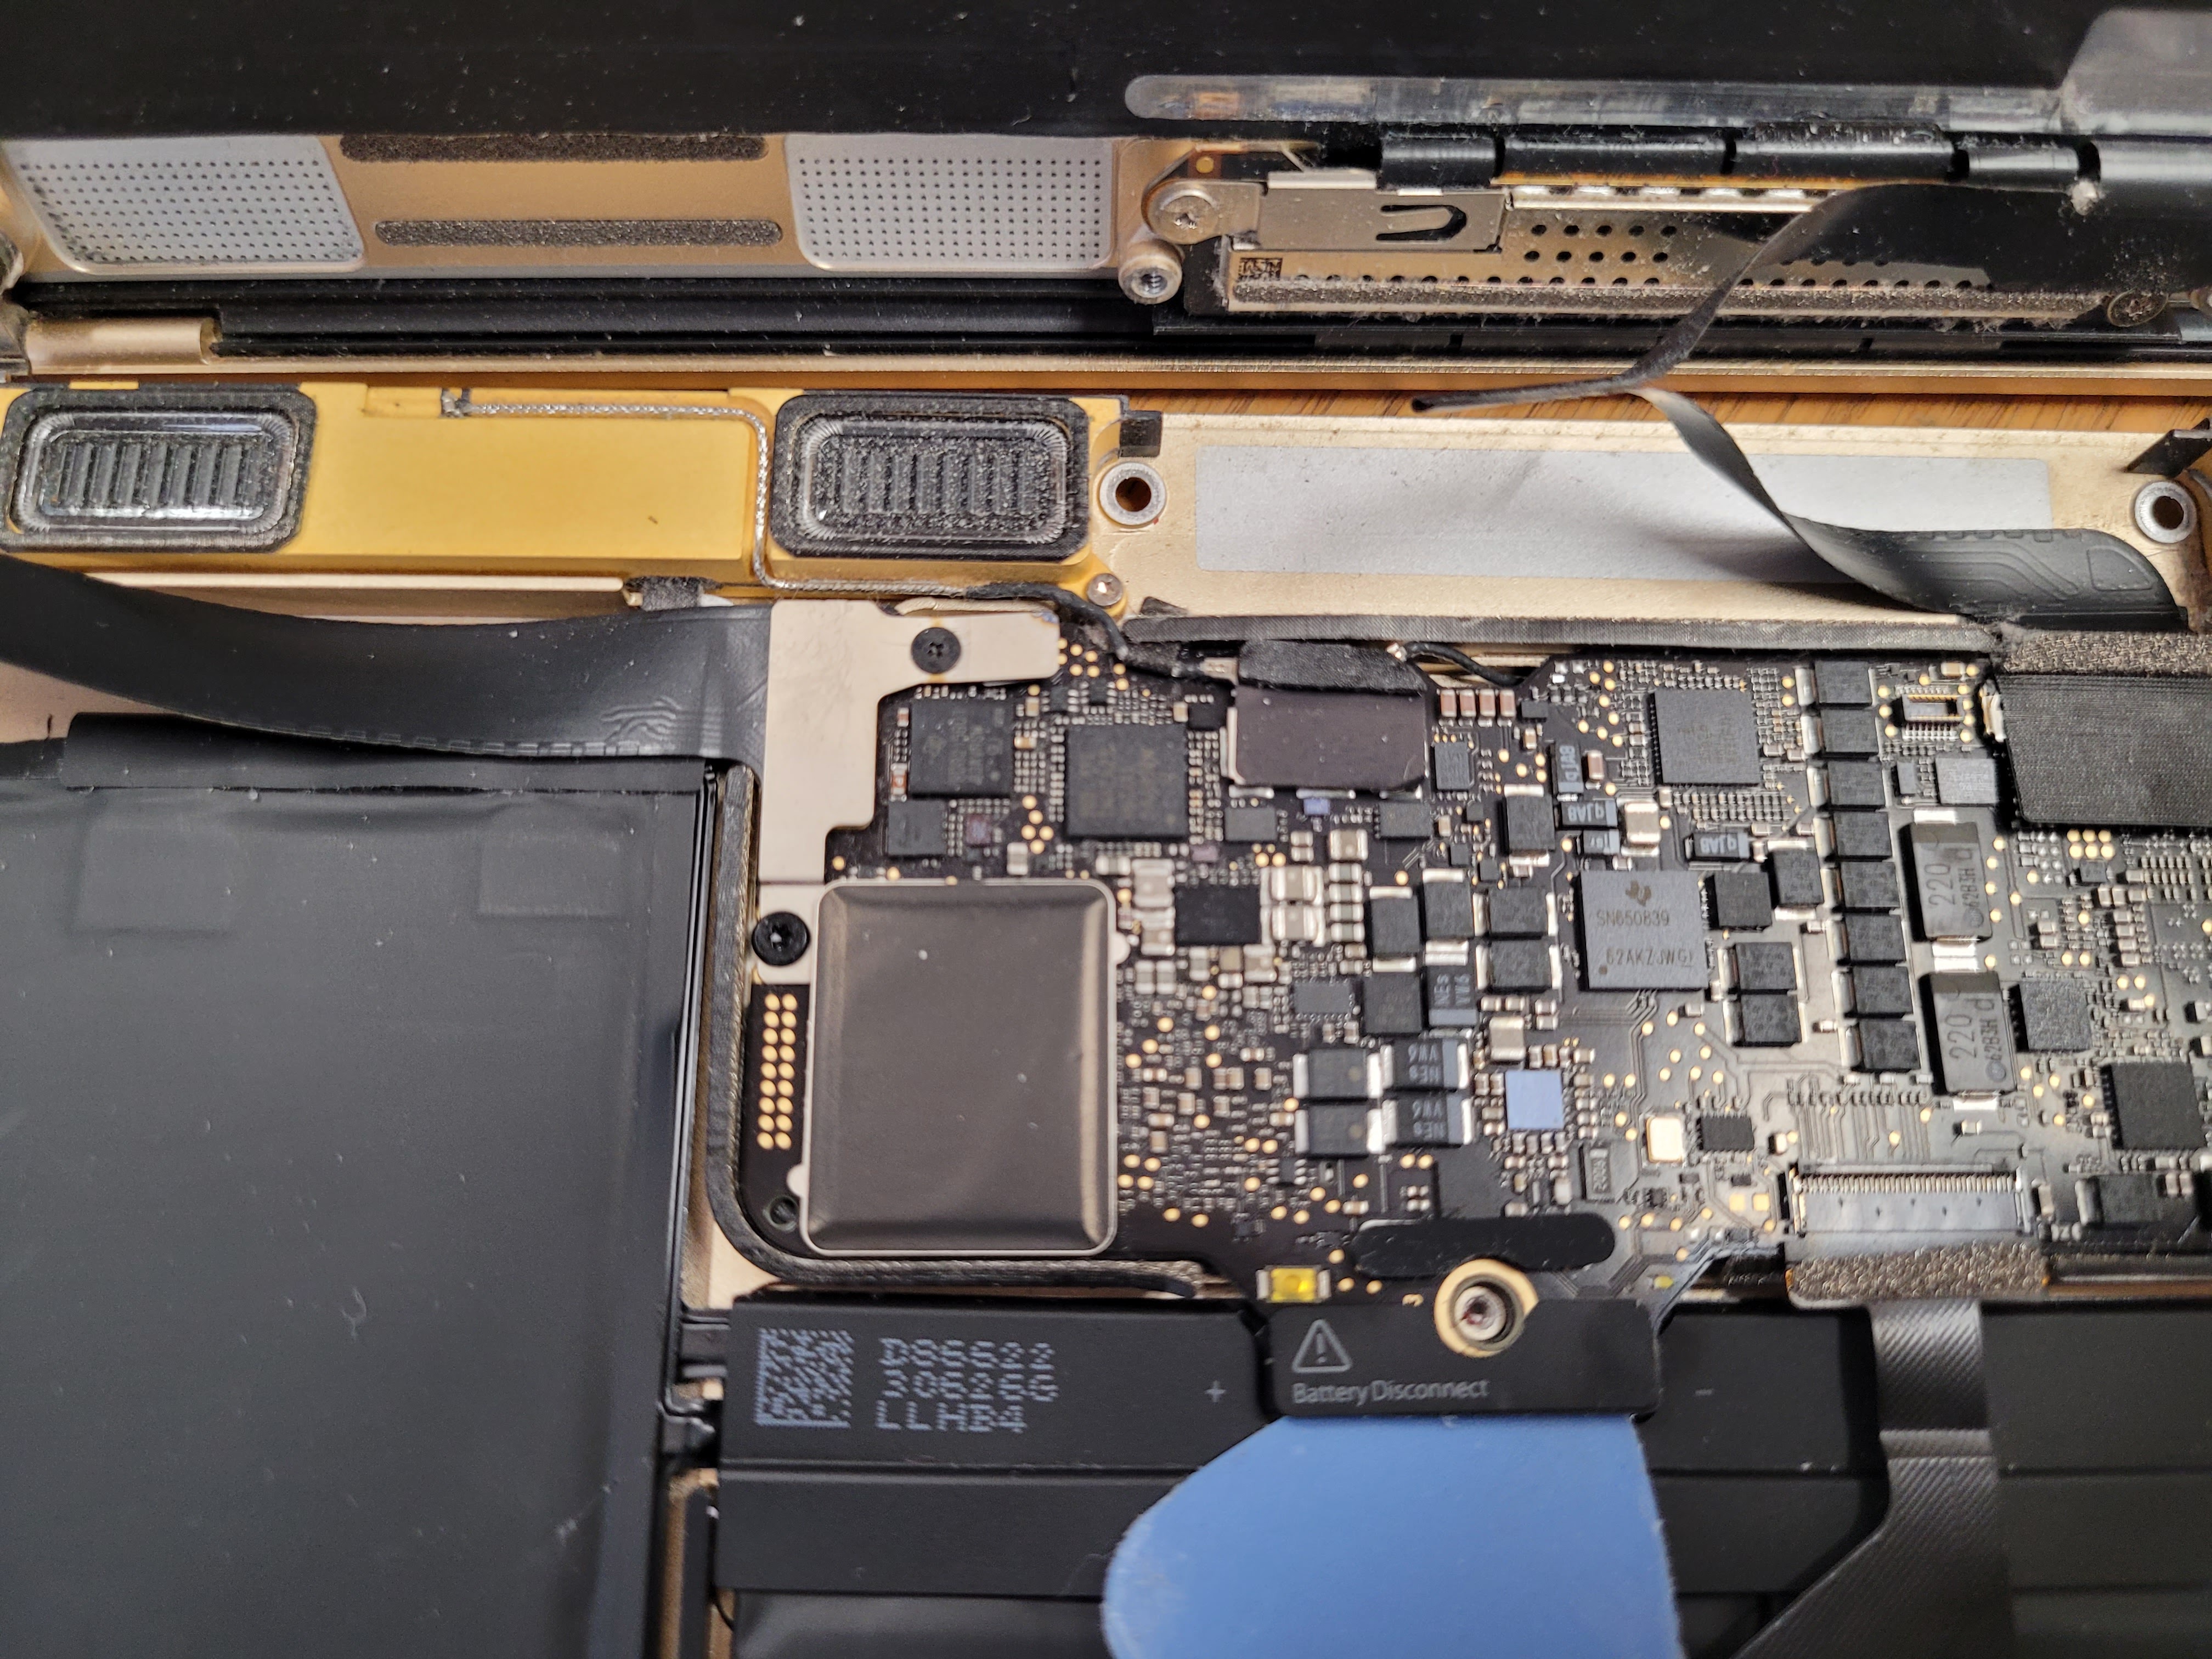
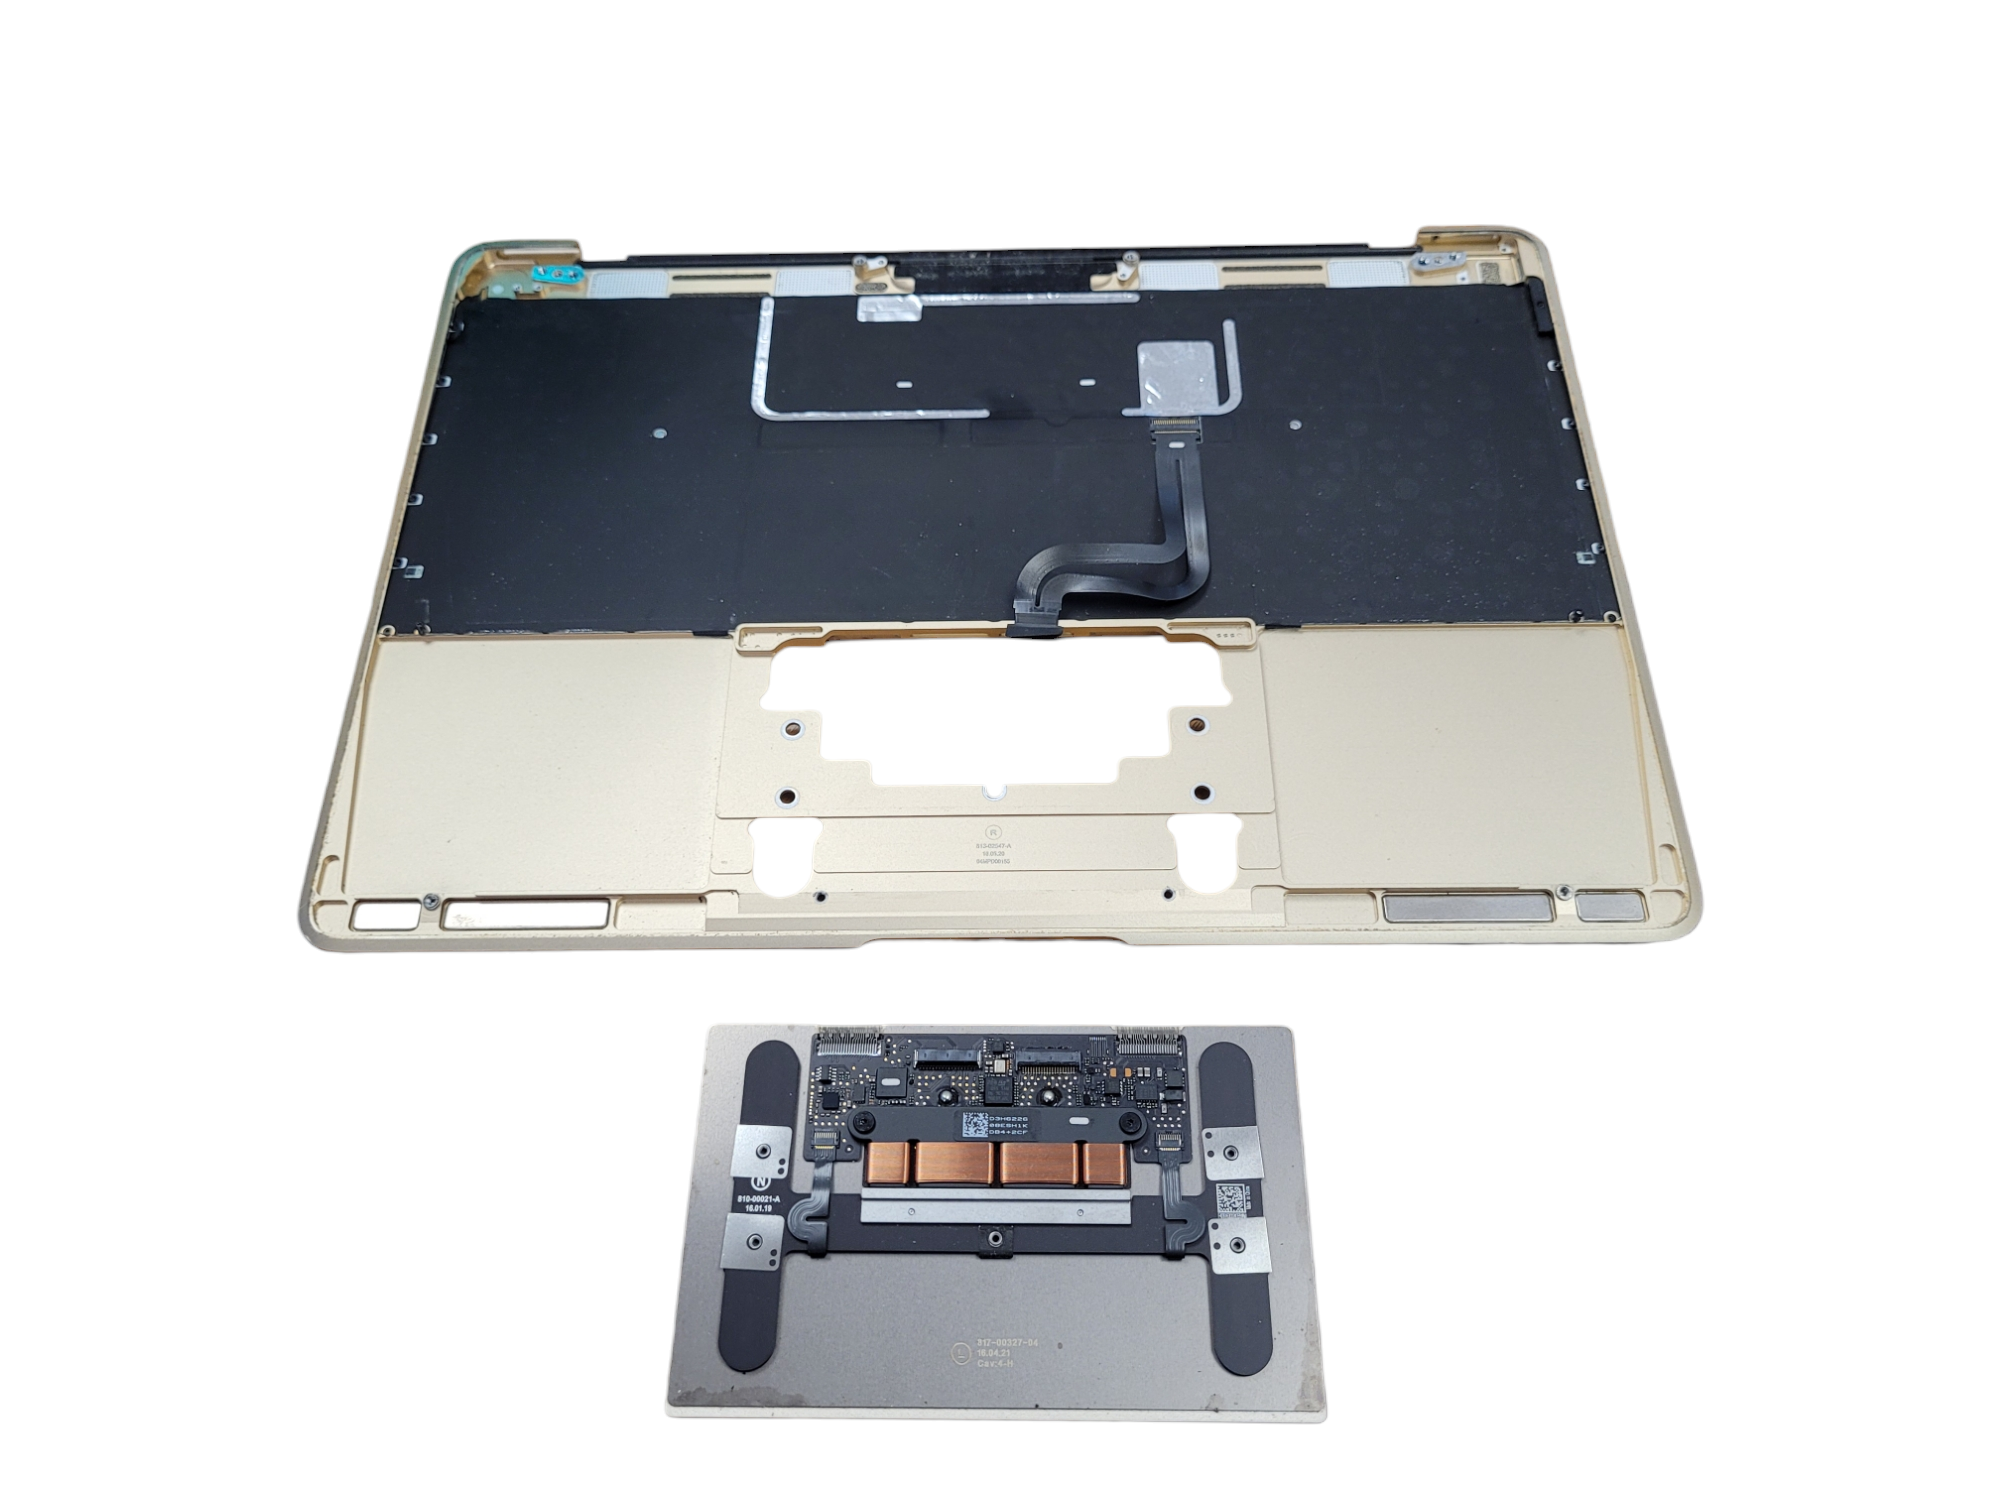
Before removing the microphone assembly, you must separate the upper and lower housing assemblies:

  1. Using a spudger, open the cover holding the ZIF connector of the dual-microphone cable.
  2. Use tweezers to pull the cable out of the socket.
  3. Remove the two screws that hold the audio jack board on the housing and remove it.


5. Removing the dual microphone unit

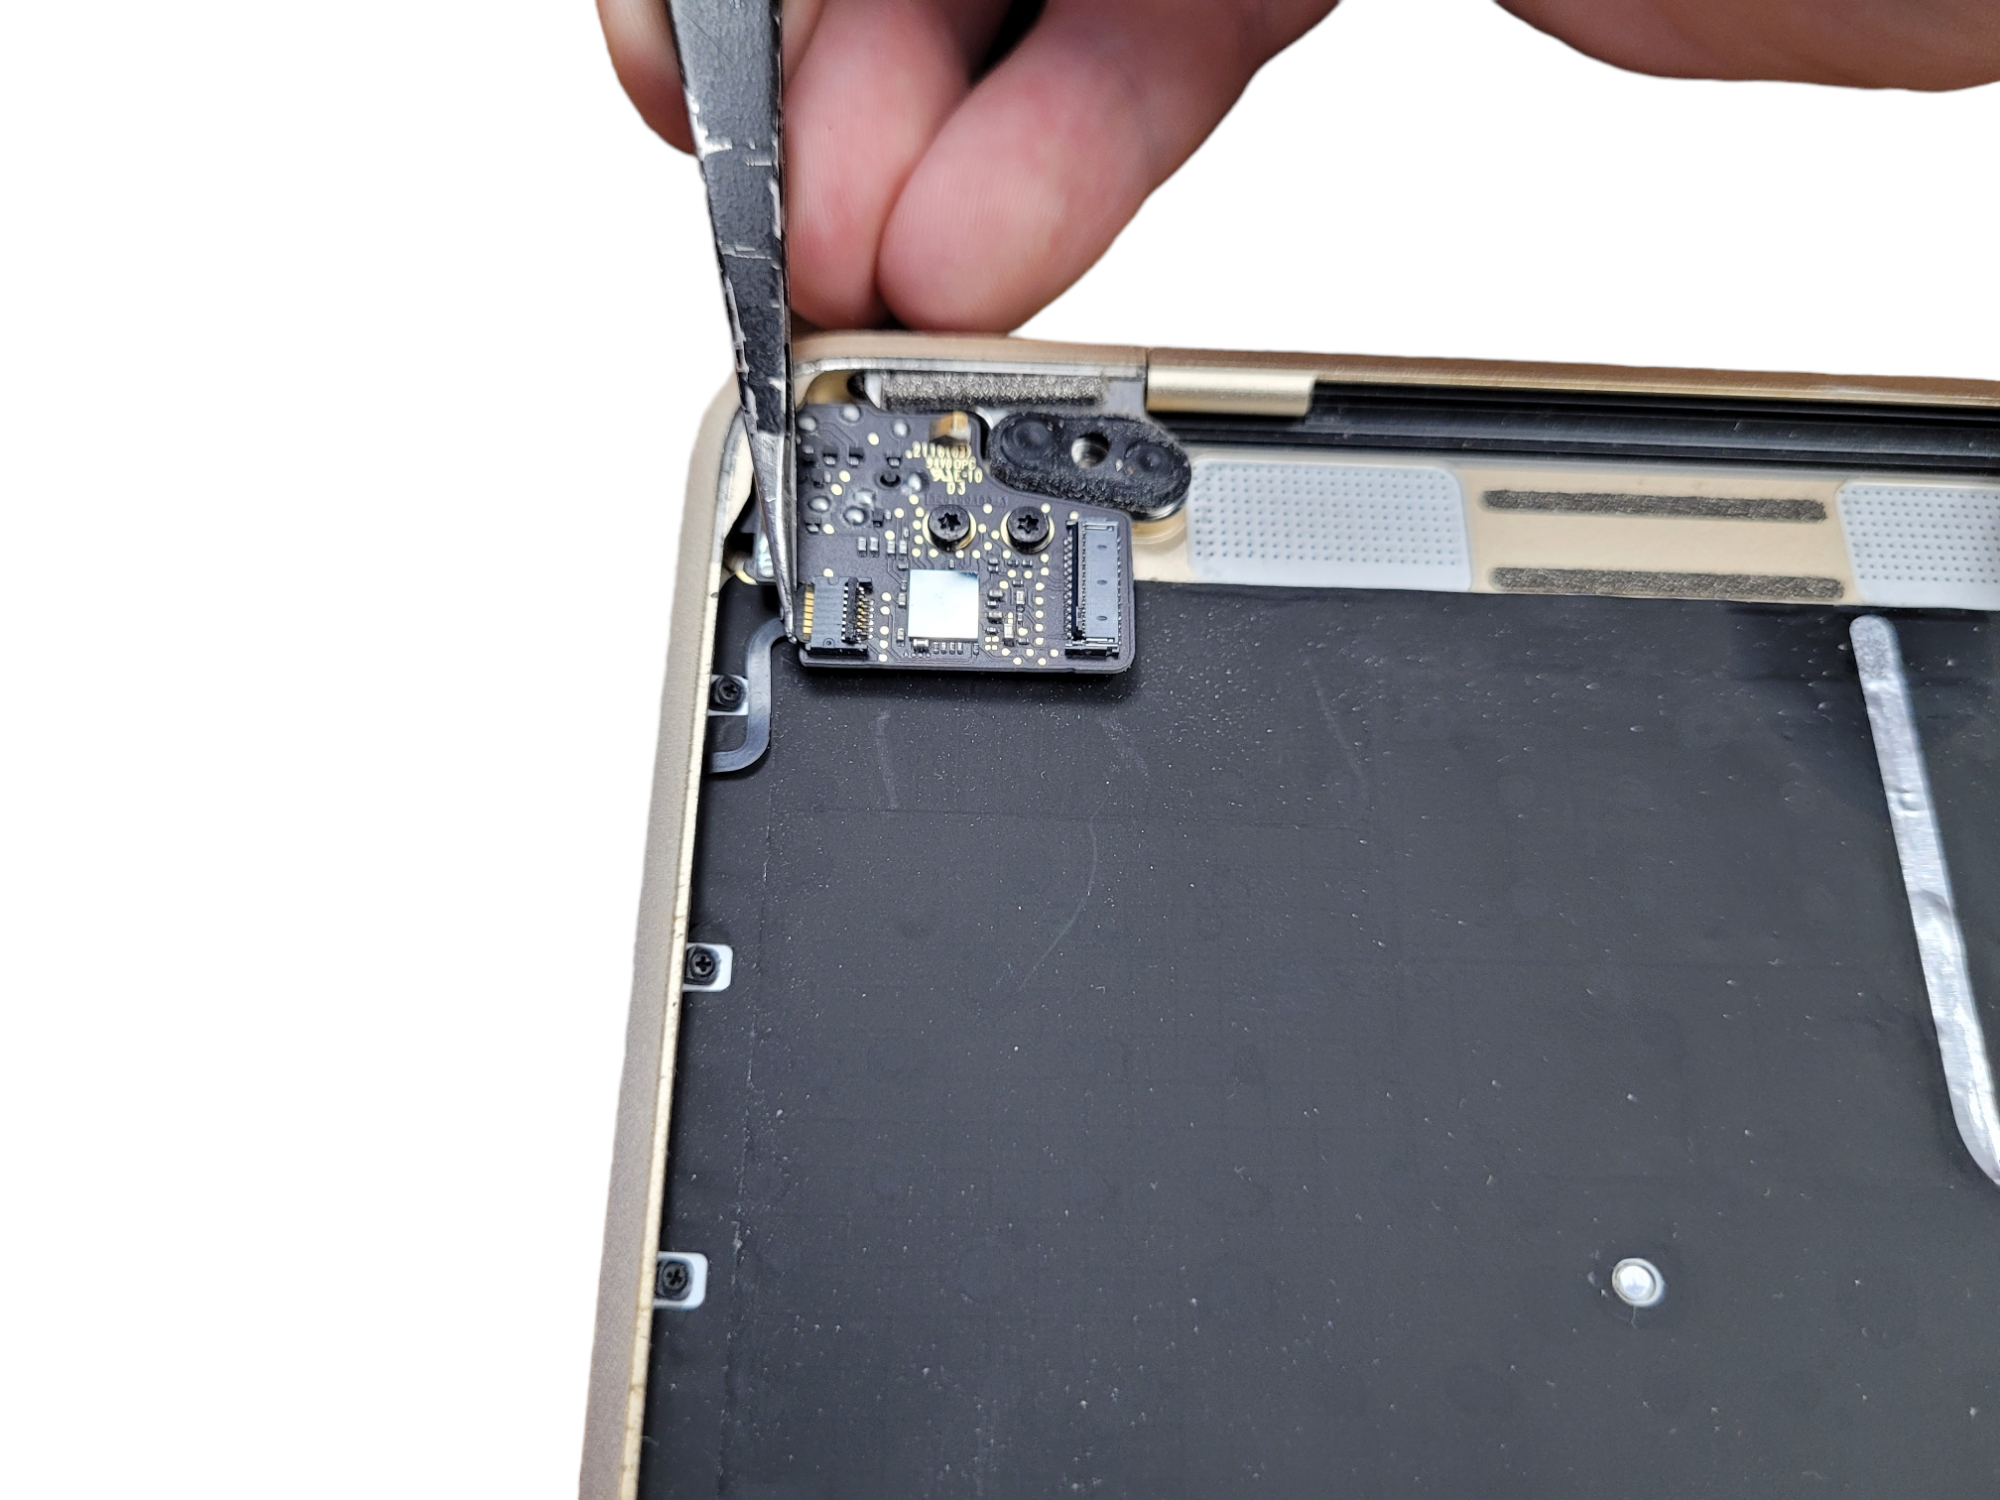
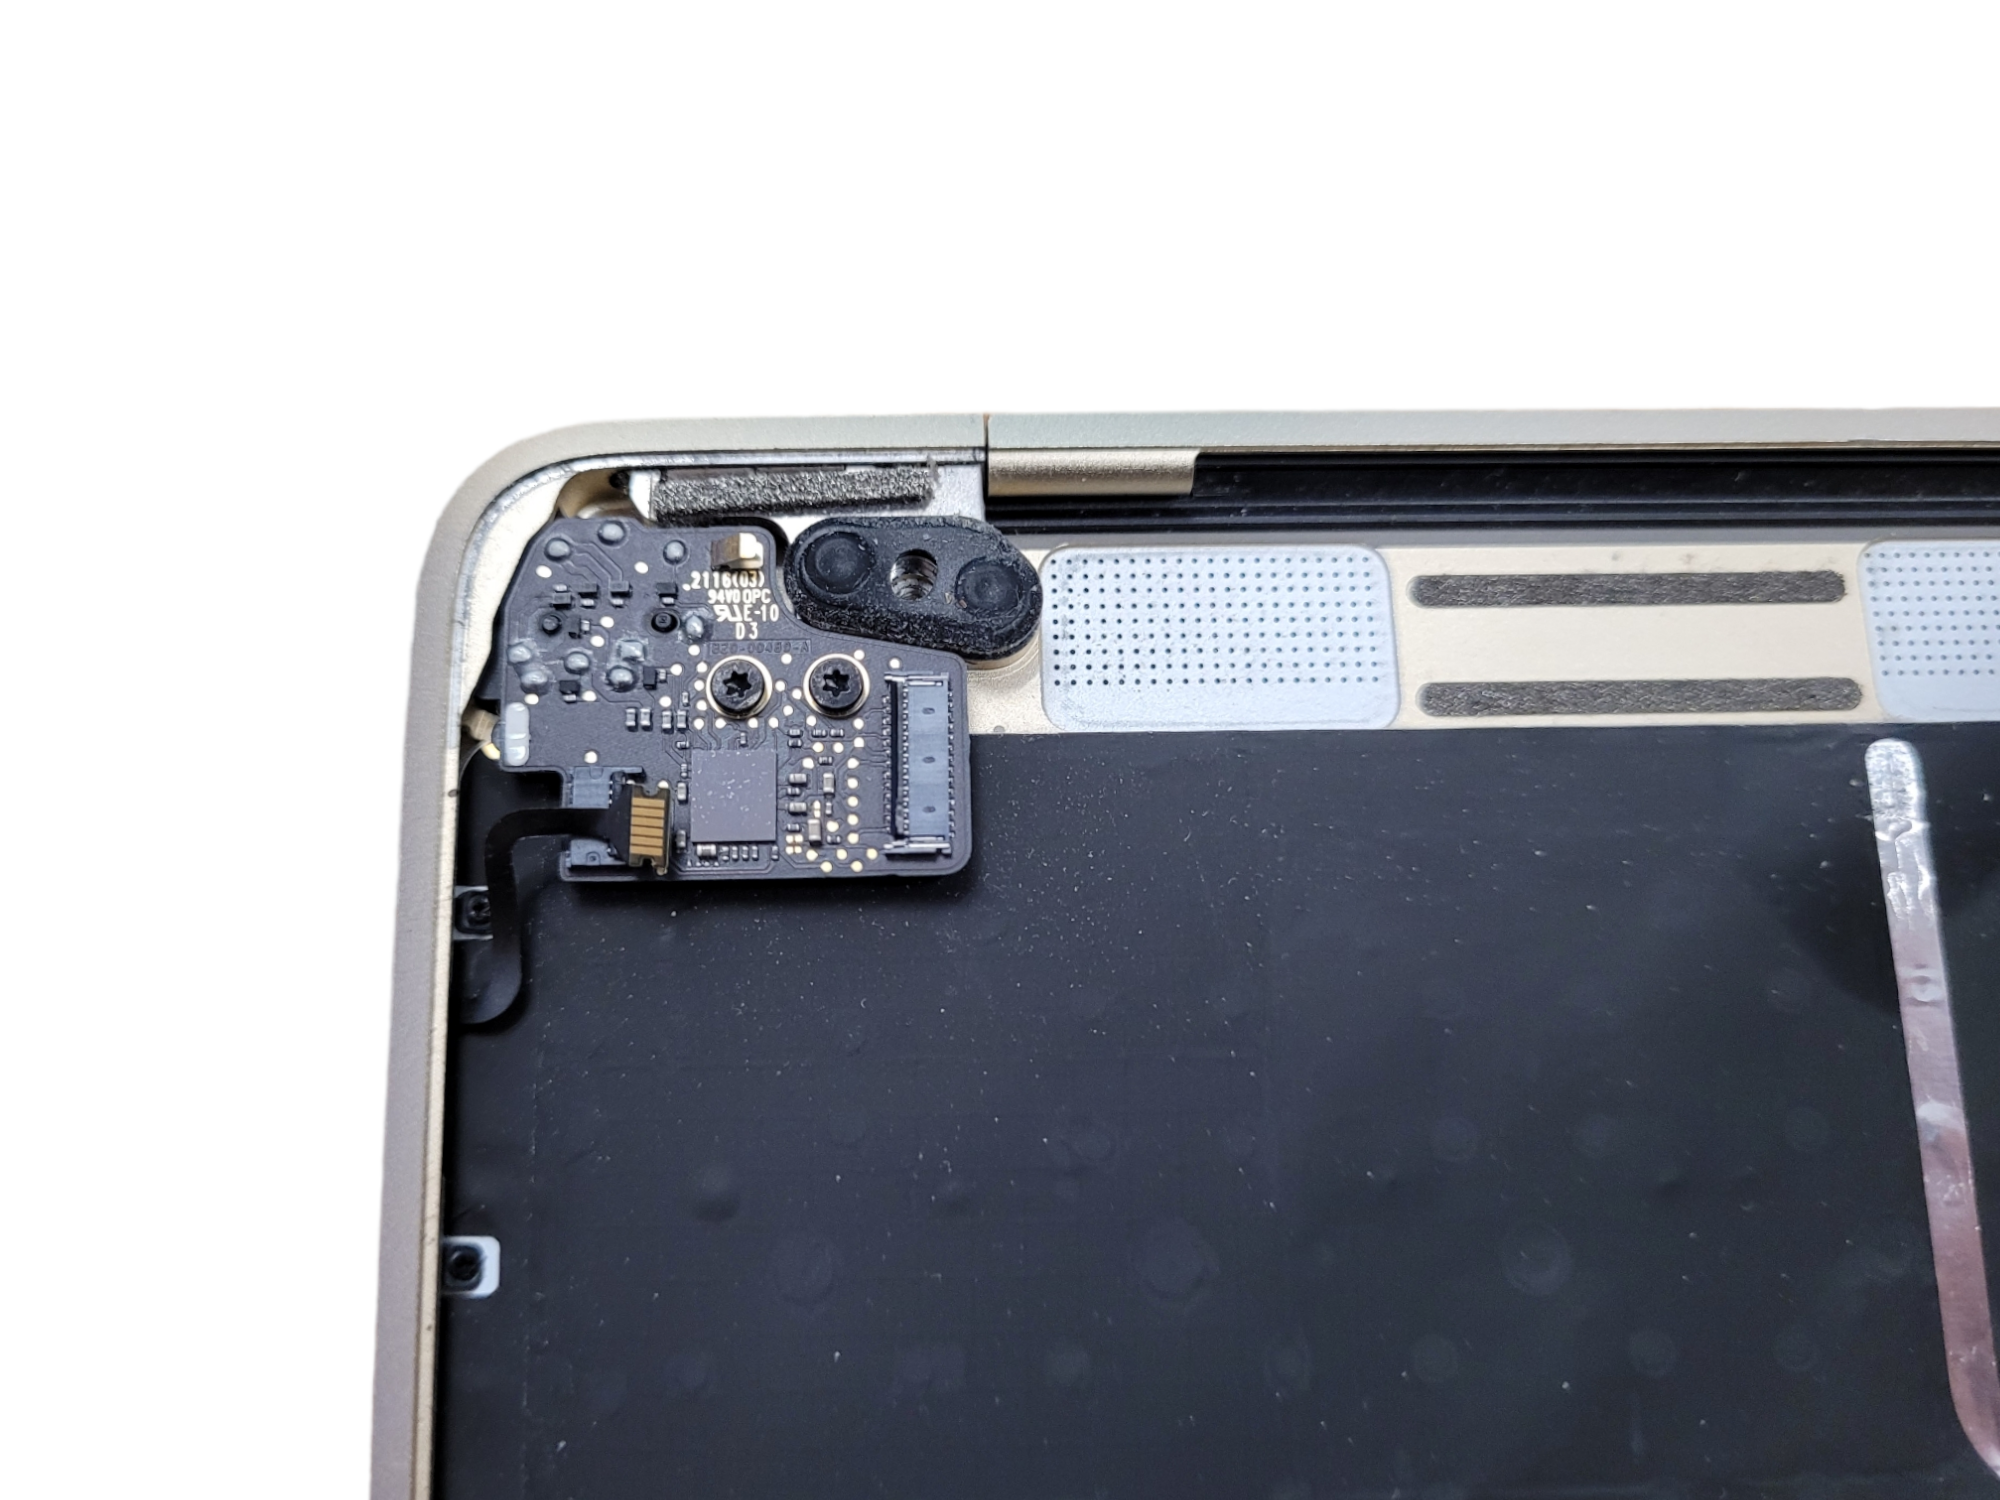
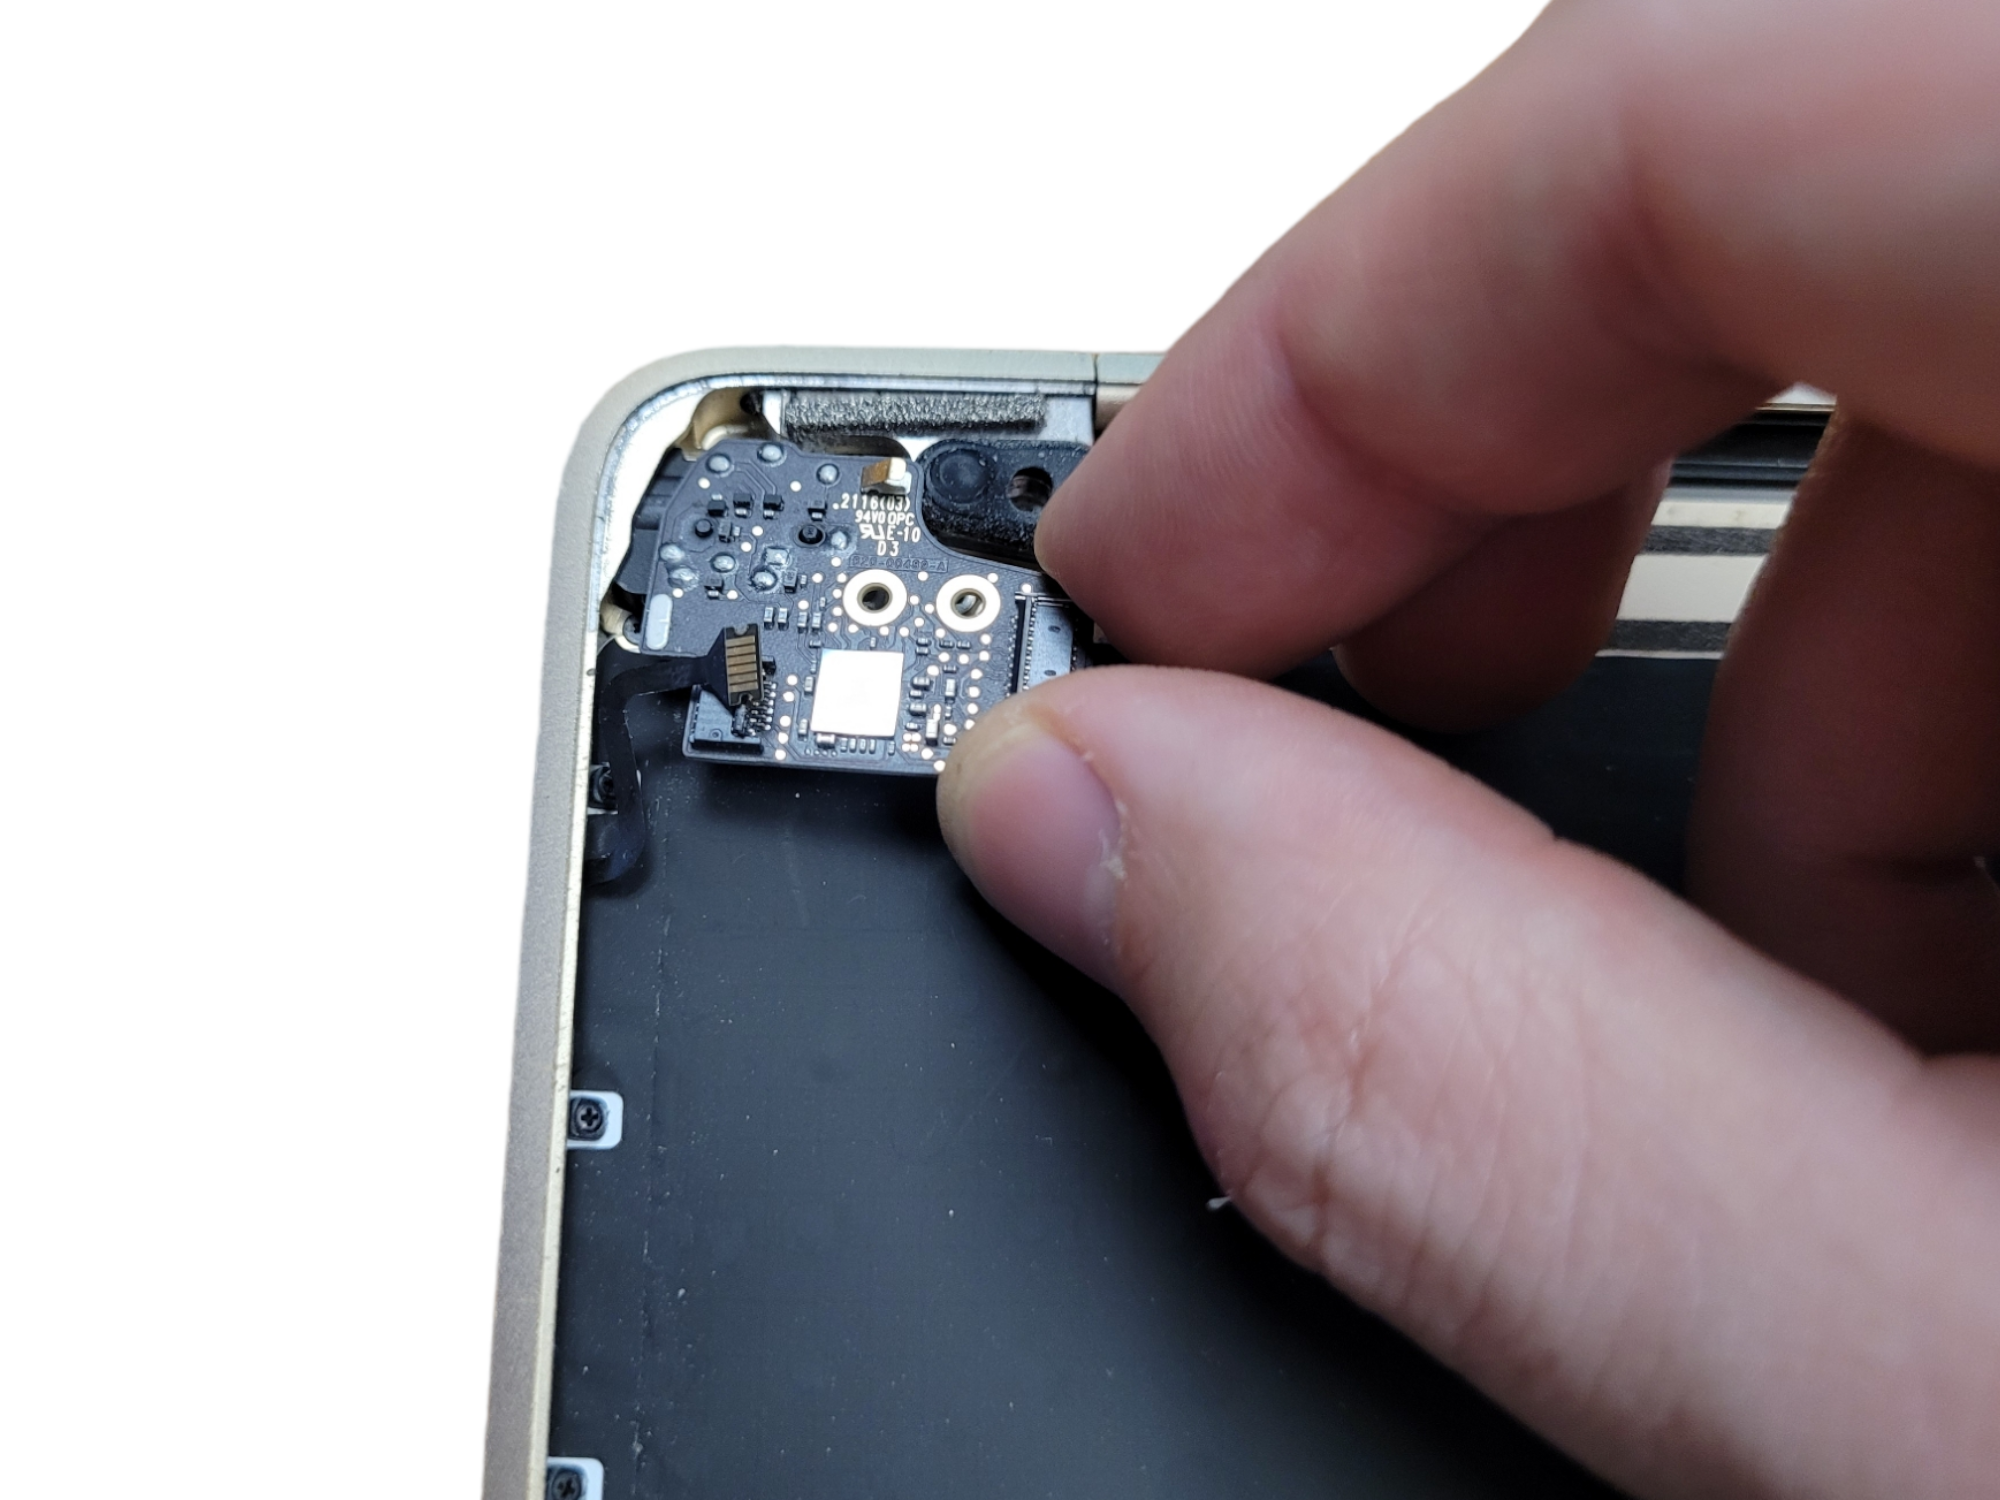
Skip this step if the top case assembly was purchased on AppleParts.io. Our top cases come with the microphones.

Prepare the iOpener case opening kit. Heat the top of the case in the area behind the microphone unit. Using the sharp gauge from the kit, carefully separate the unit from the case and remove it.

6. Disconnecting the display and USB-C cables

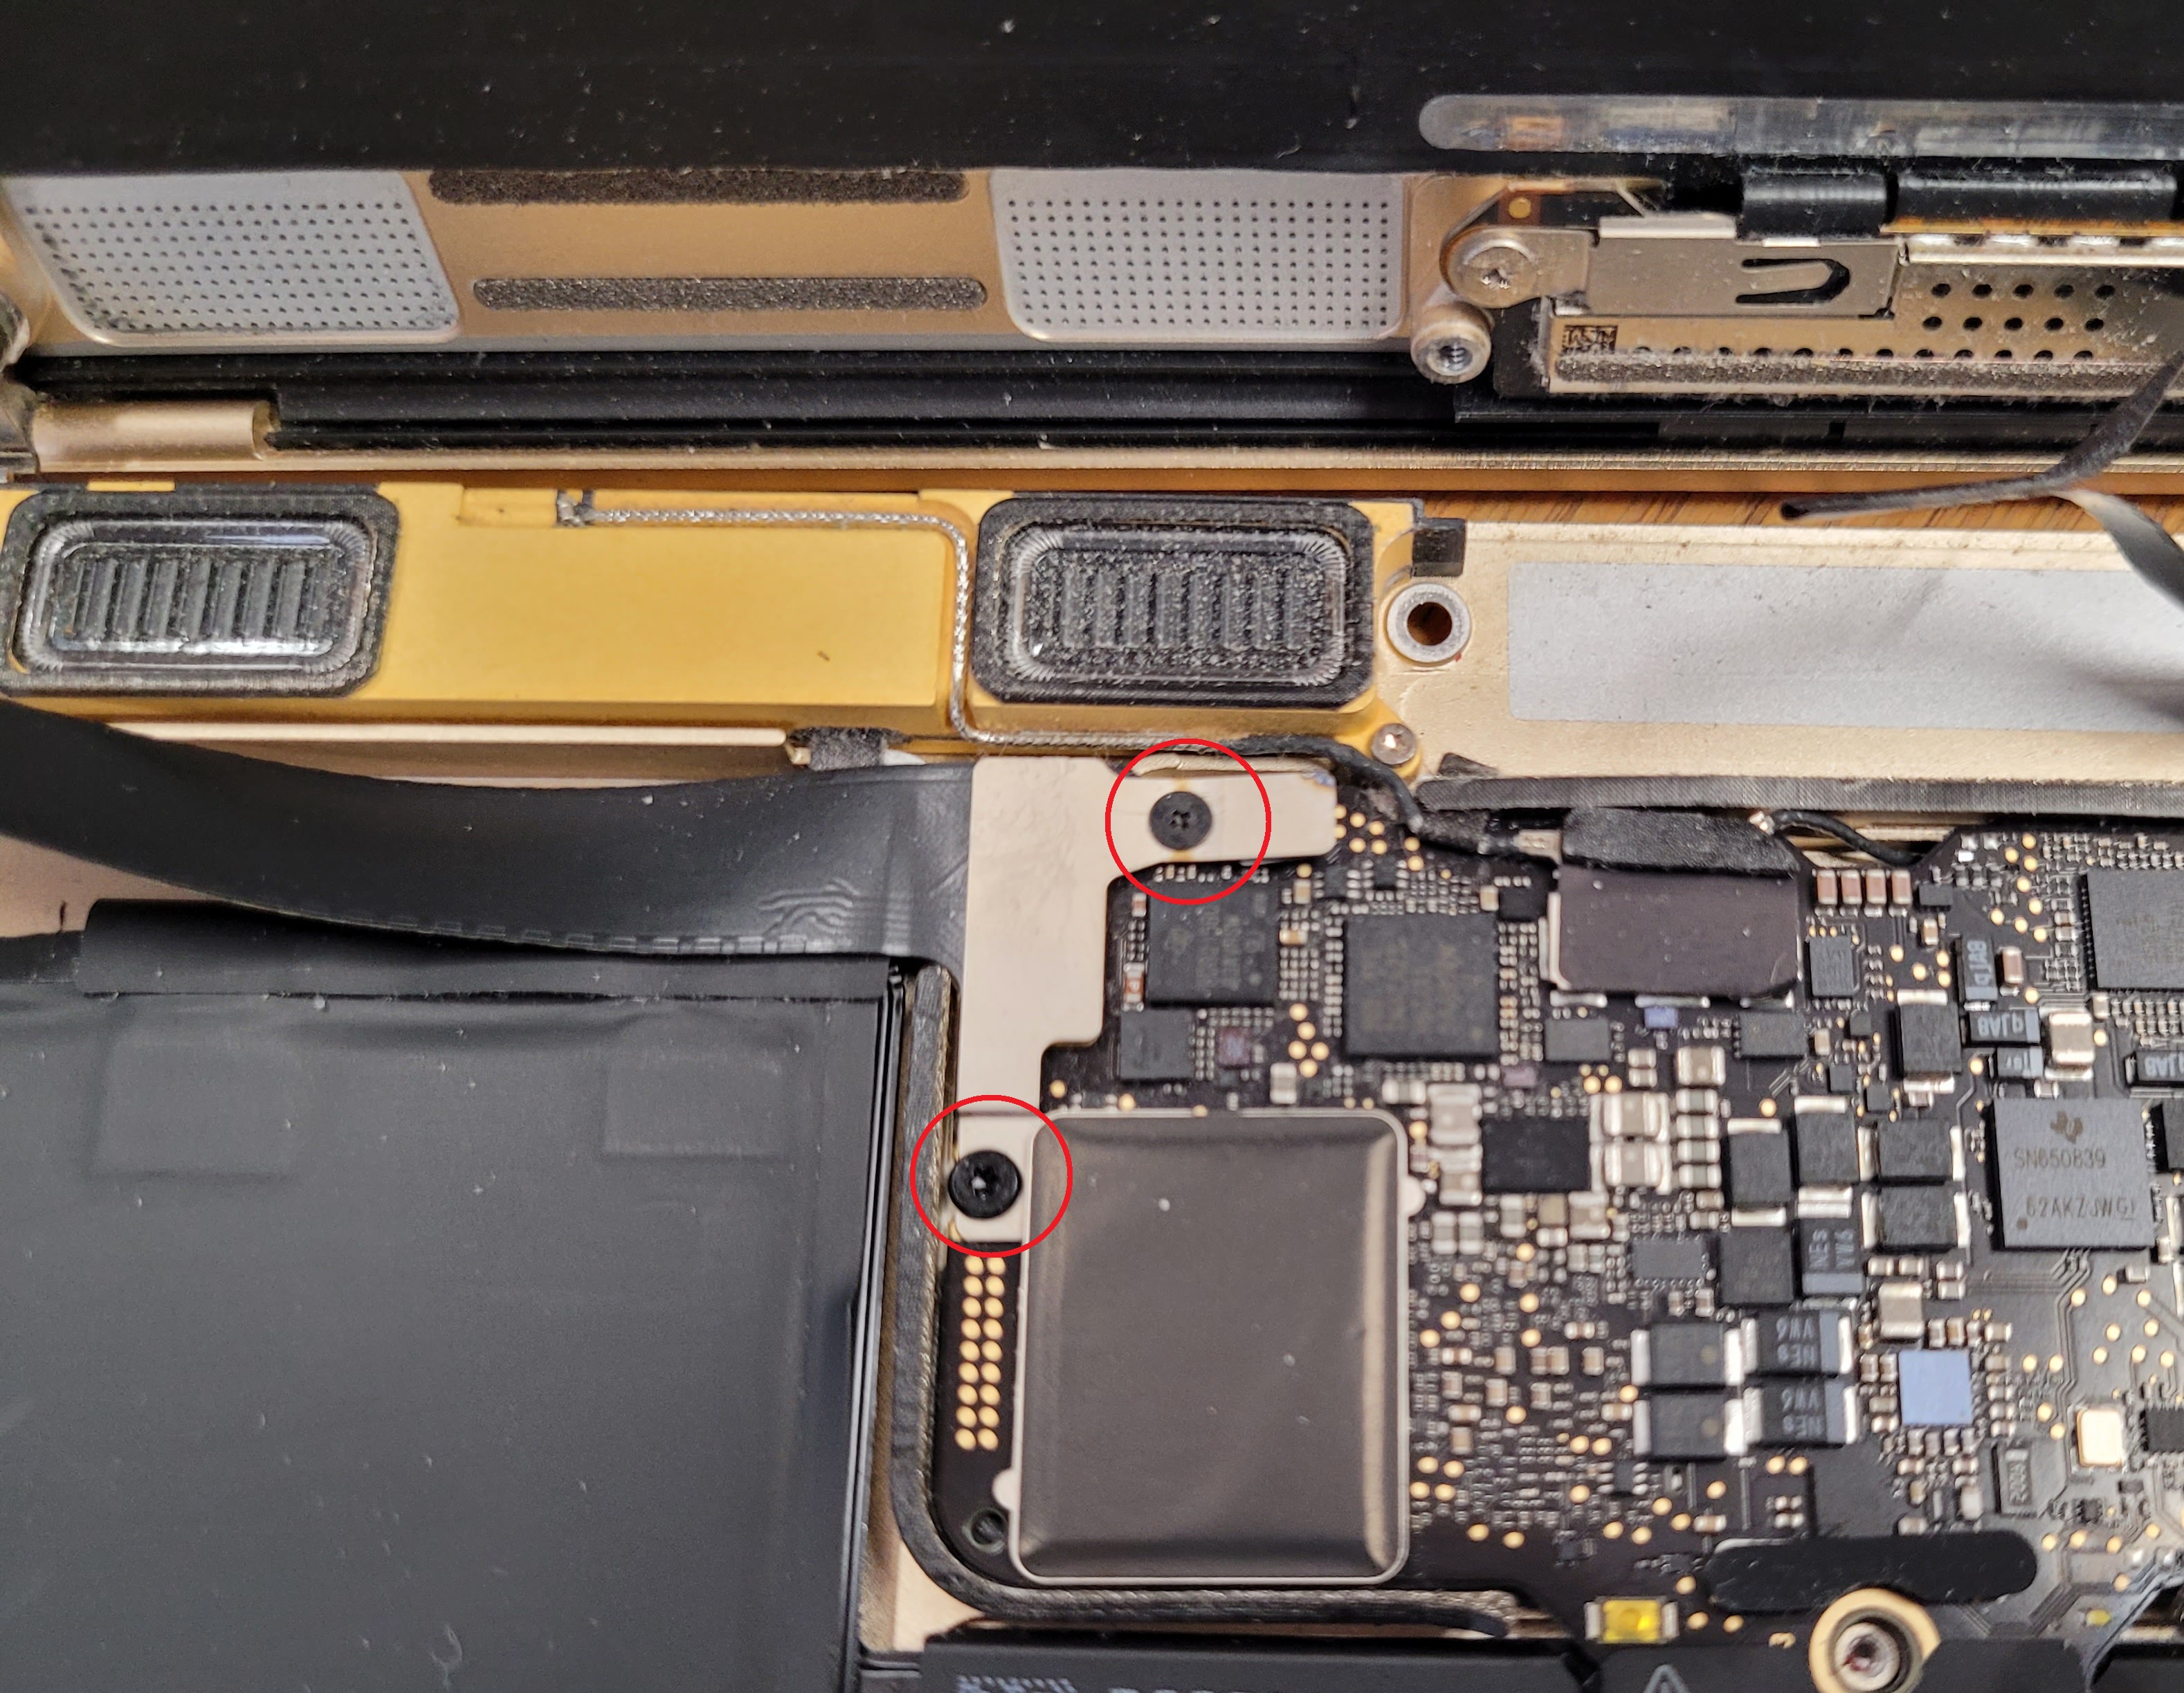
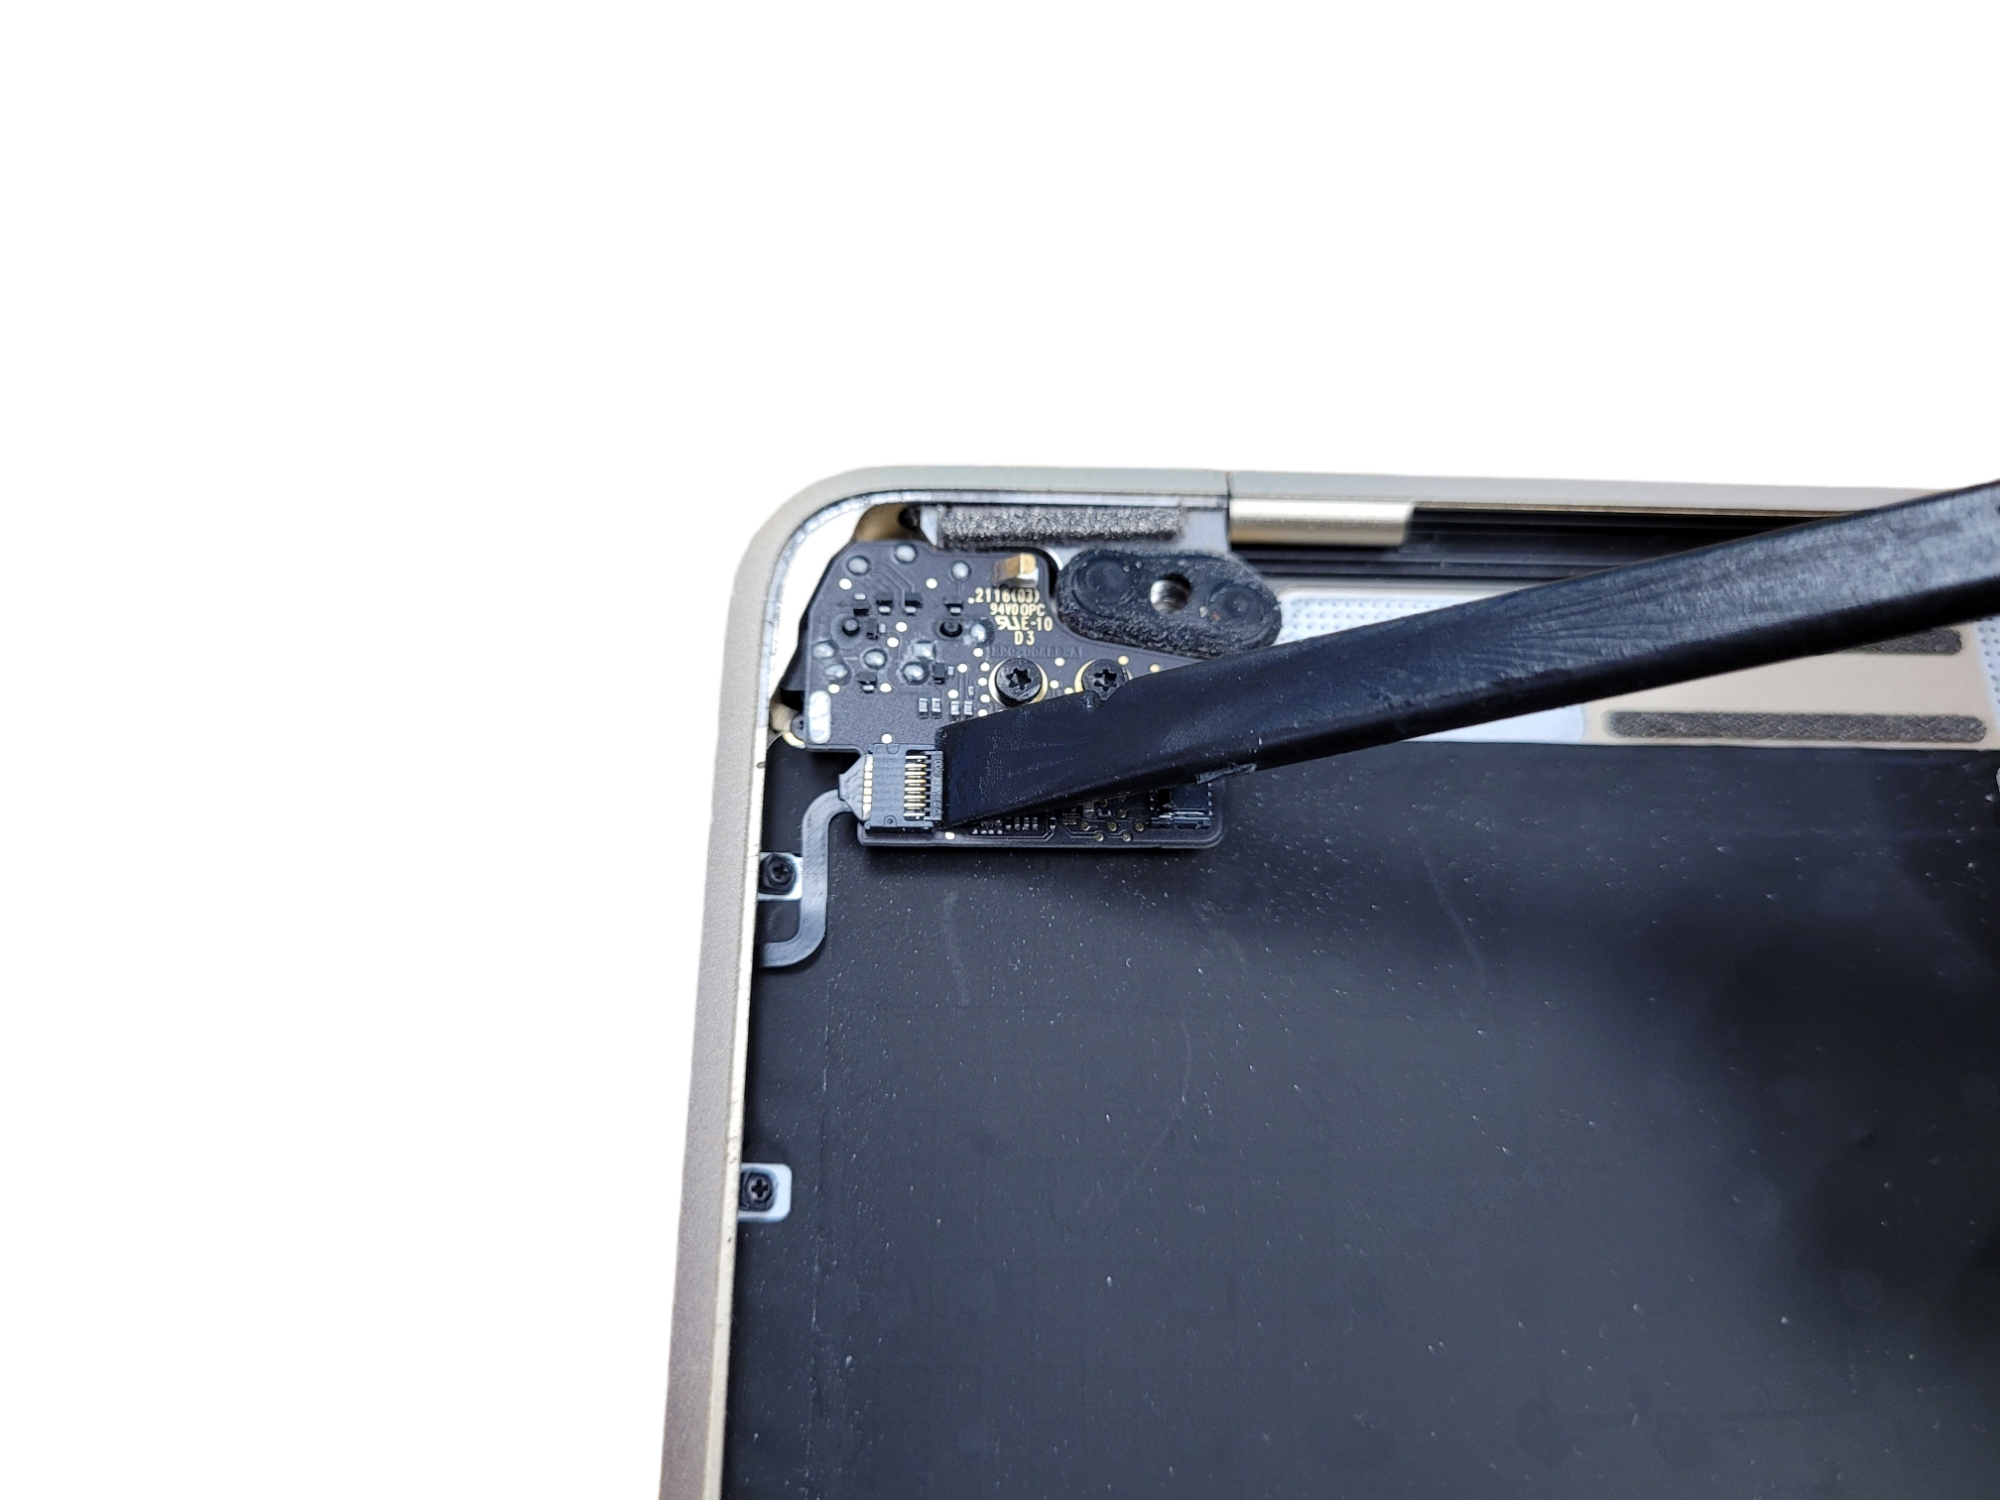
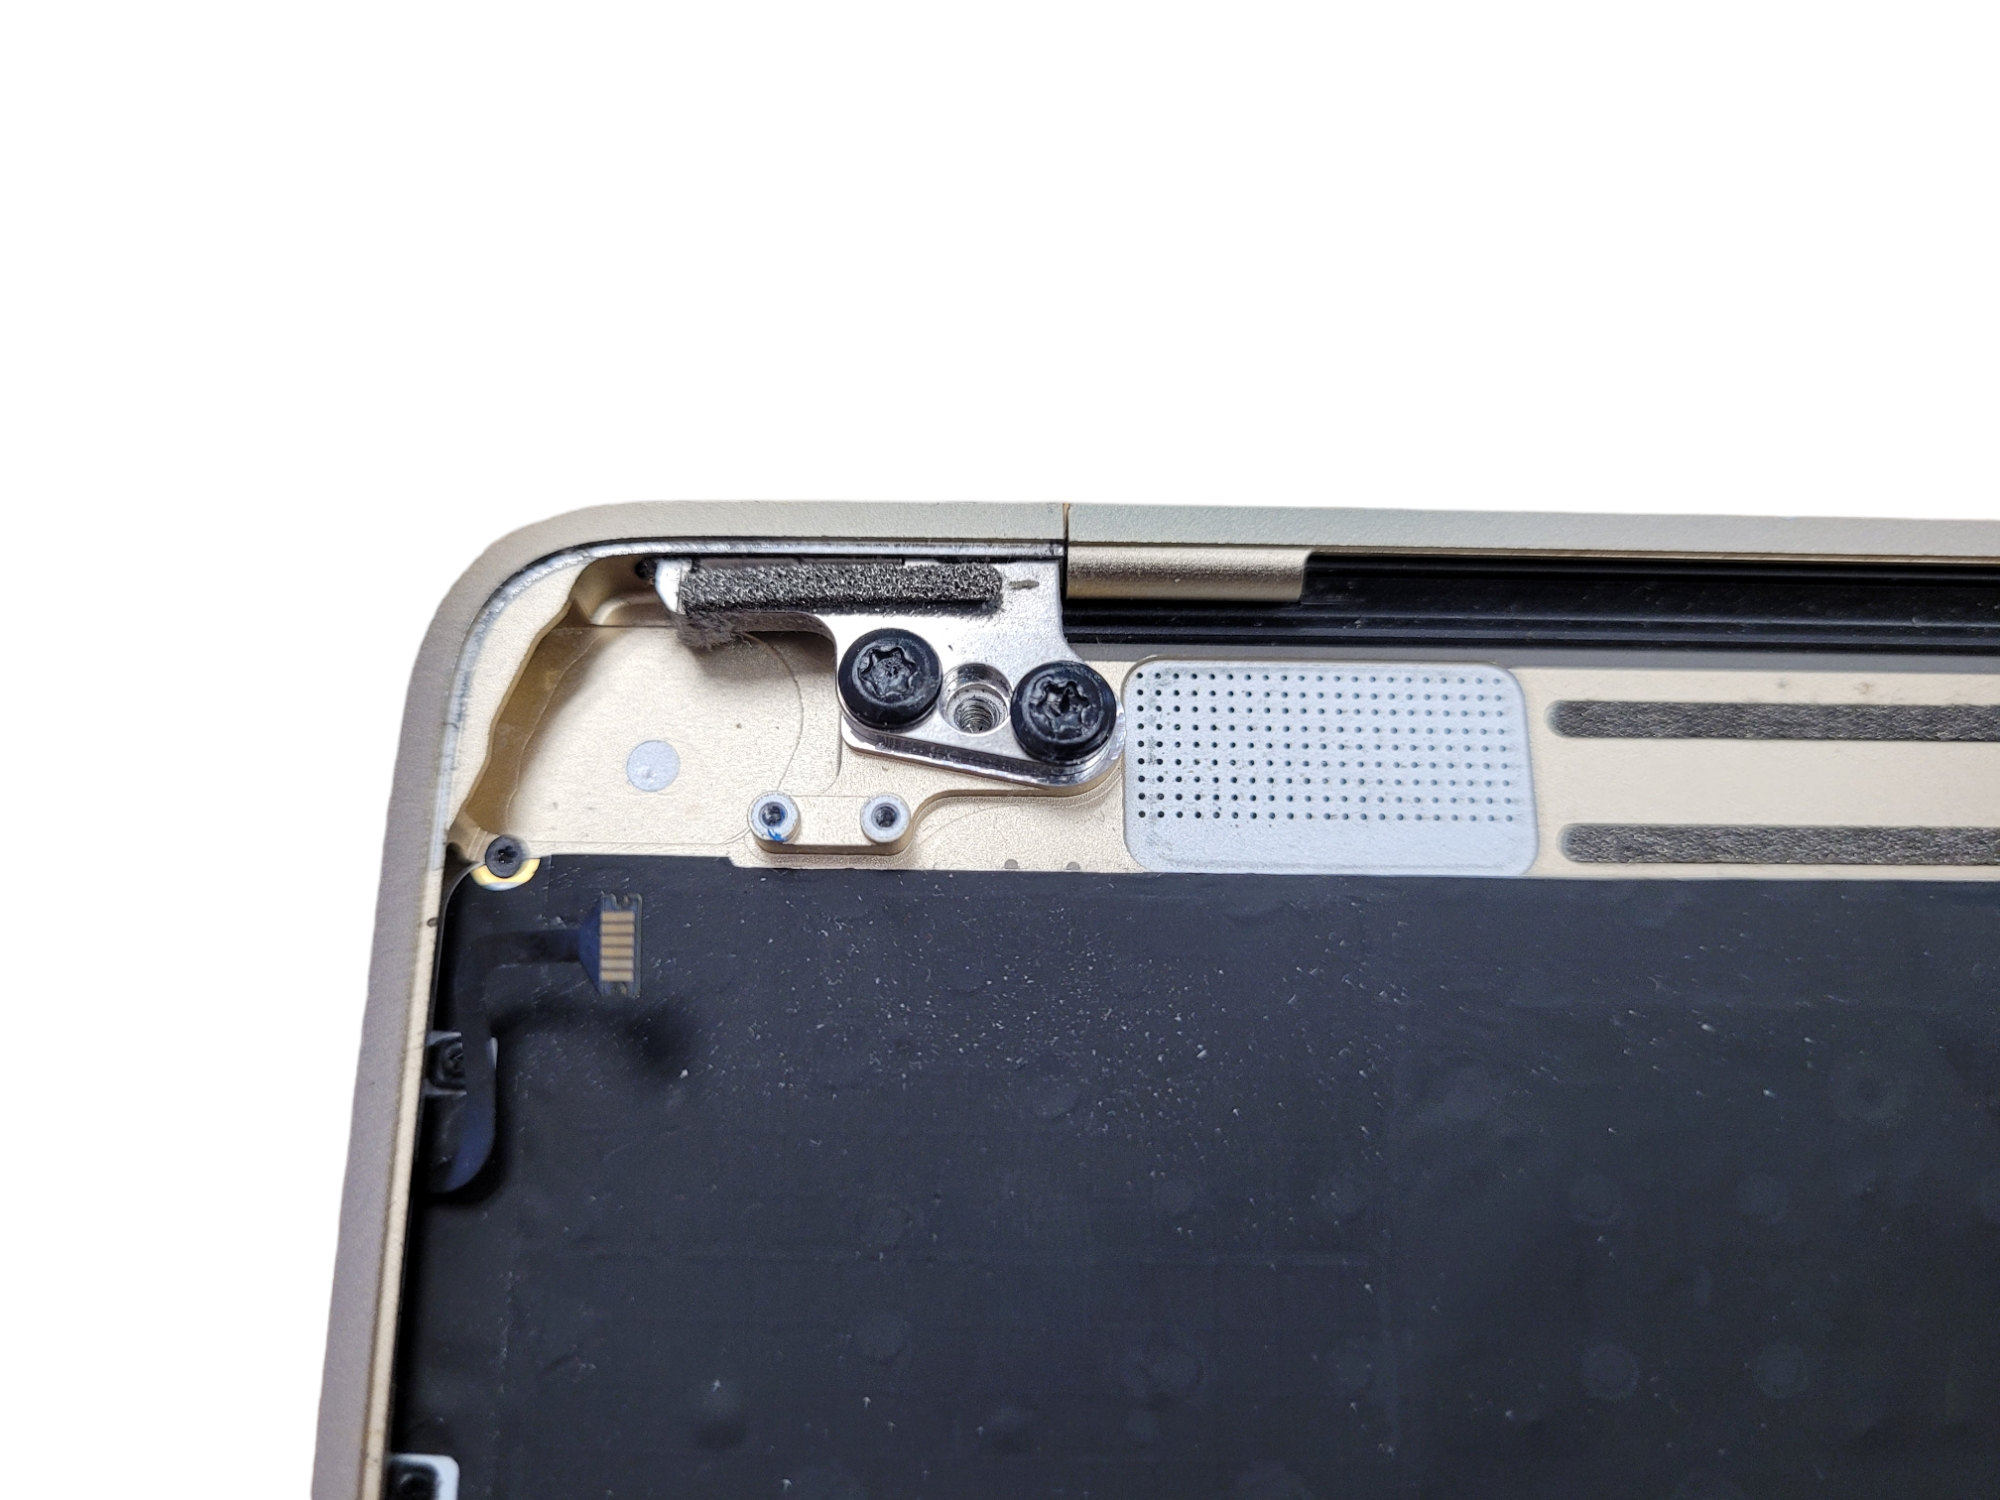
First remove the two screws that secure the display cable and one screw that secures the USB-C port cable. Then proceed as described below:

  1. Turn the USB-C port cable so that you can access the mount underneath.
  2. Lift up and remove the bracket that secures the USB-C port cable connector. Disconnect it with a spatula by prying it straight up and then remove it.


7. Removing the display

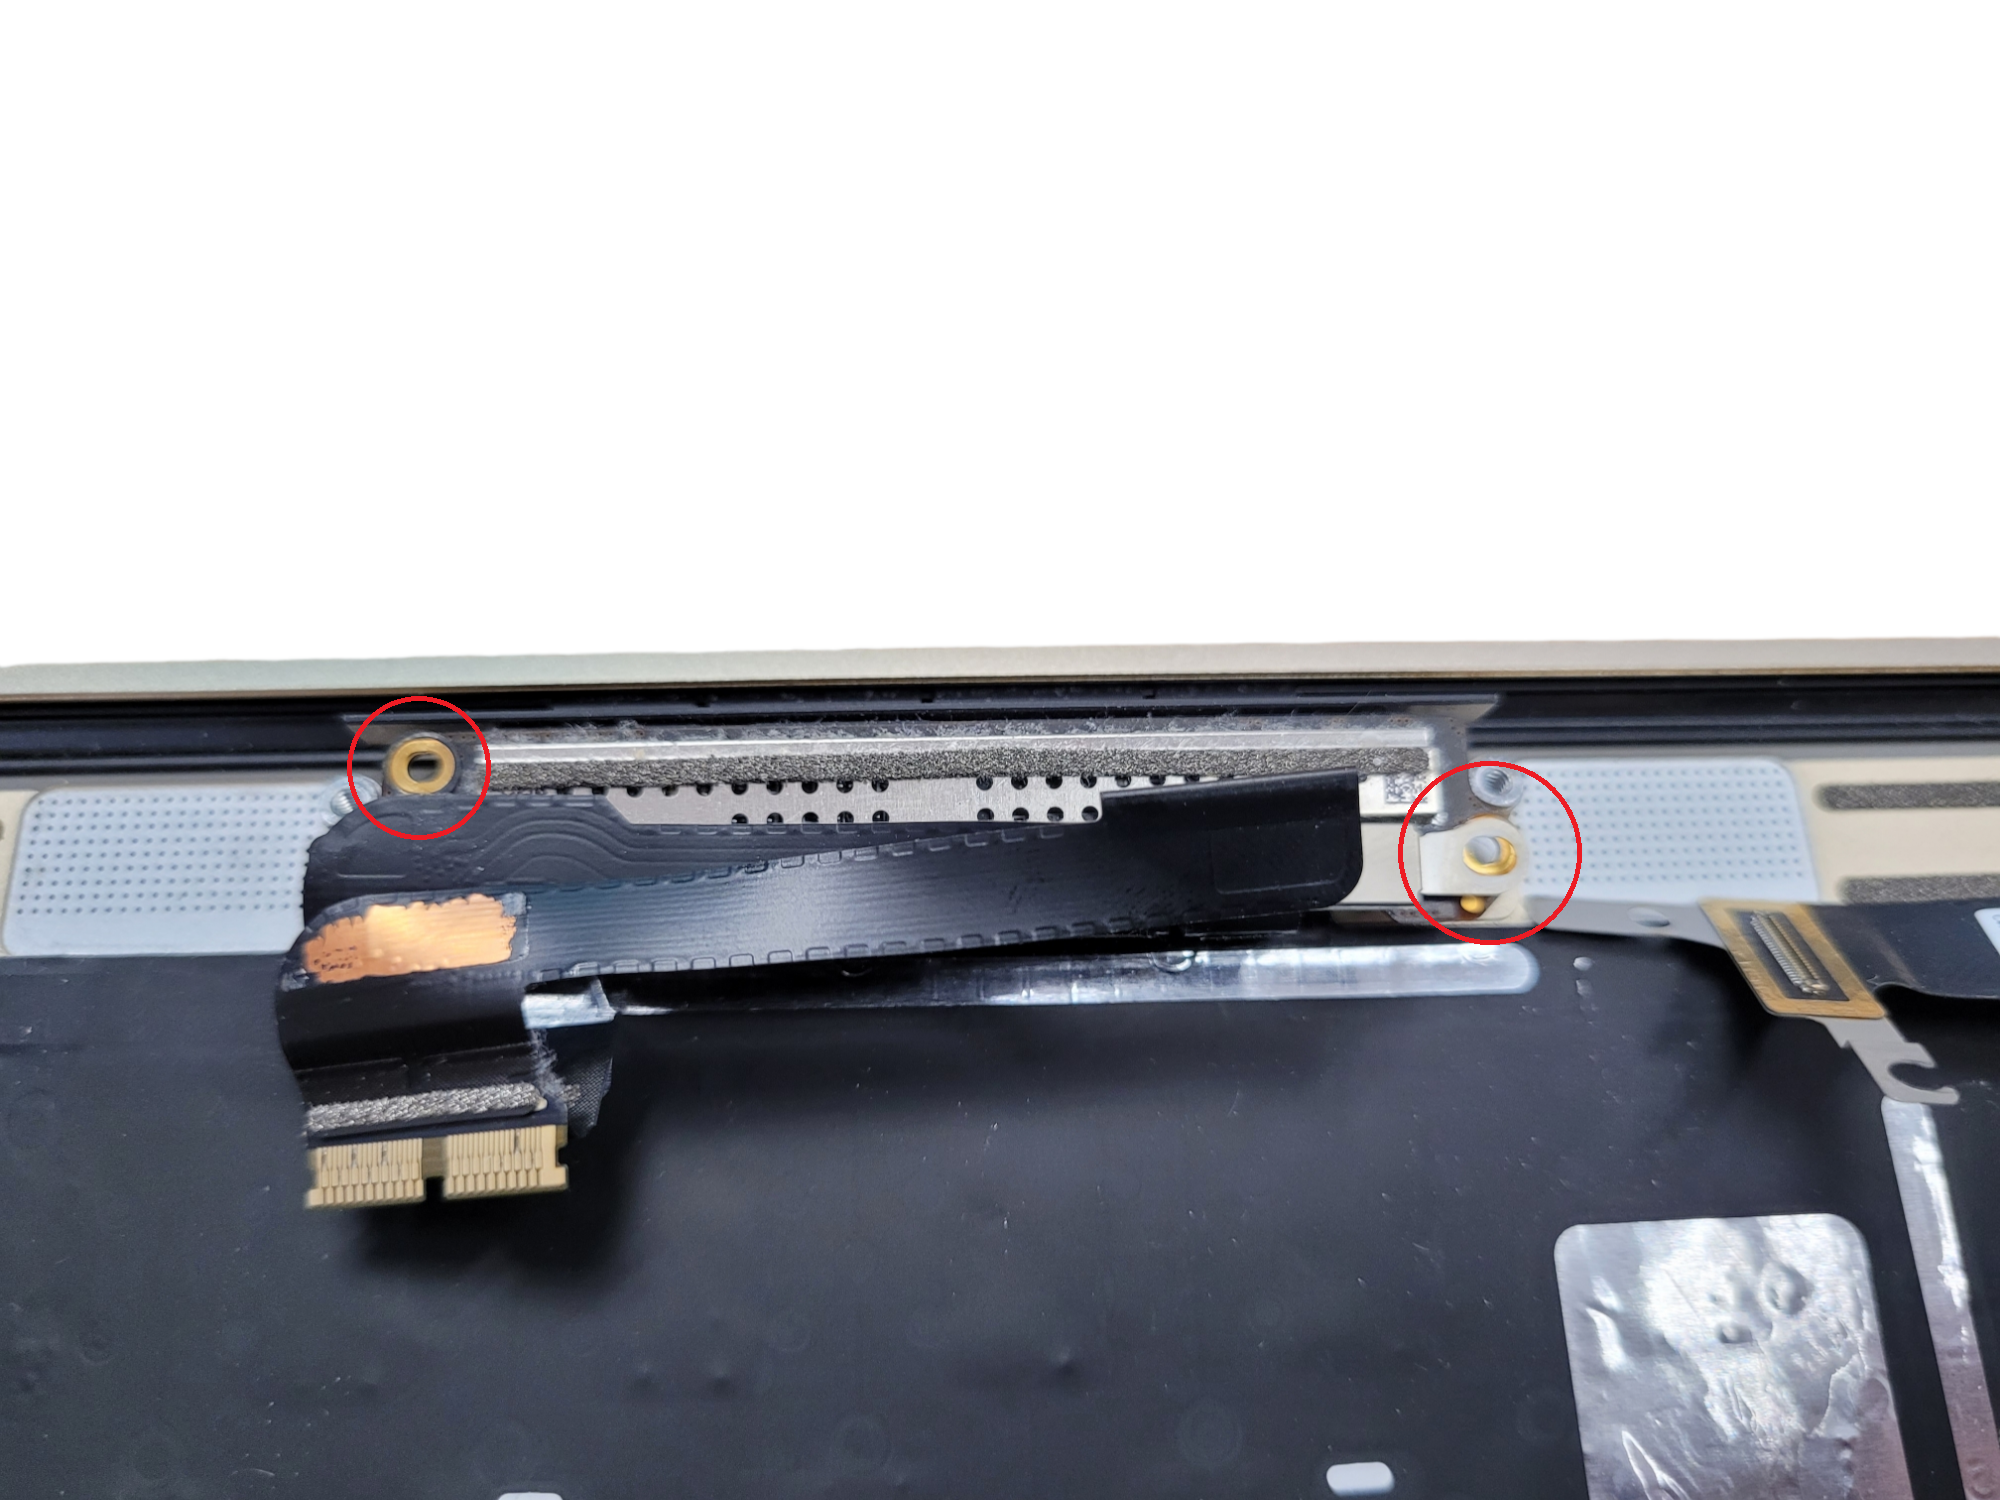
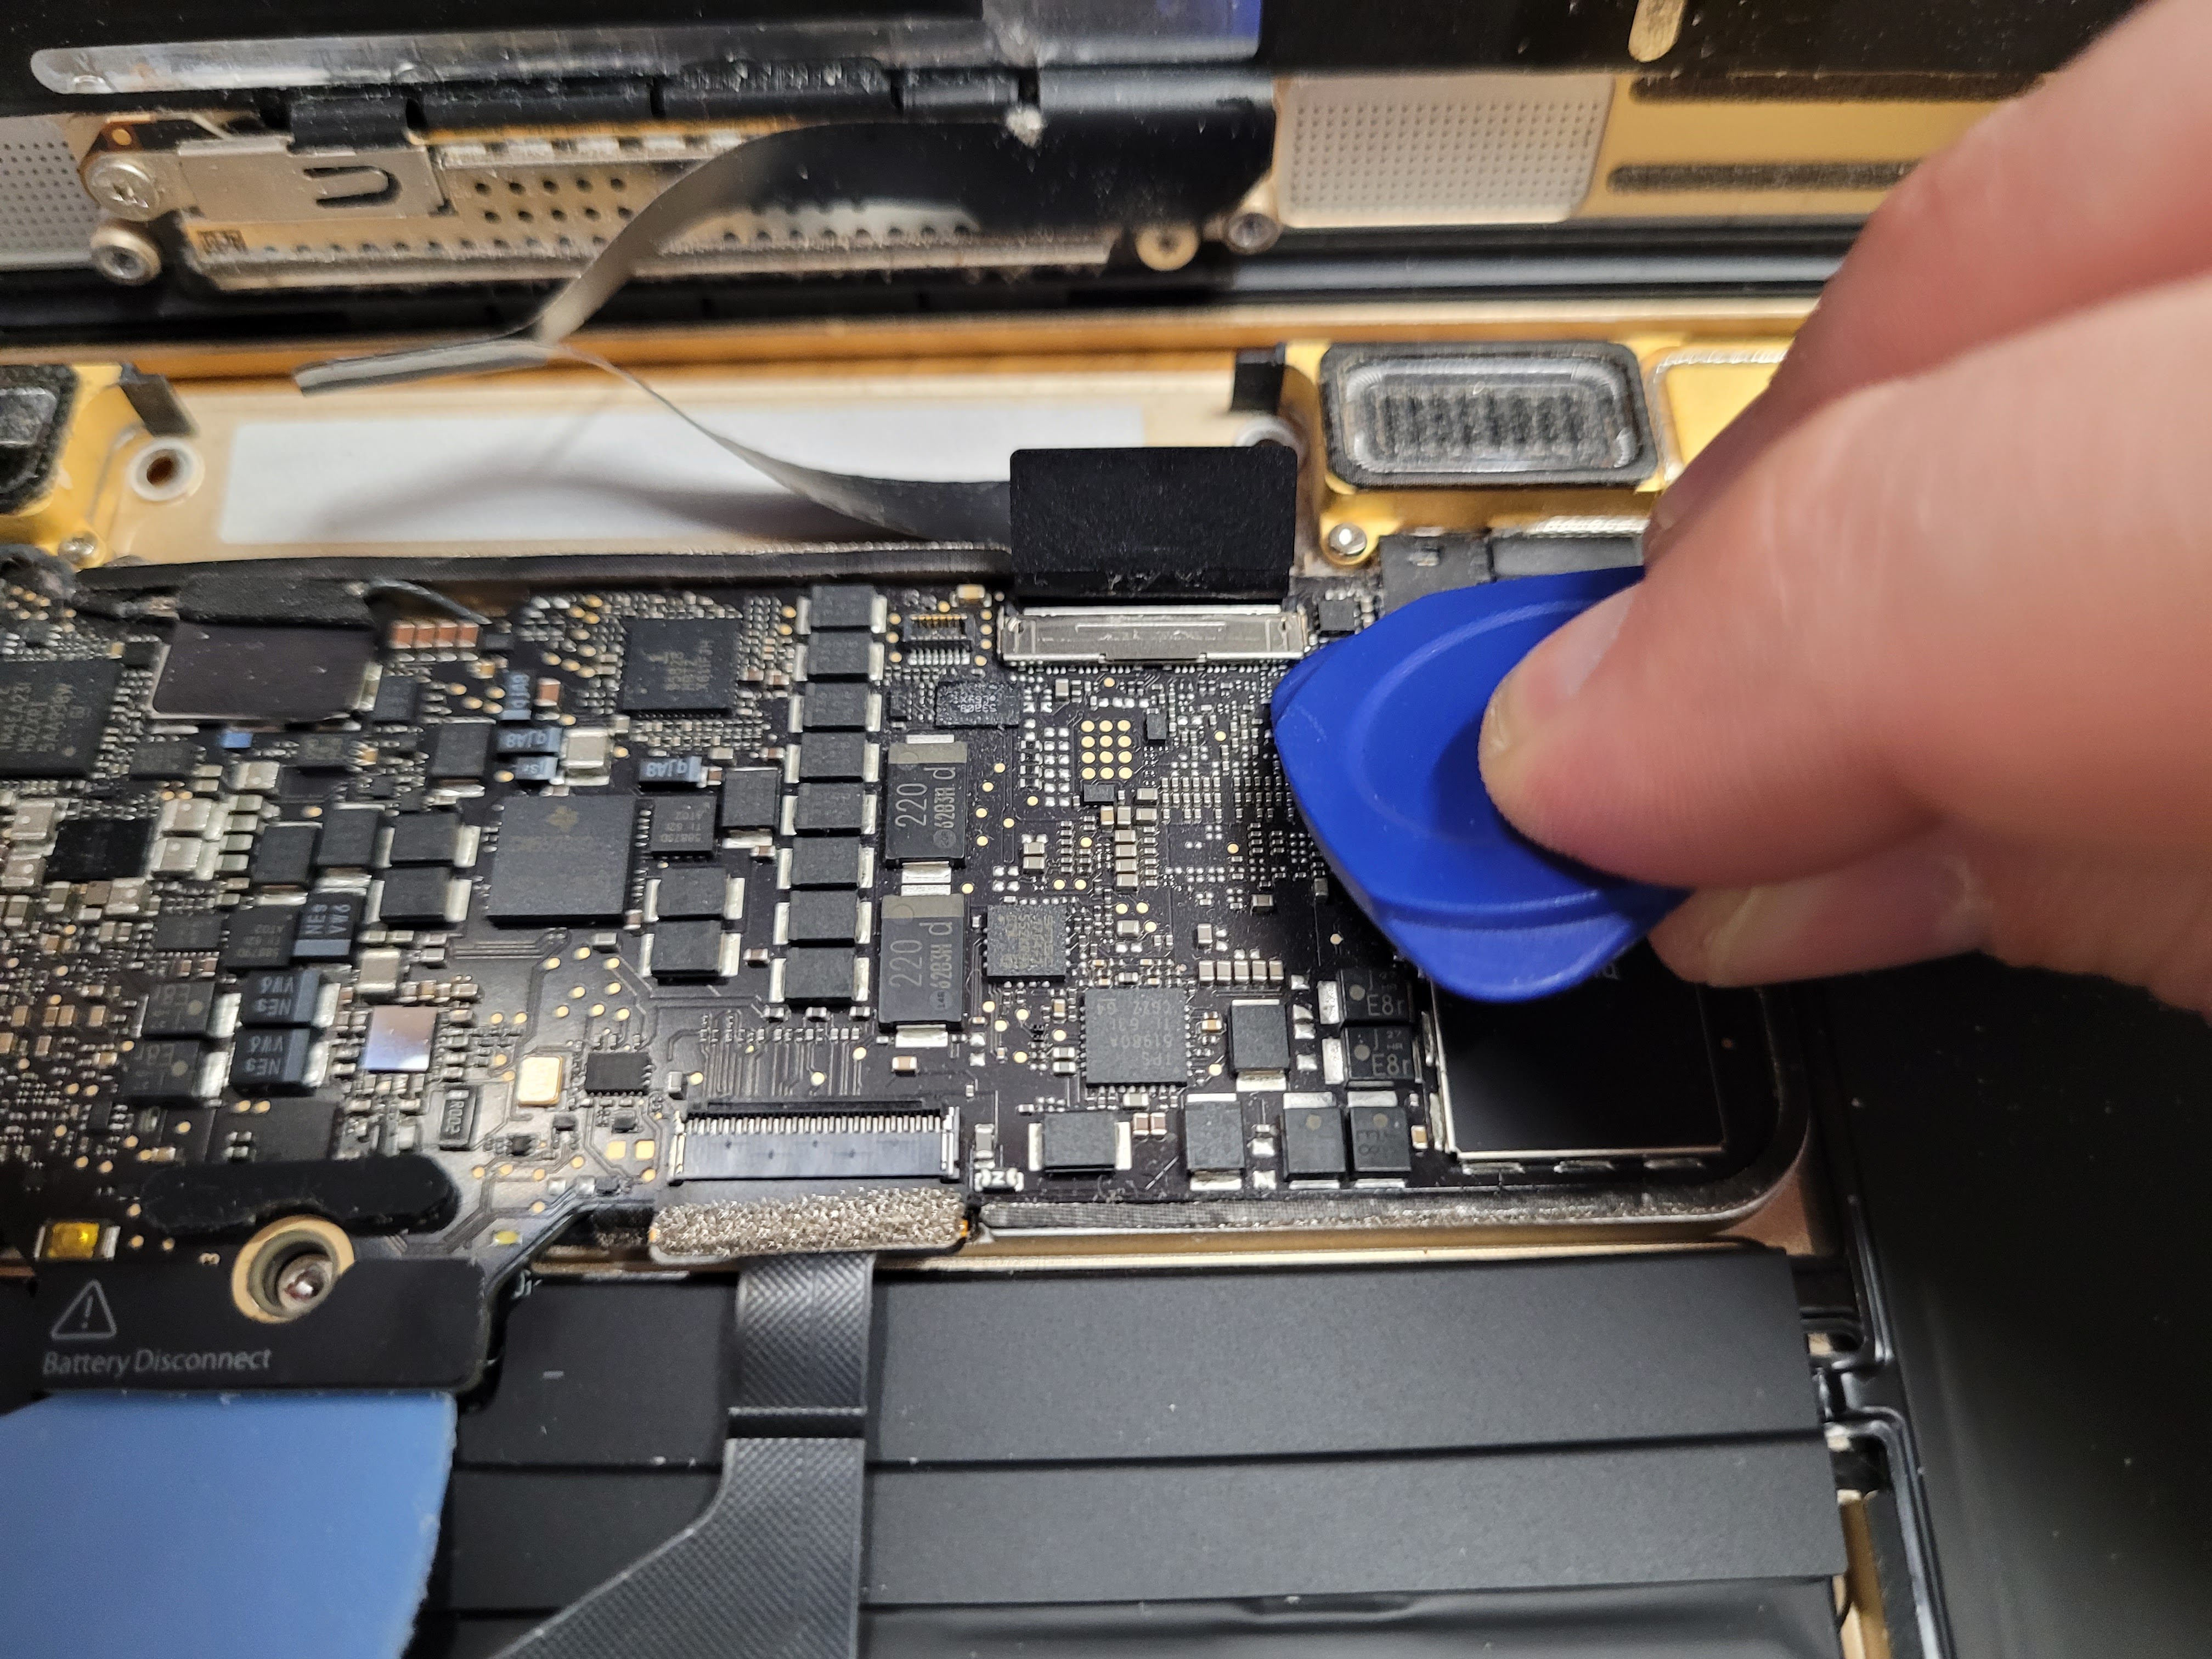
Open the display as far as possible and place your MacBook with its right side facing away from you.

  1. Remove the four screws that secure the display hinges.
  2. Holding both parts of the case, carefully slide them together so that the hinges come out of the grooves above.
  3. Slide out the top of the case by pulling back the display. Make sure that the movements are strictly horizontal.
  4. Remove the display after releasing the top cover from the hinges.


8. Removing the USB-C port and trackpad unit

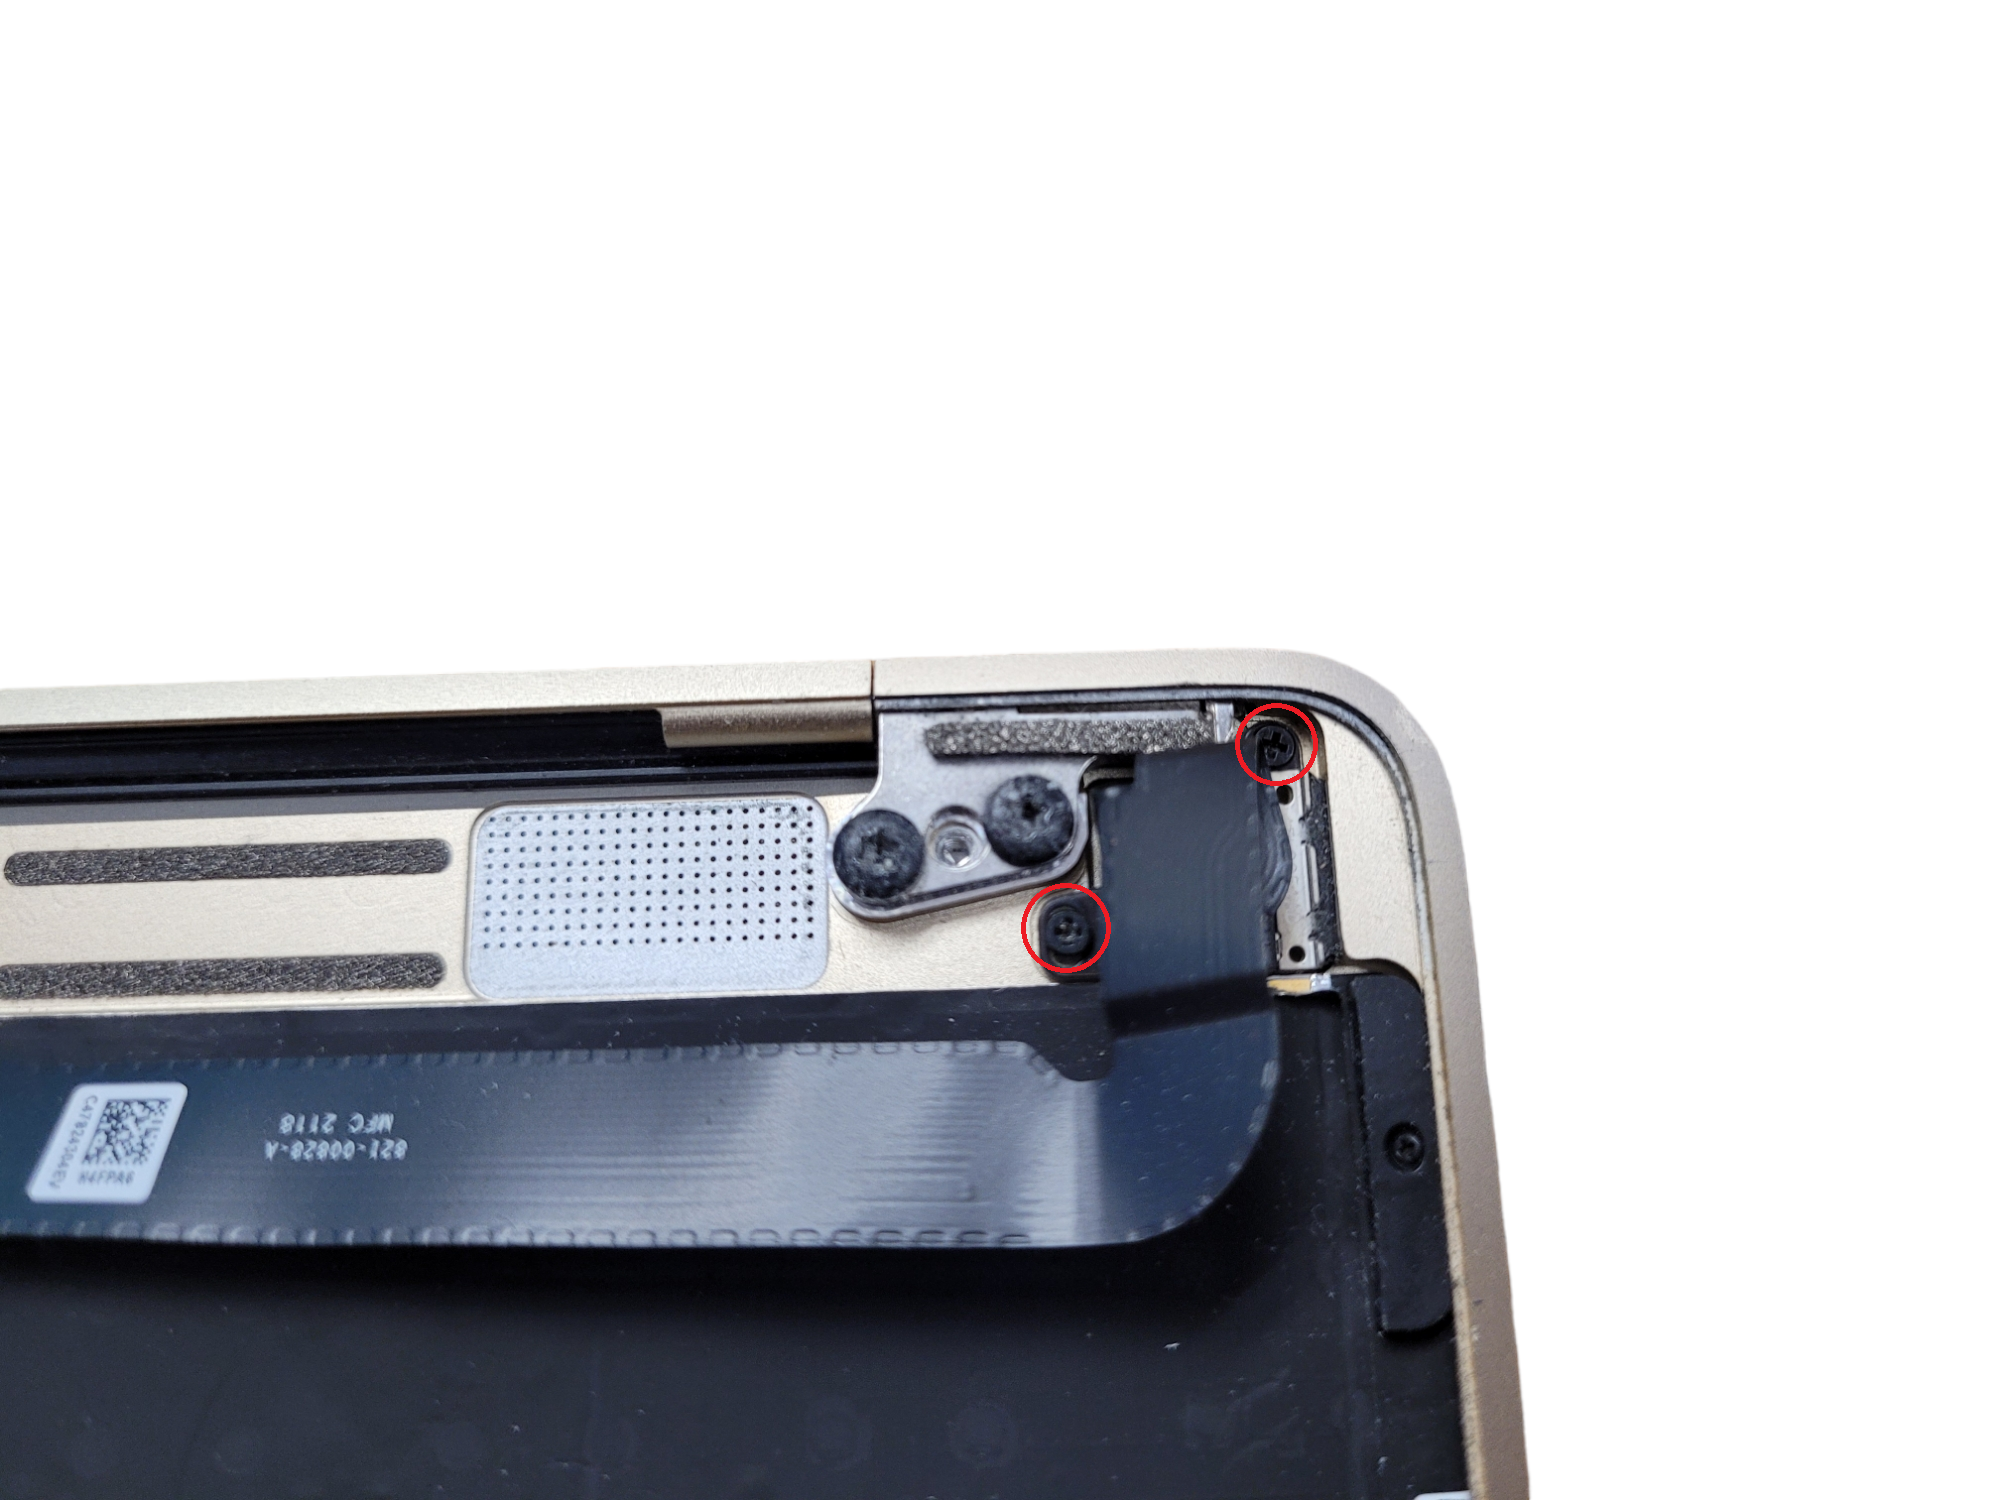
First remove the screw that secures the USB-C port to the top of the case.

  1. Slide the USB-C port out of the recess in the top cover and remove it.
  2. Use tweezers to remove the tape that covers the keyboard cable connector on the trackpad.
  3. Use a spudger to open the cover on the ZIF connector of the keyboard ribbon cable.
  4. Pull the keyboard cable out of the socket in the frame.
  5. Remove the five screws that secure the trackpad to the case and remove it.


9. Removing the keyboard ribbon cable

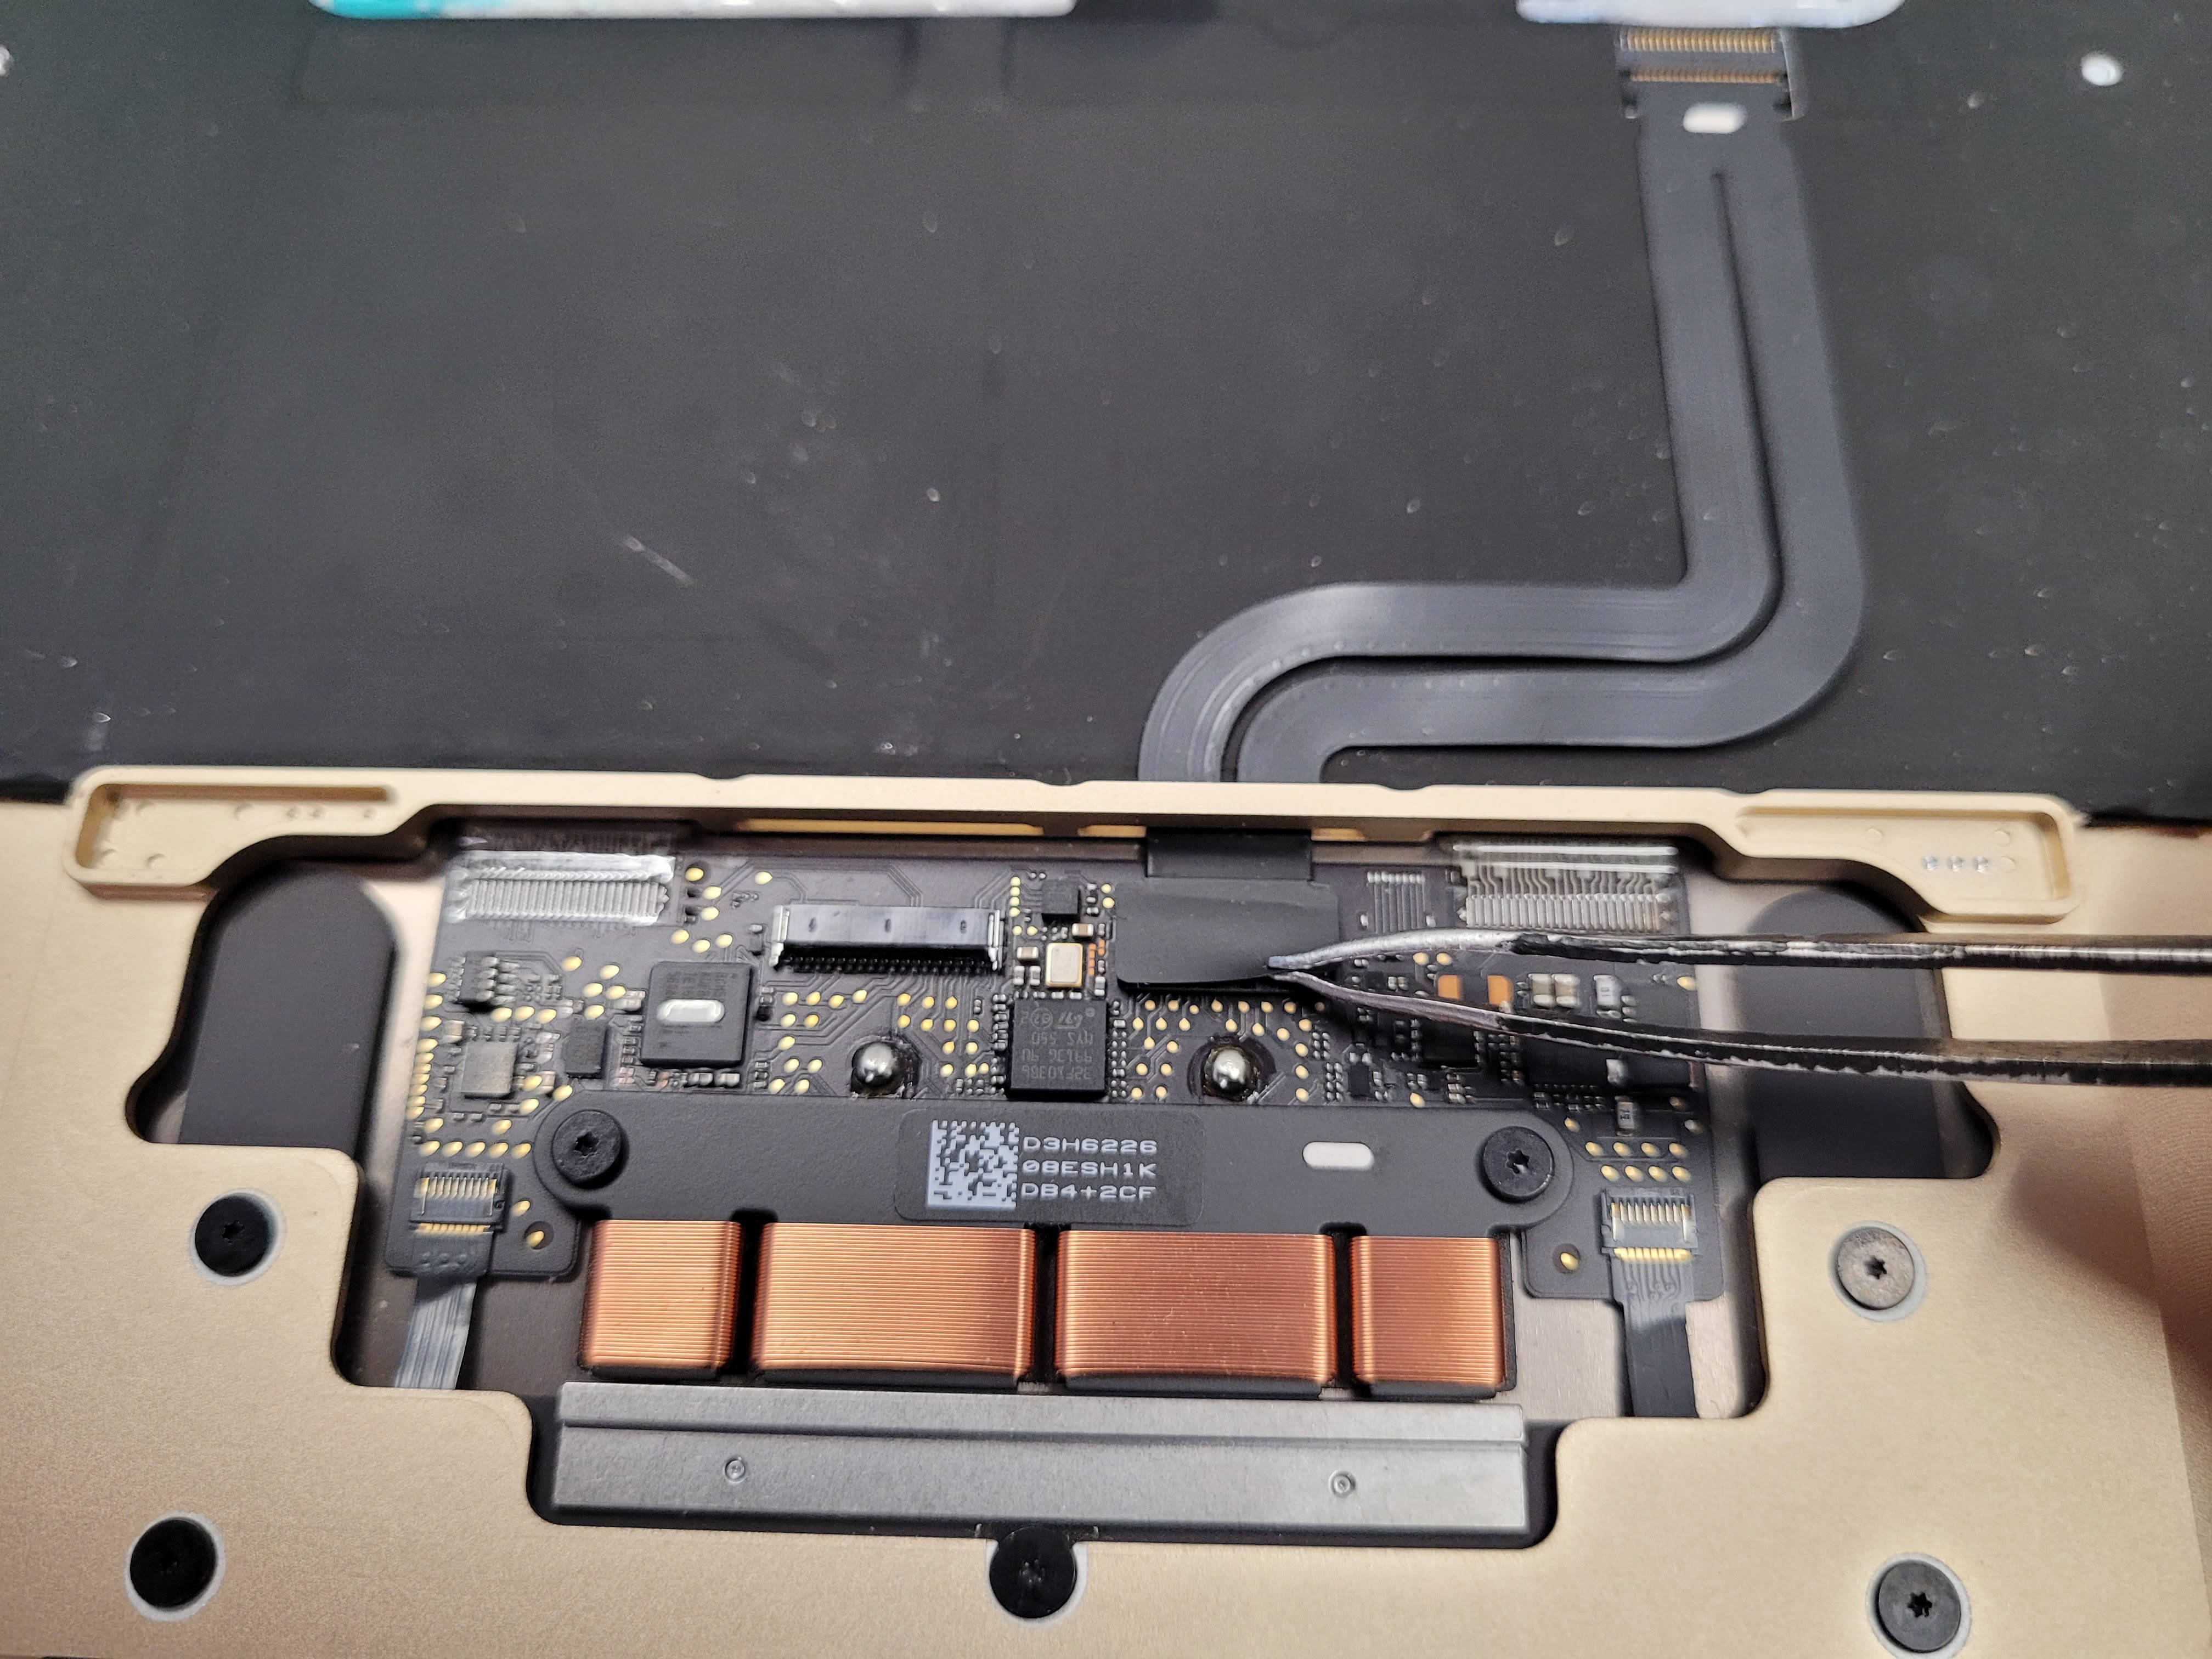
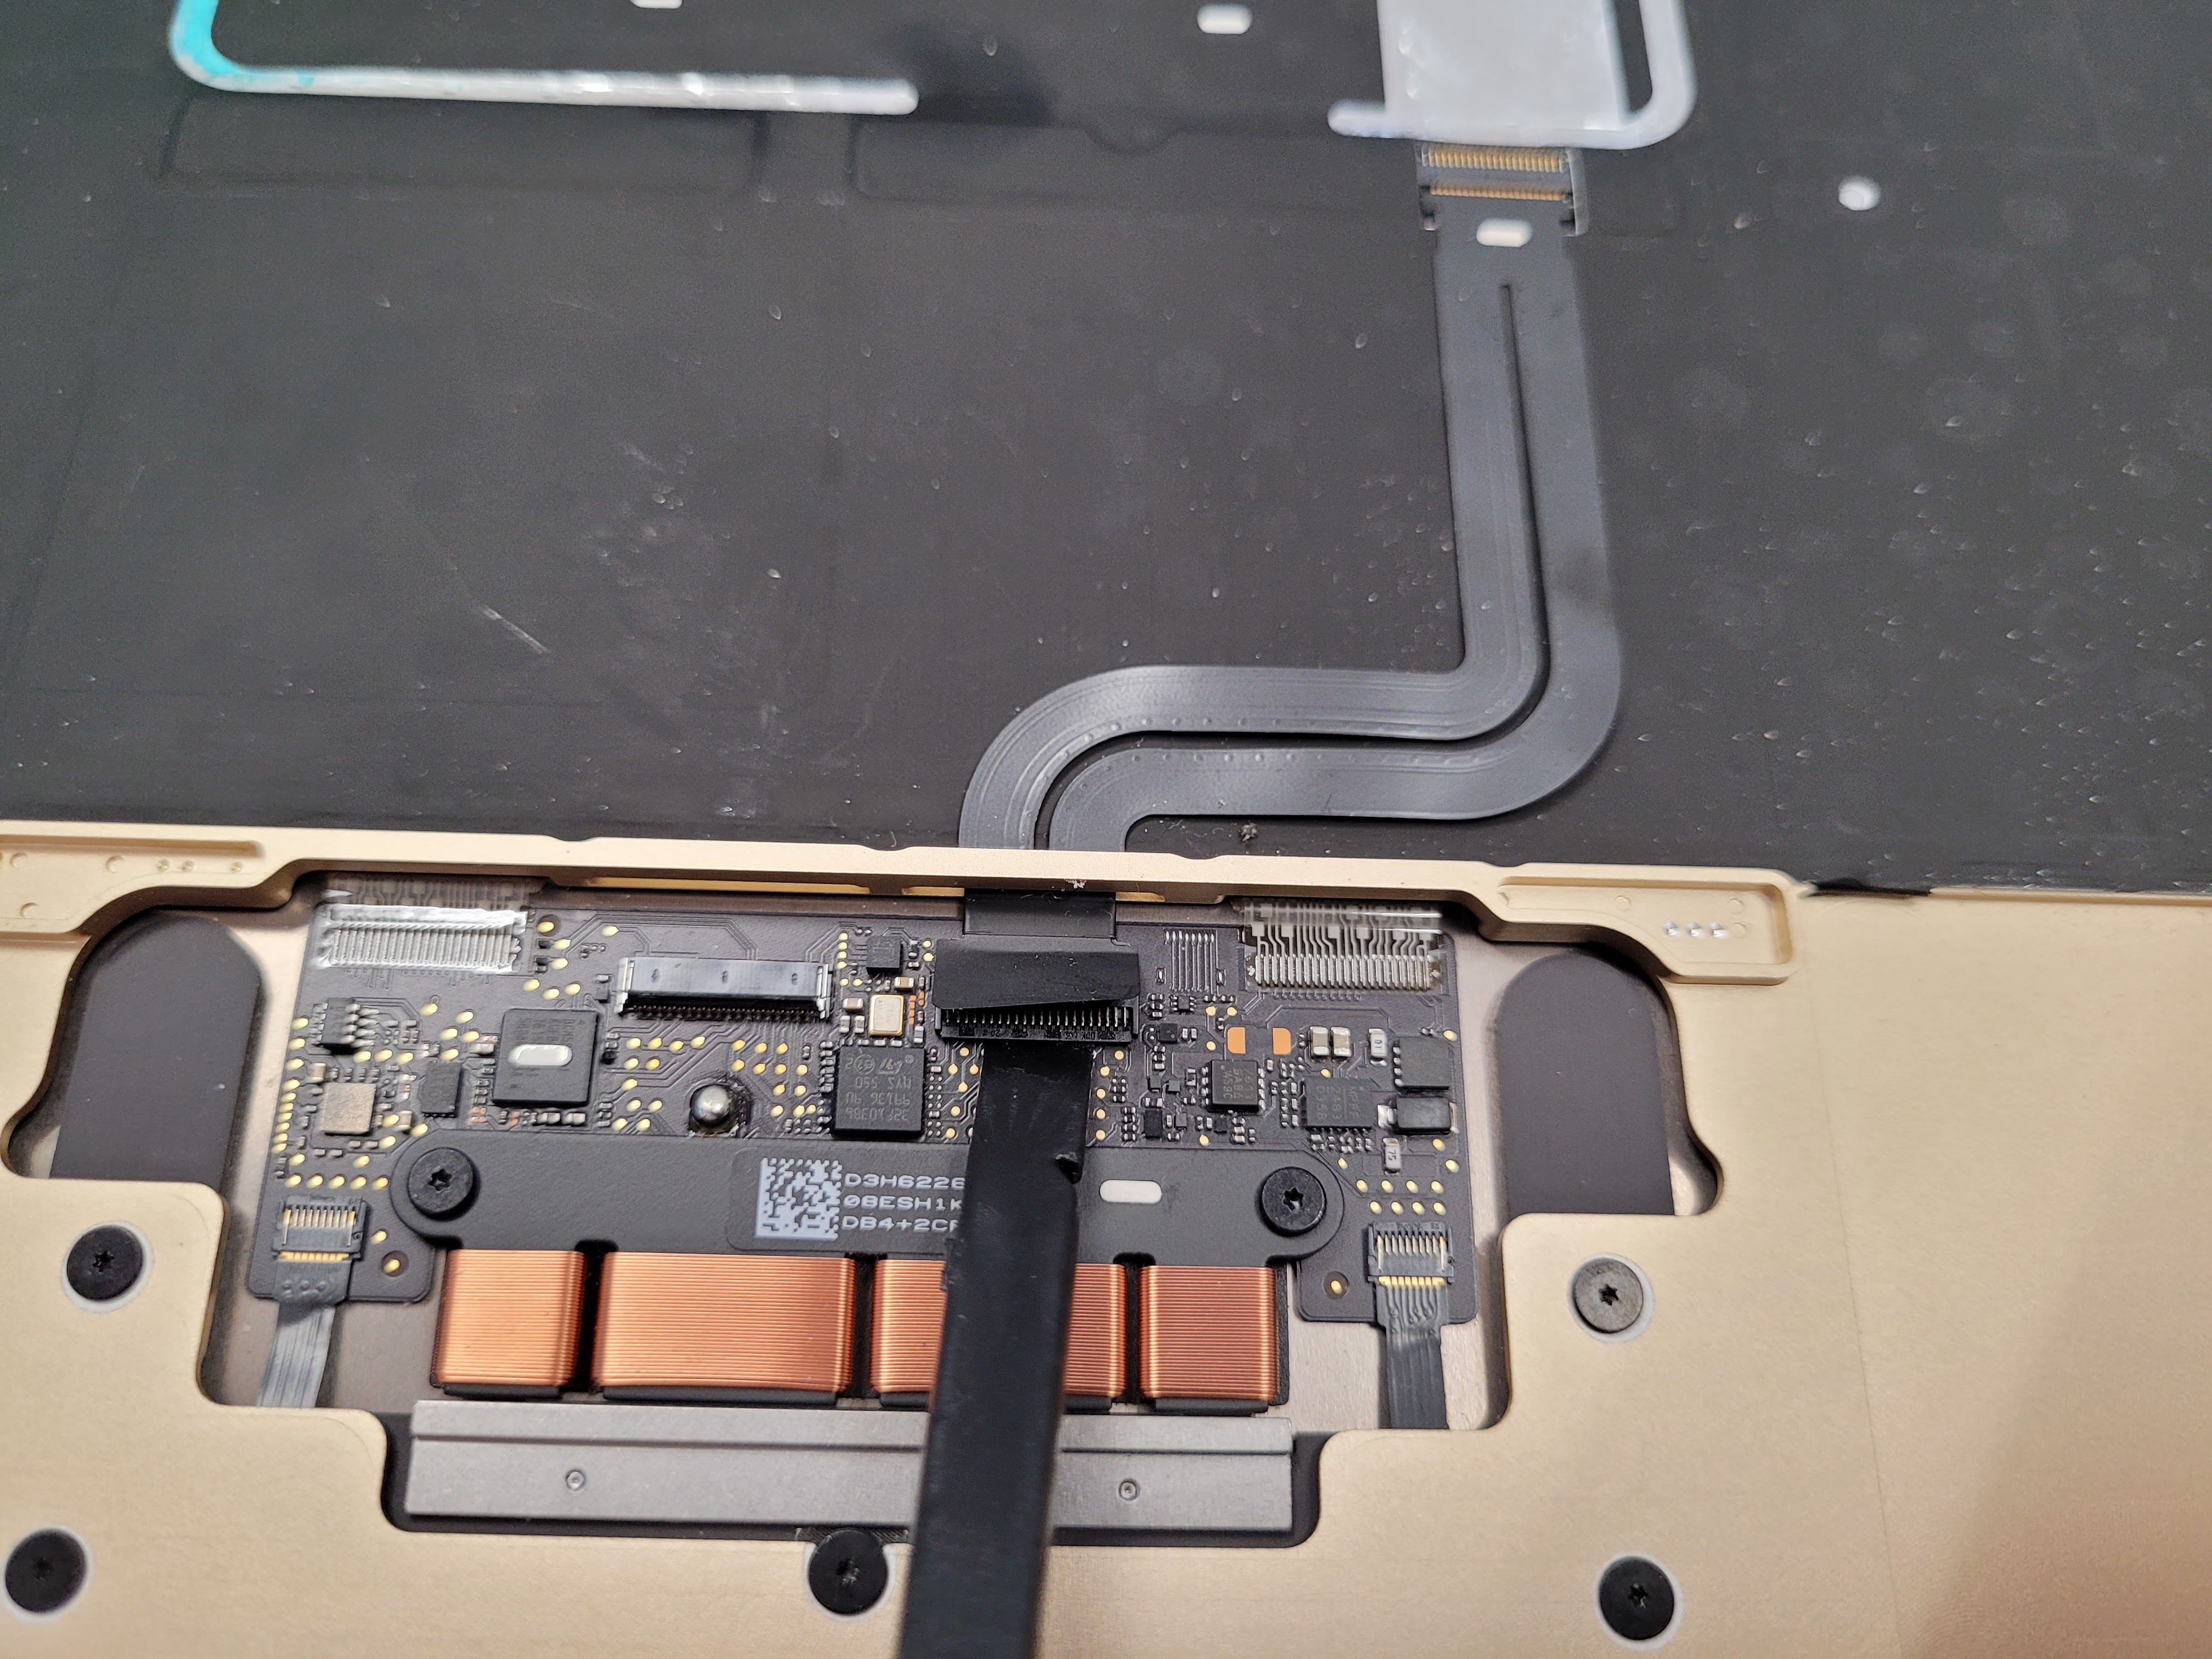
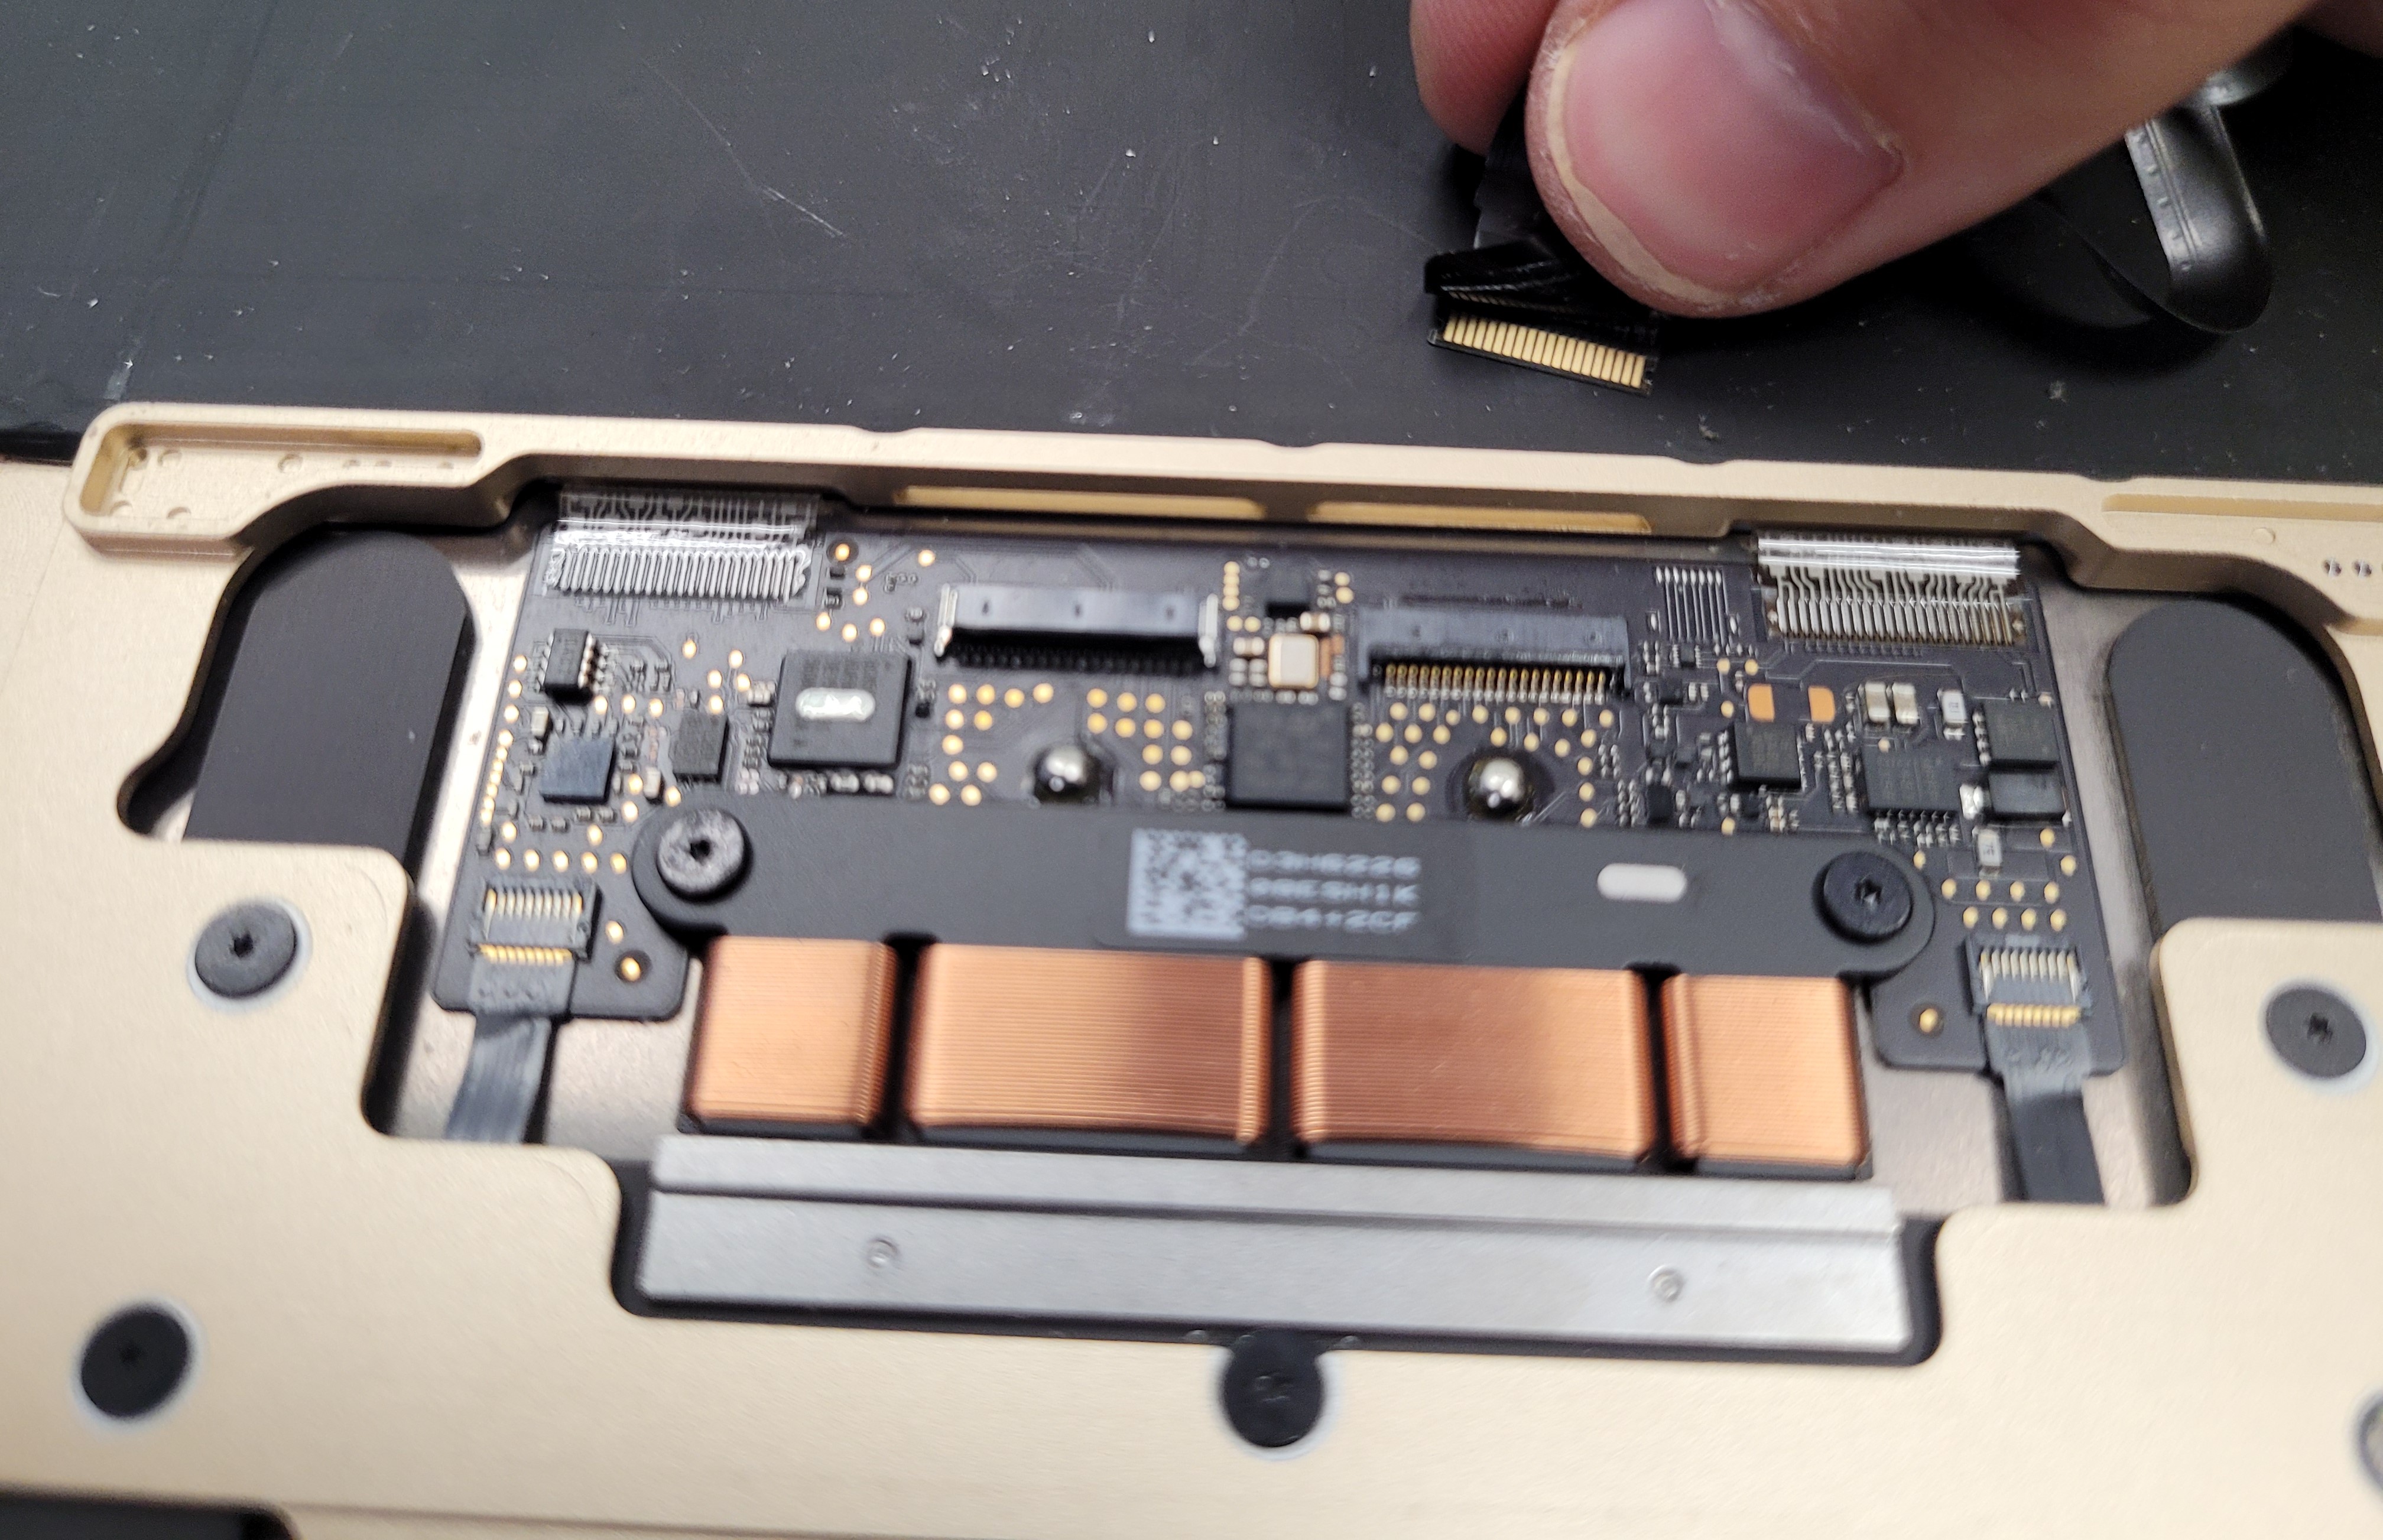
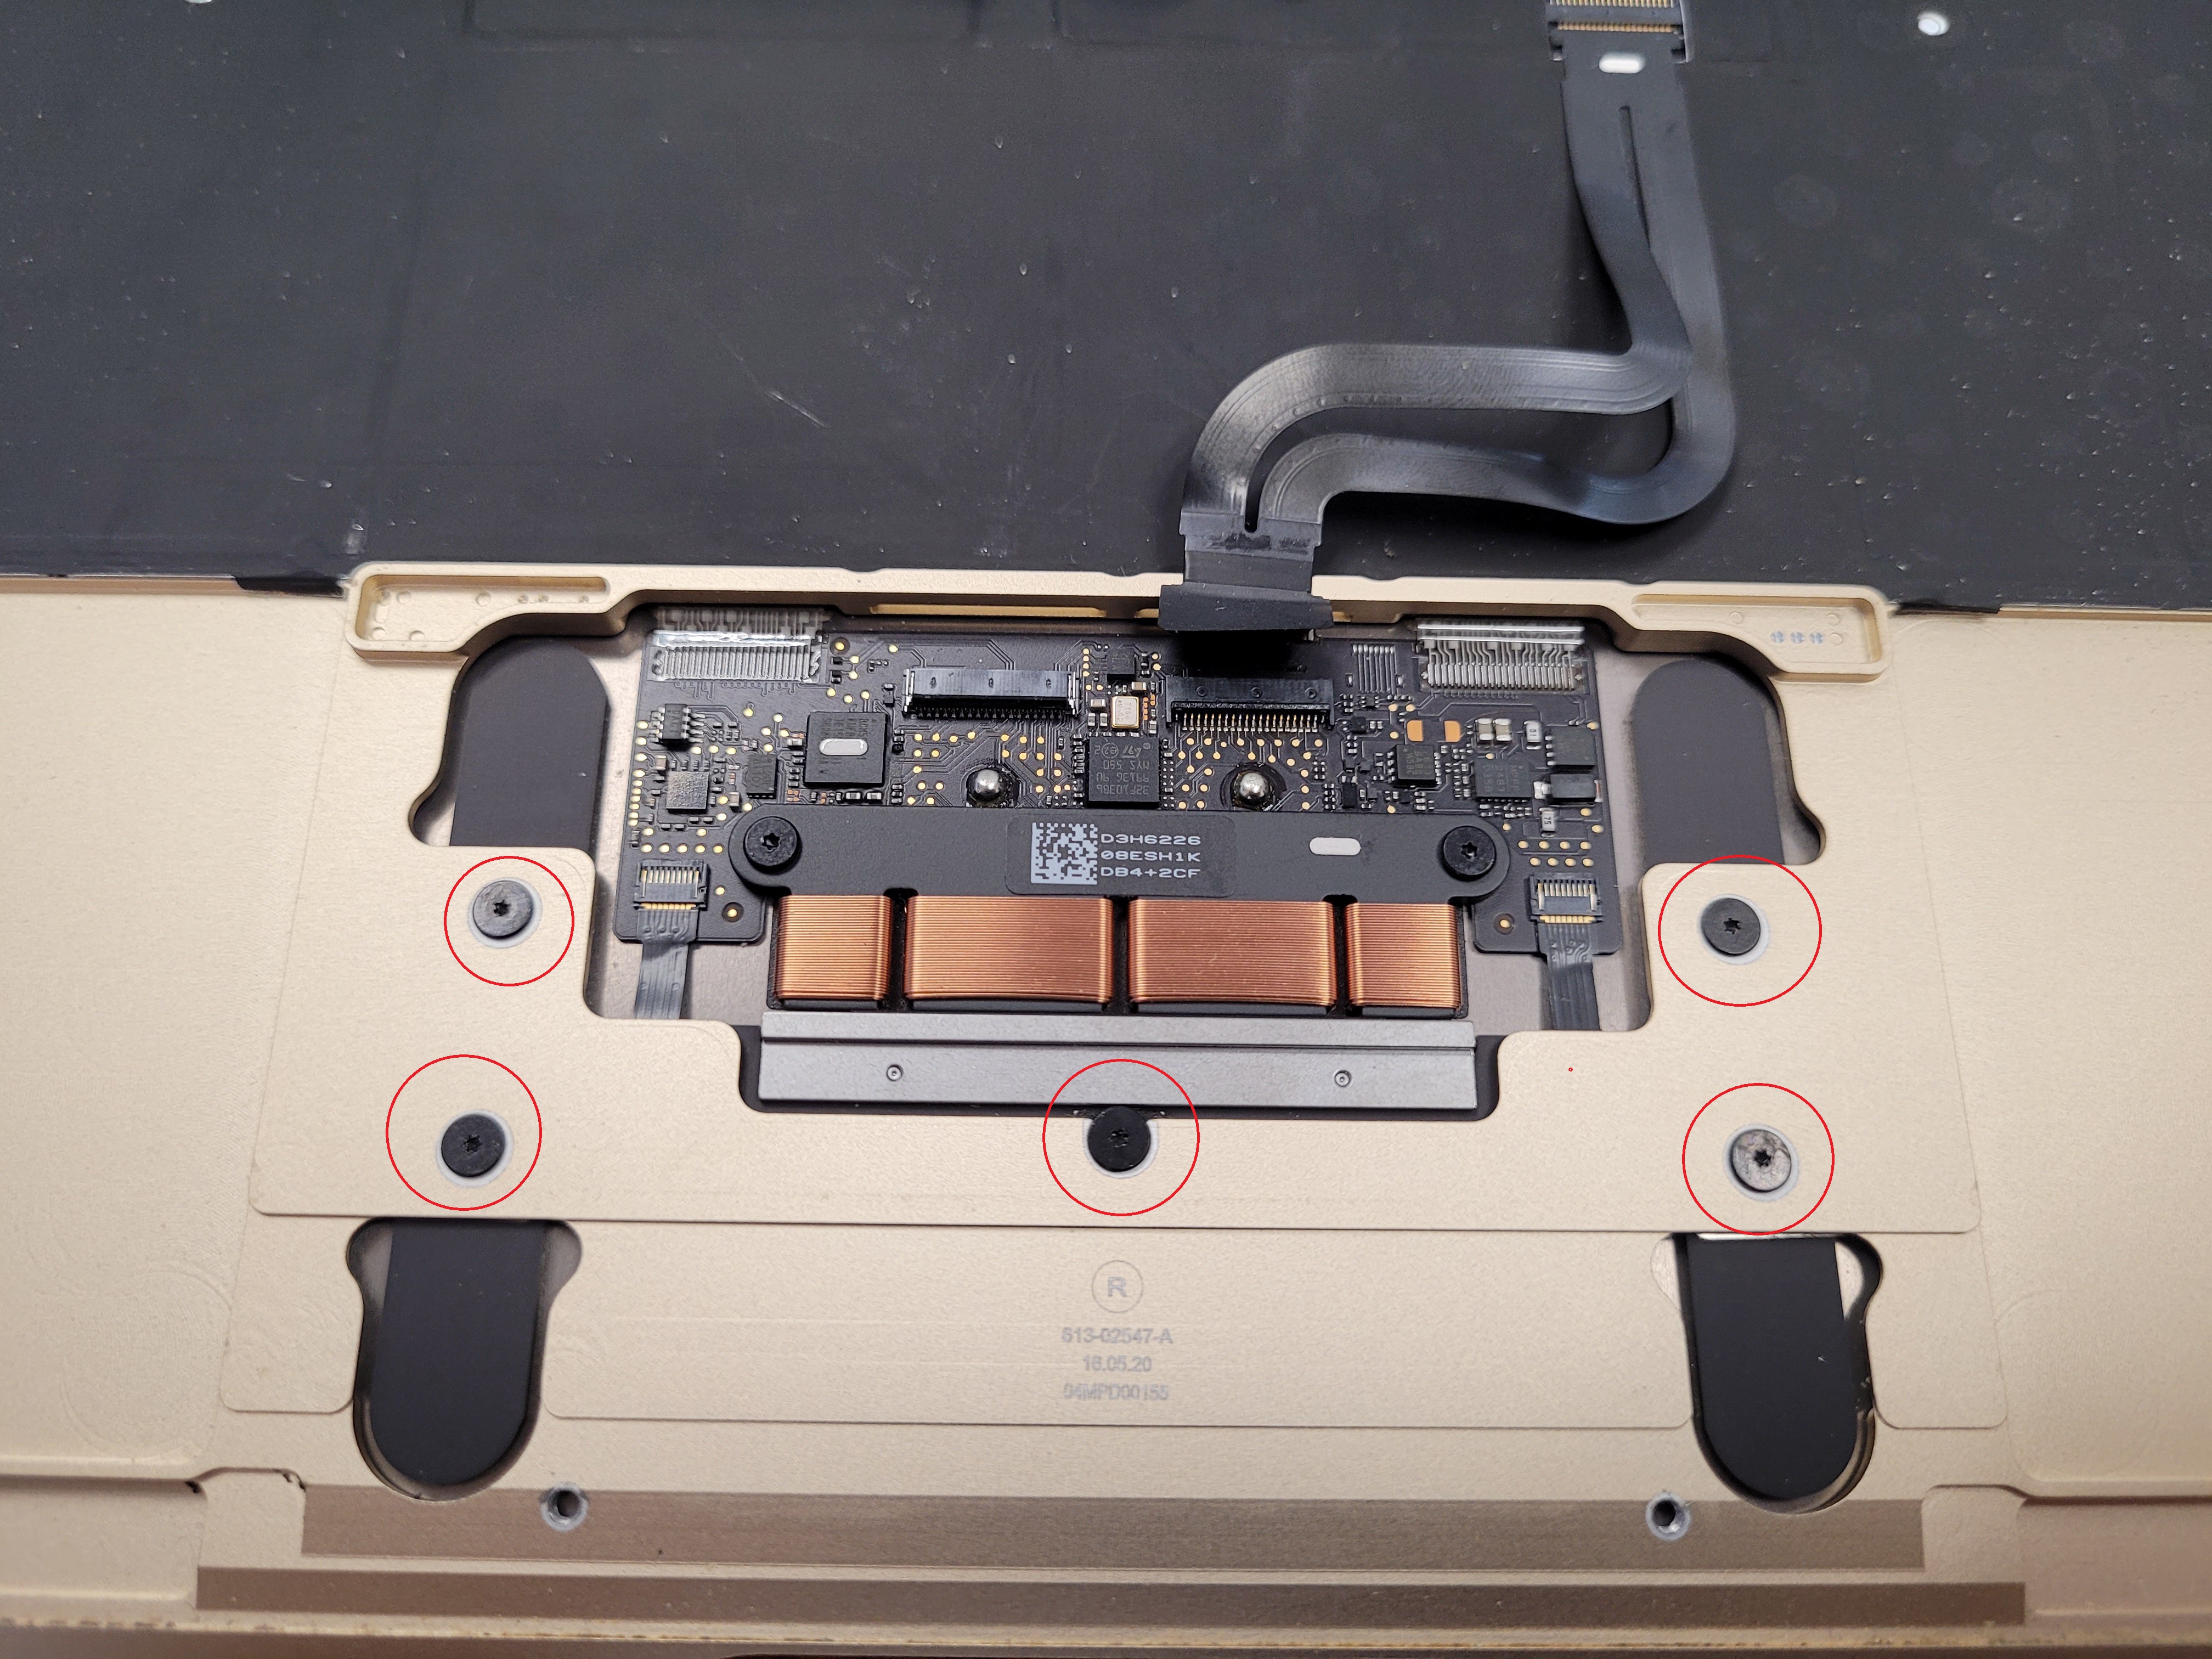
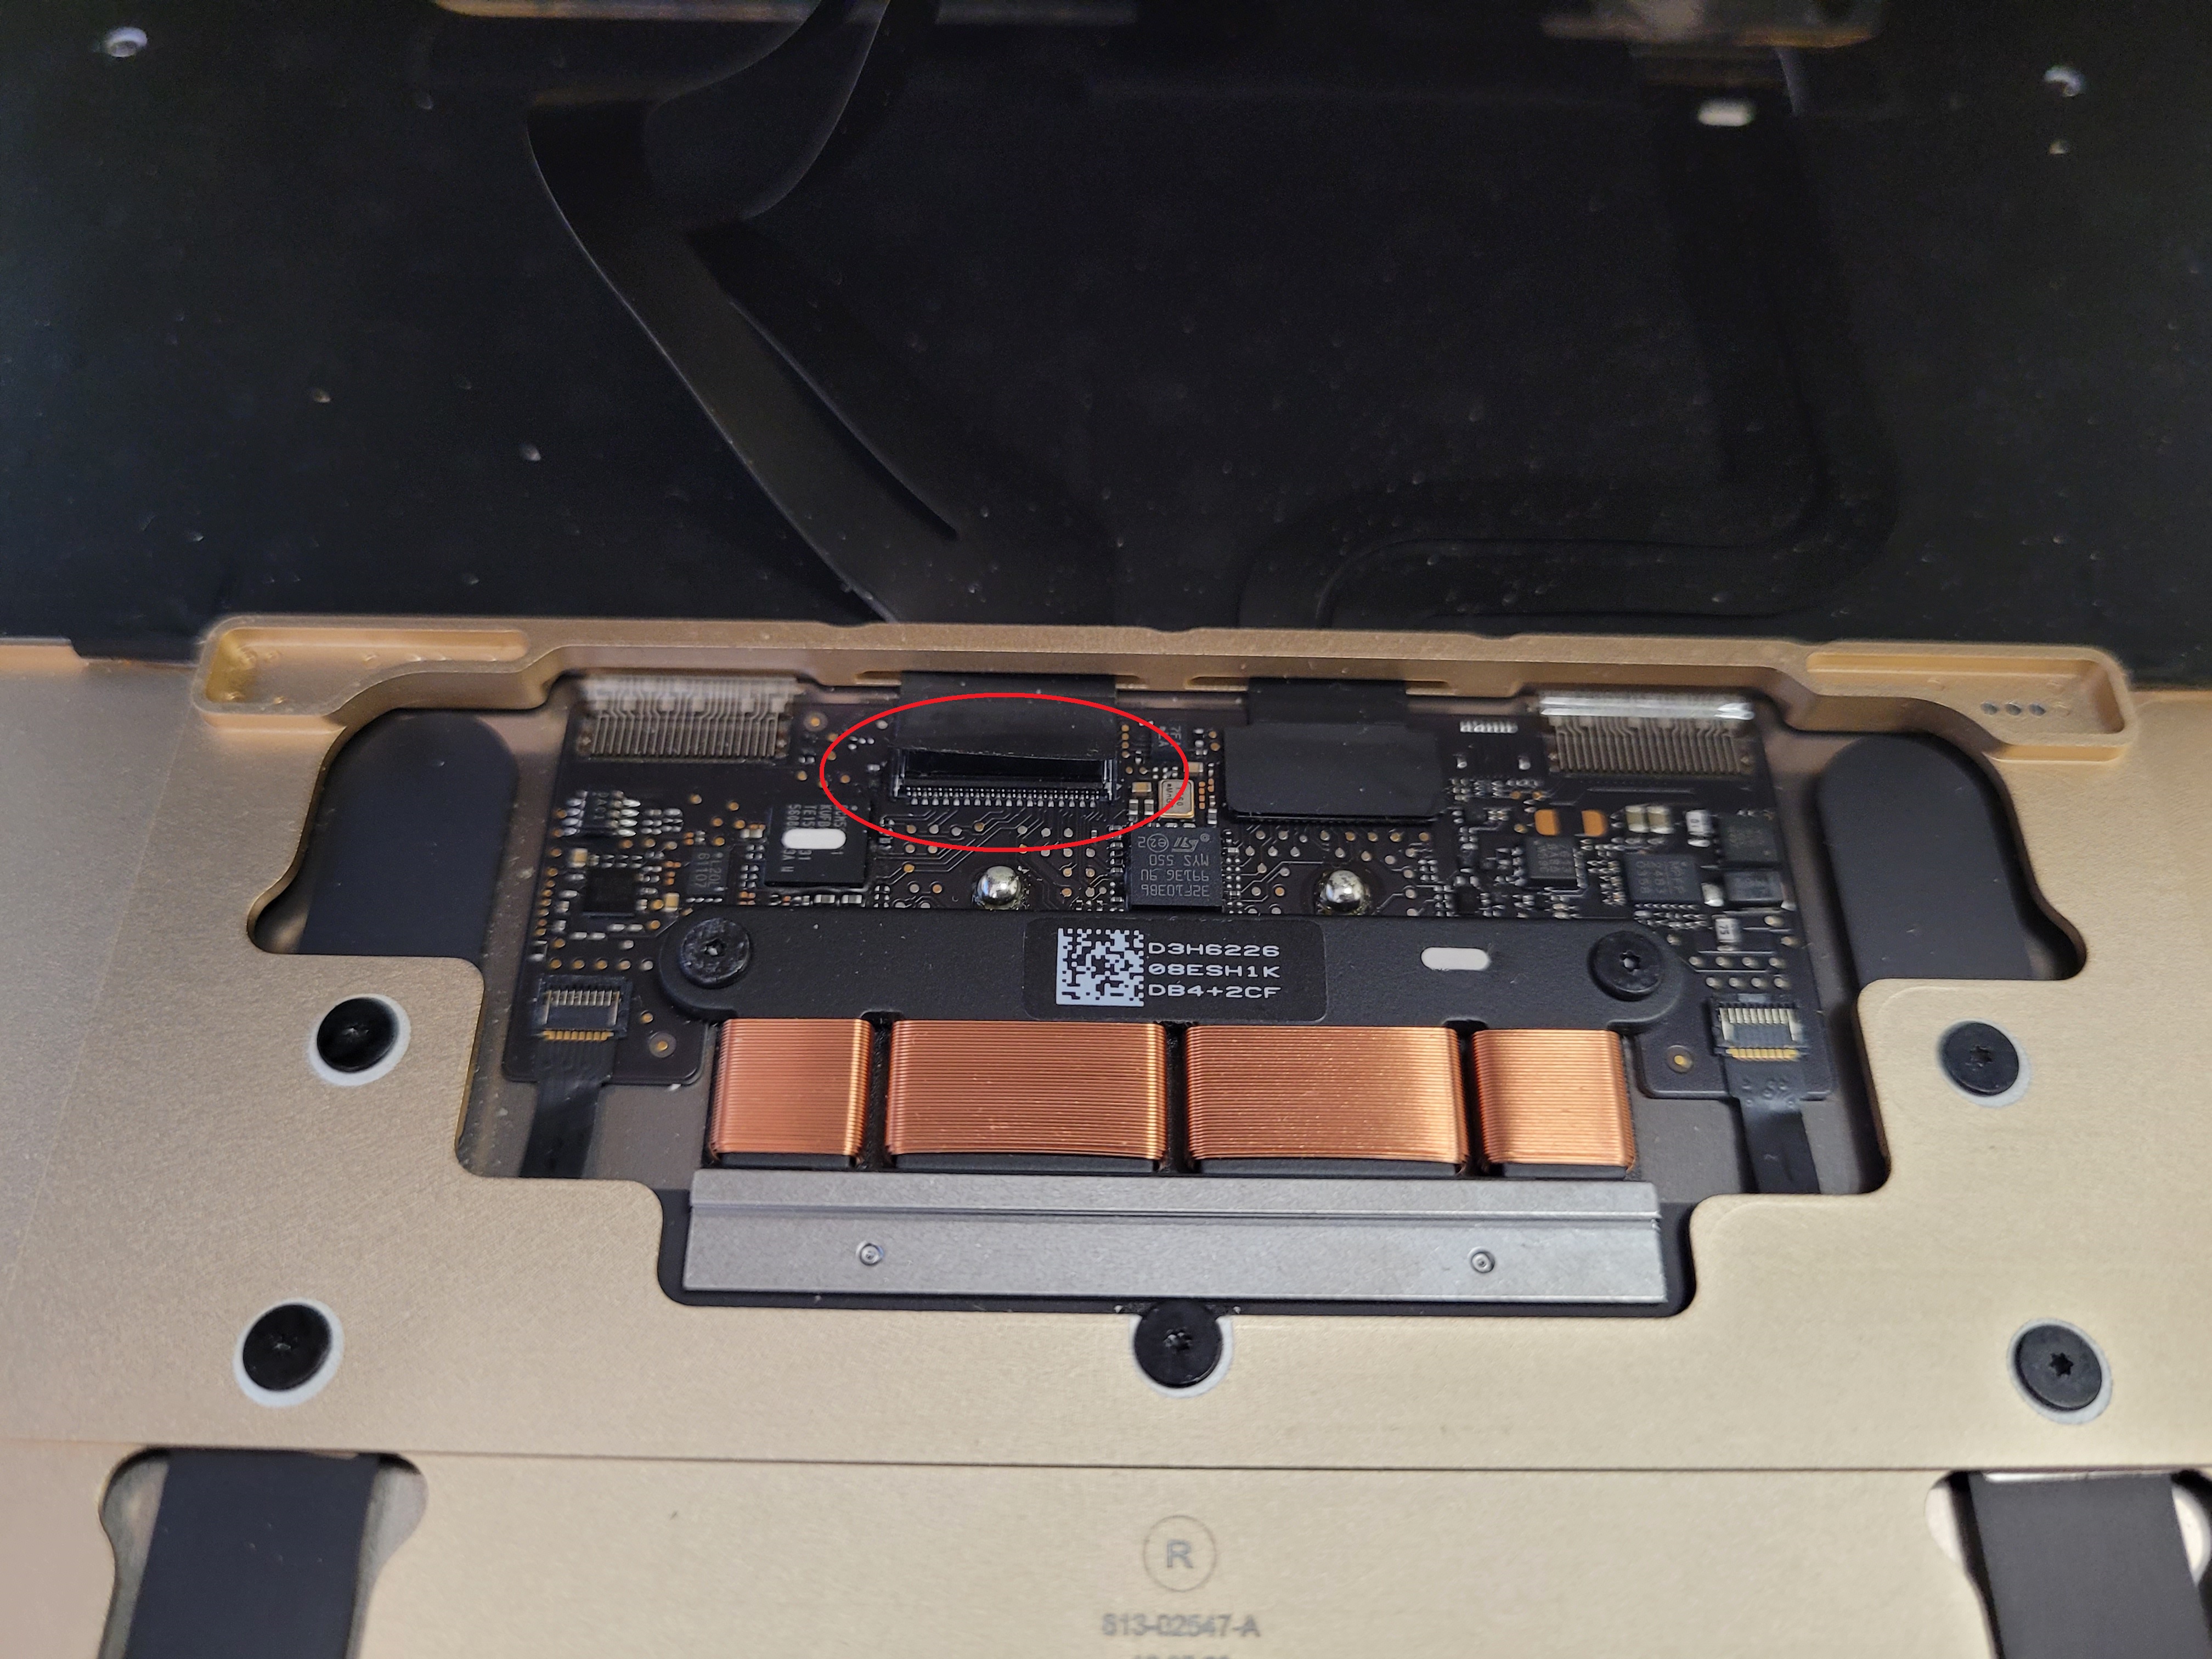
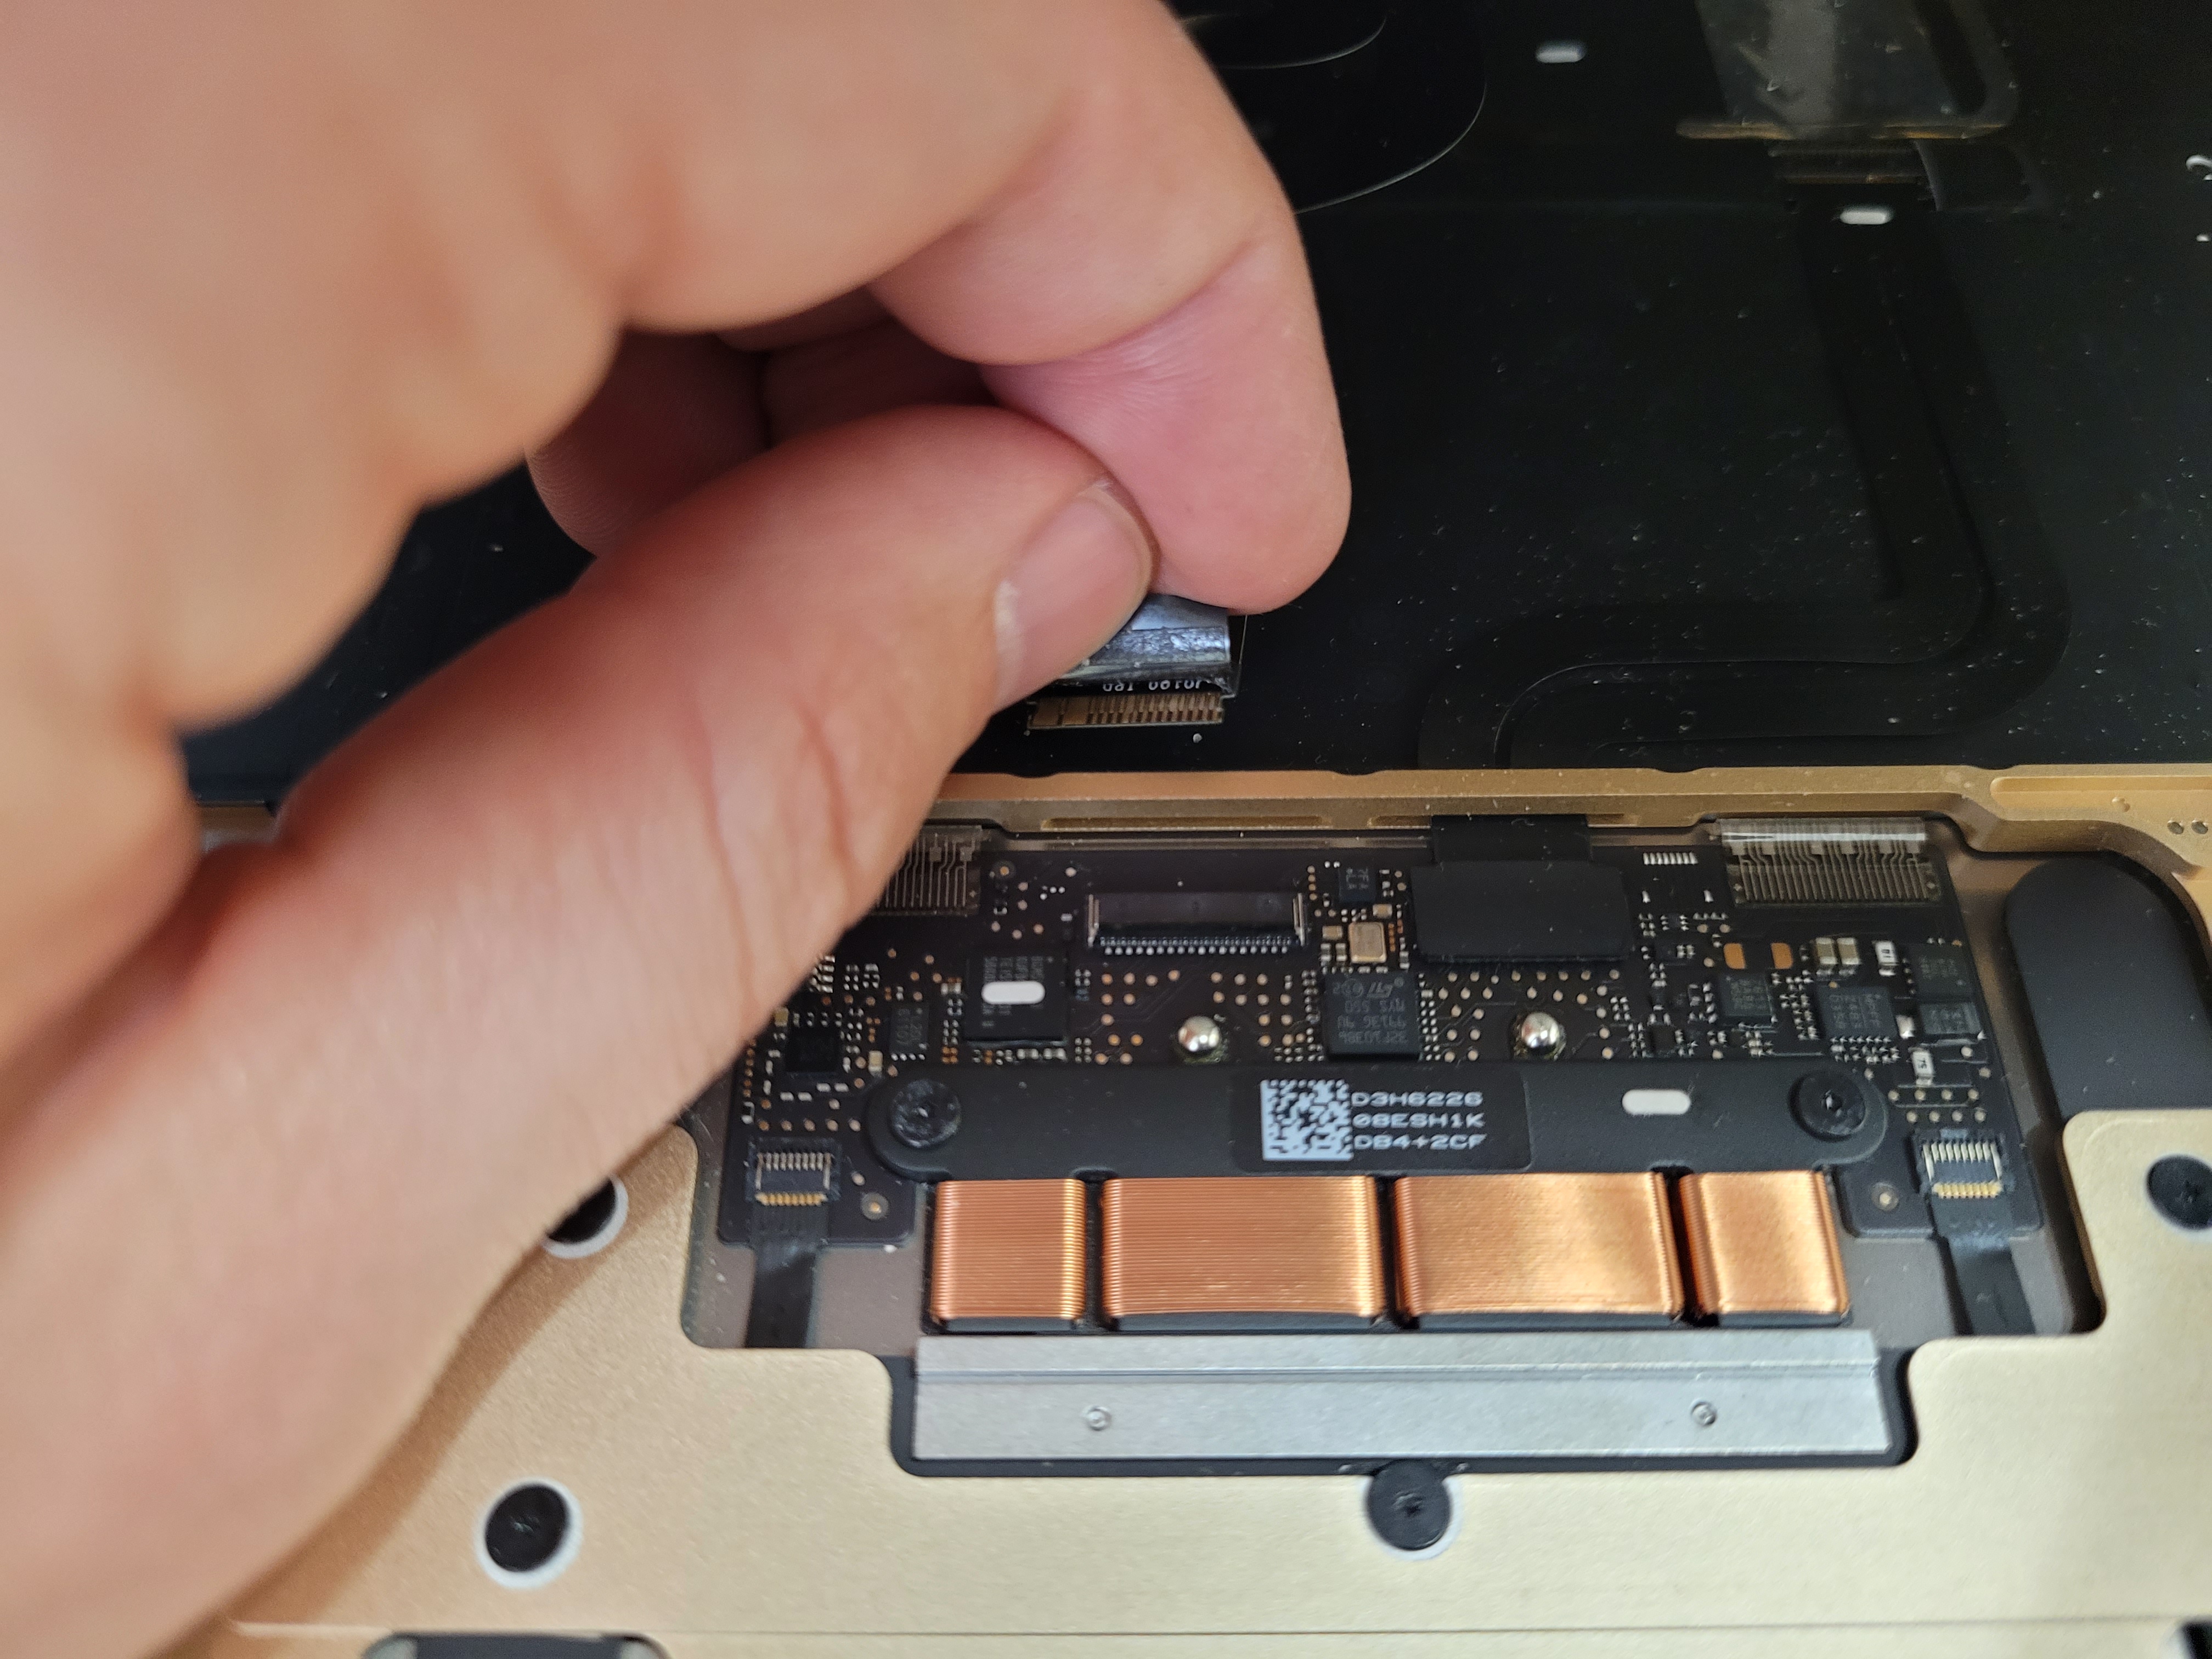
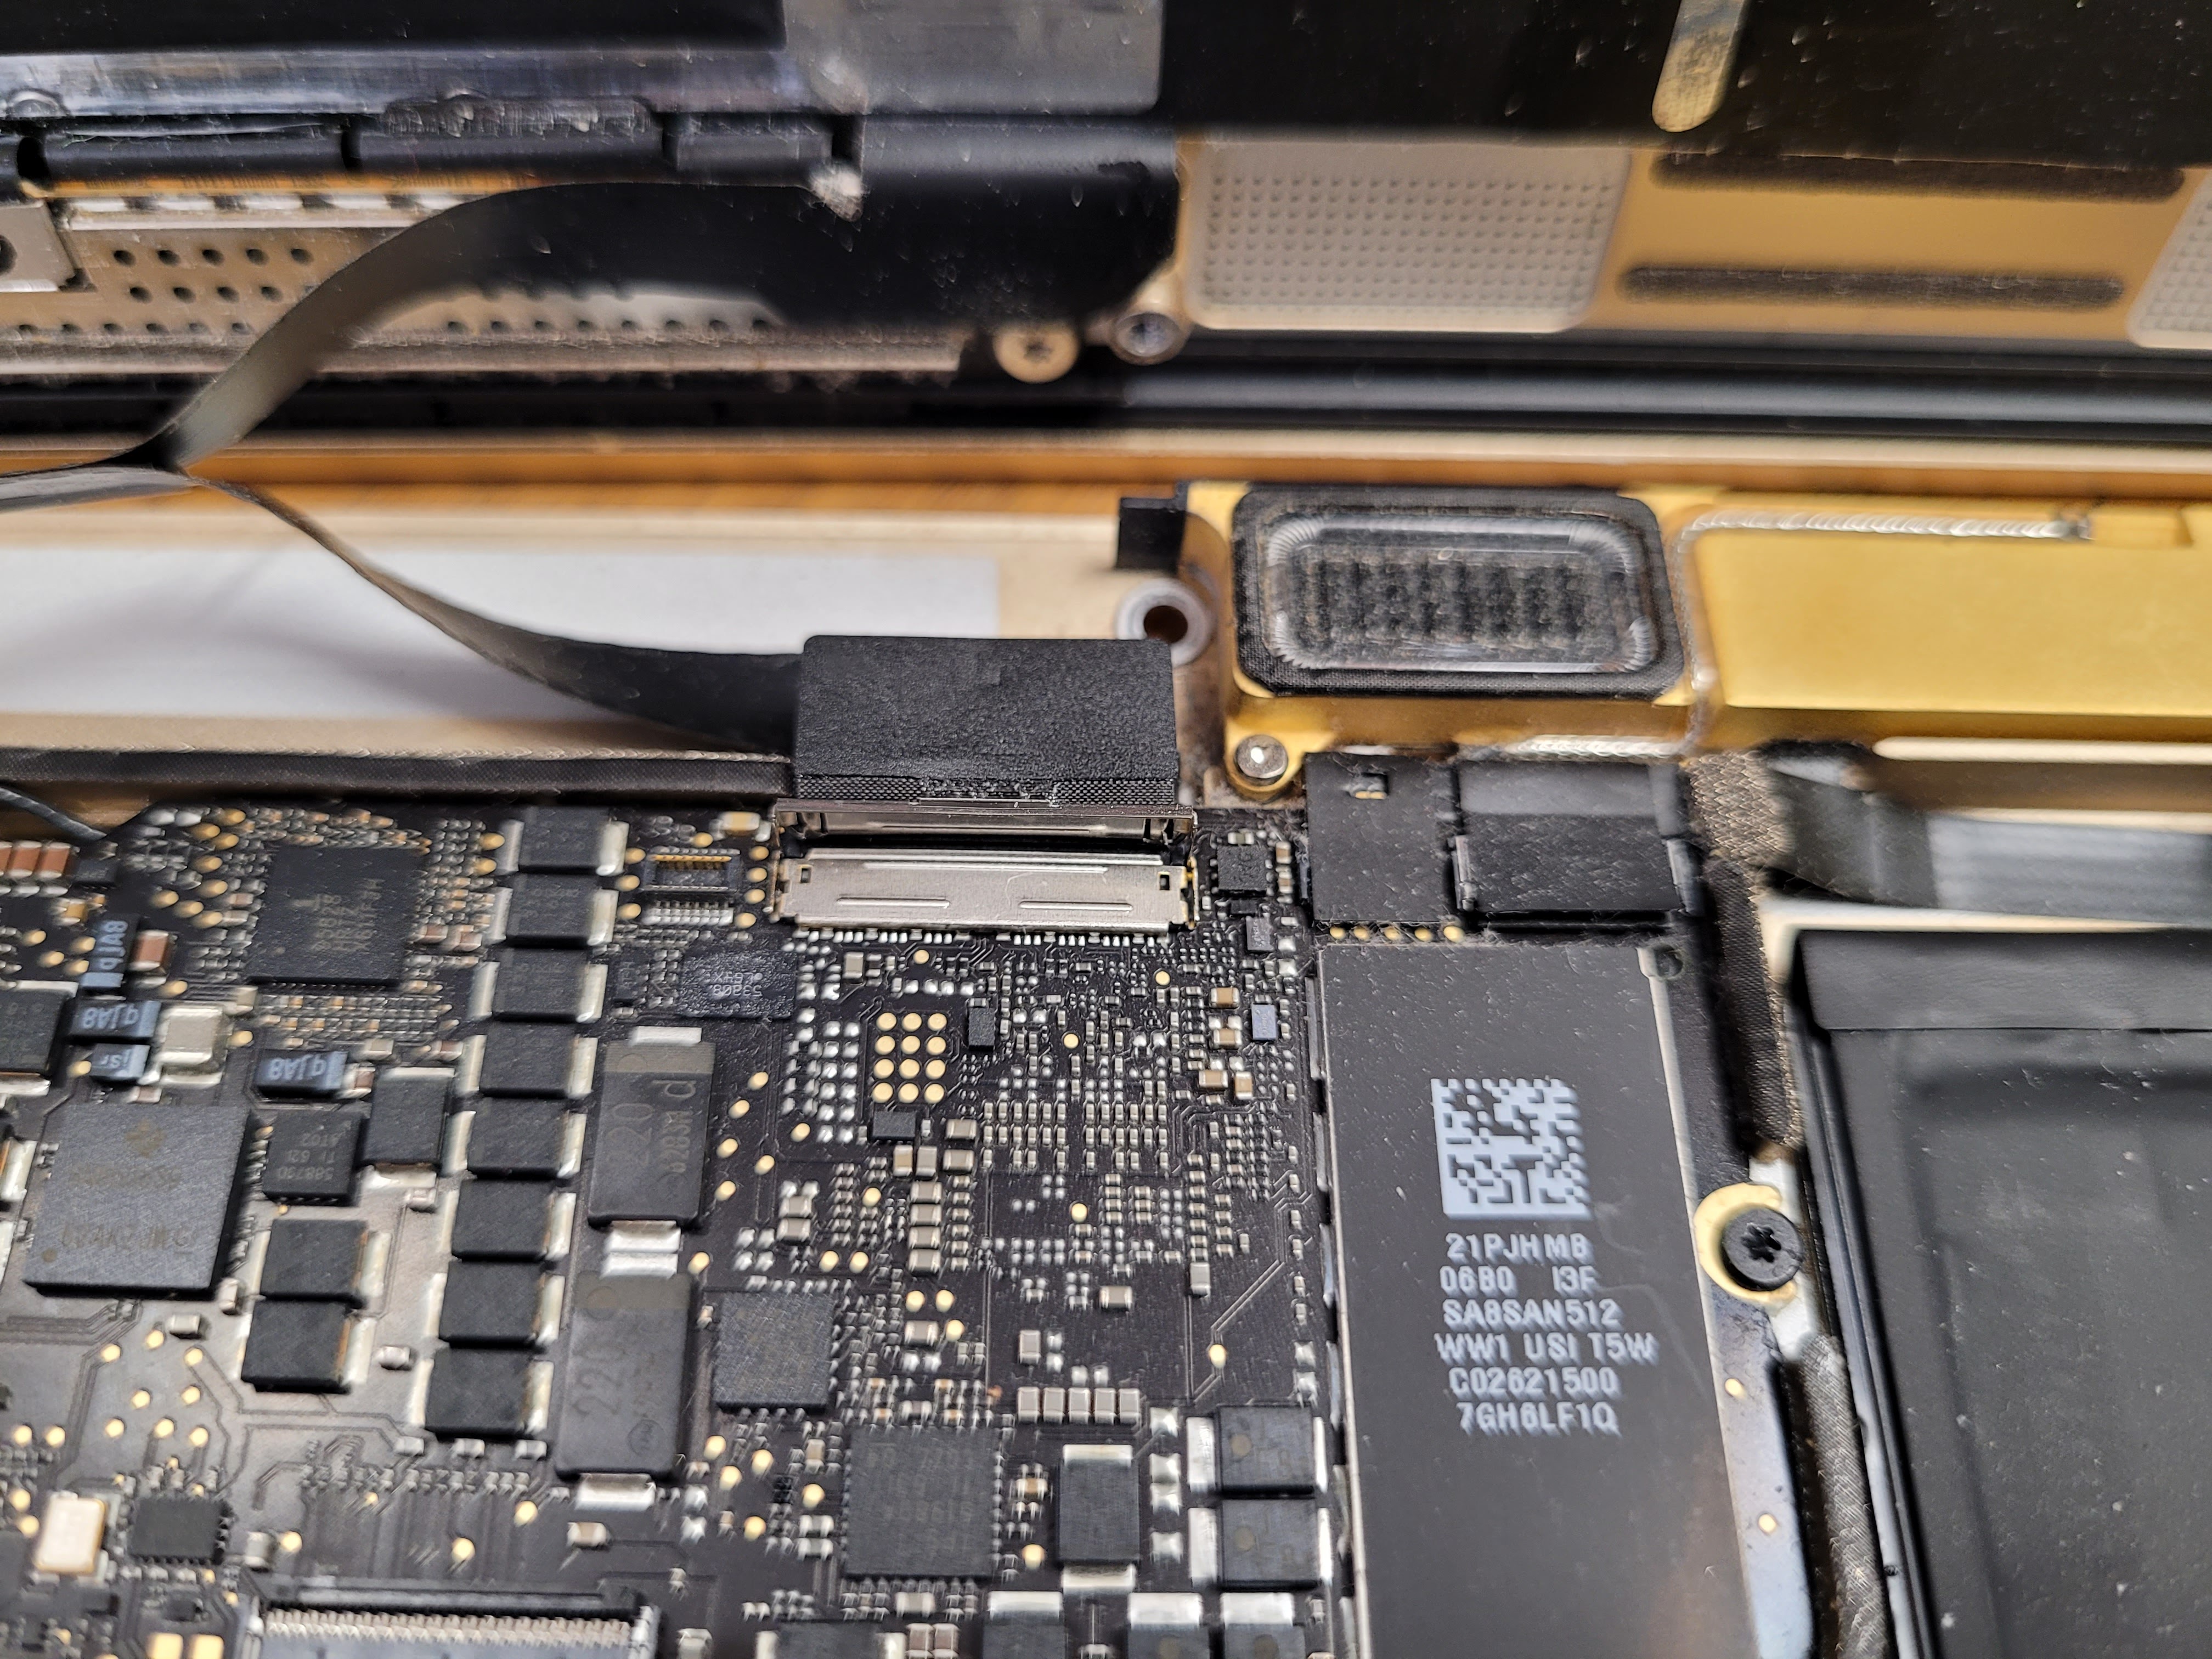
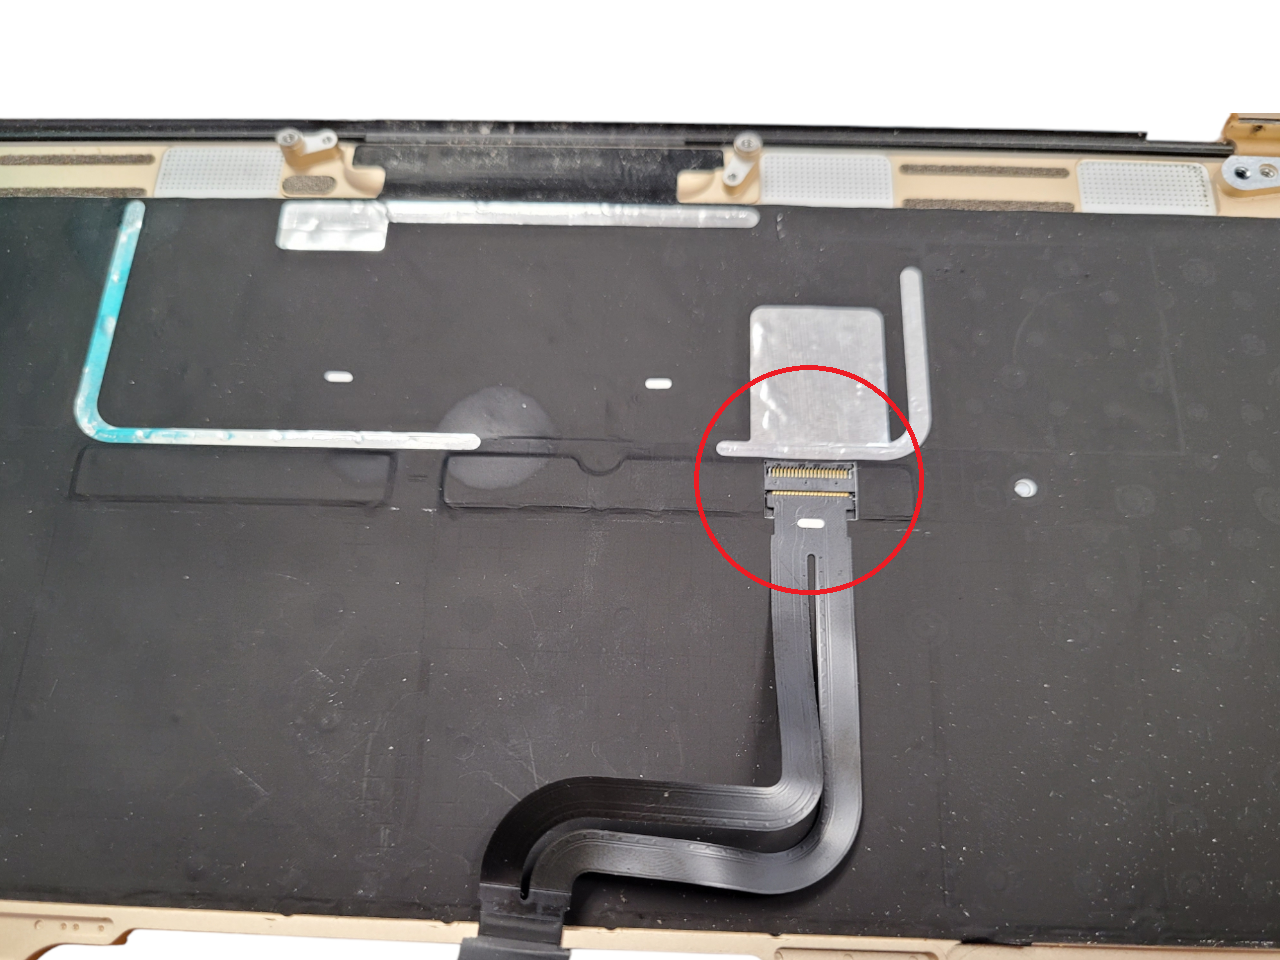
Use the flat end of the spatula to lift the locking plate on the ZIF connector of the keyboard cable. Gently disconnect the ribbon cable from the device case and remove it.


Also: How to replace a keyboard on a MacBook Pro: tutorial for 13 inch A1502

10. Installing the upper housing unit with a keyboard

Follow the instructions for the MacBook A1534 keyboard replacement in reverse order to reassemble your MacBook. To avoid damaging the motherboard, note the following recommendation before turning on the device. Connect your MacBook to a low-voltage power source. Use a 5W iPhone charger and the USB-C to USB-A cable that you should have at hand before the repair.

It is strongly recommended to do any repair or upgrade of Apple gadgets only with genuine parts. The Apple Parts website offers many parts and accessories for various MacBook models. The store's assortment includes parts that have been tested. All parts are 100% original and work according to the stated factory specifications.

Affordable prices for the entire range will pleasantly surprise you. For your convenience, Apple Parts offers several payment options and fast shipping within the U.S. and internationally.


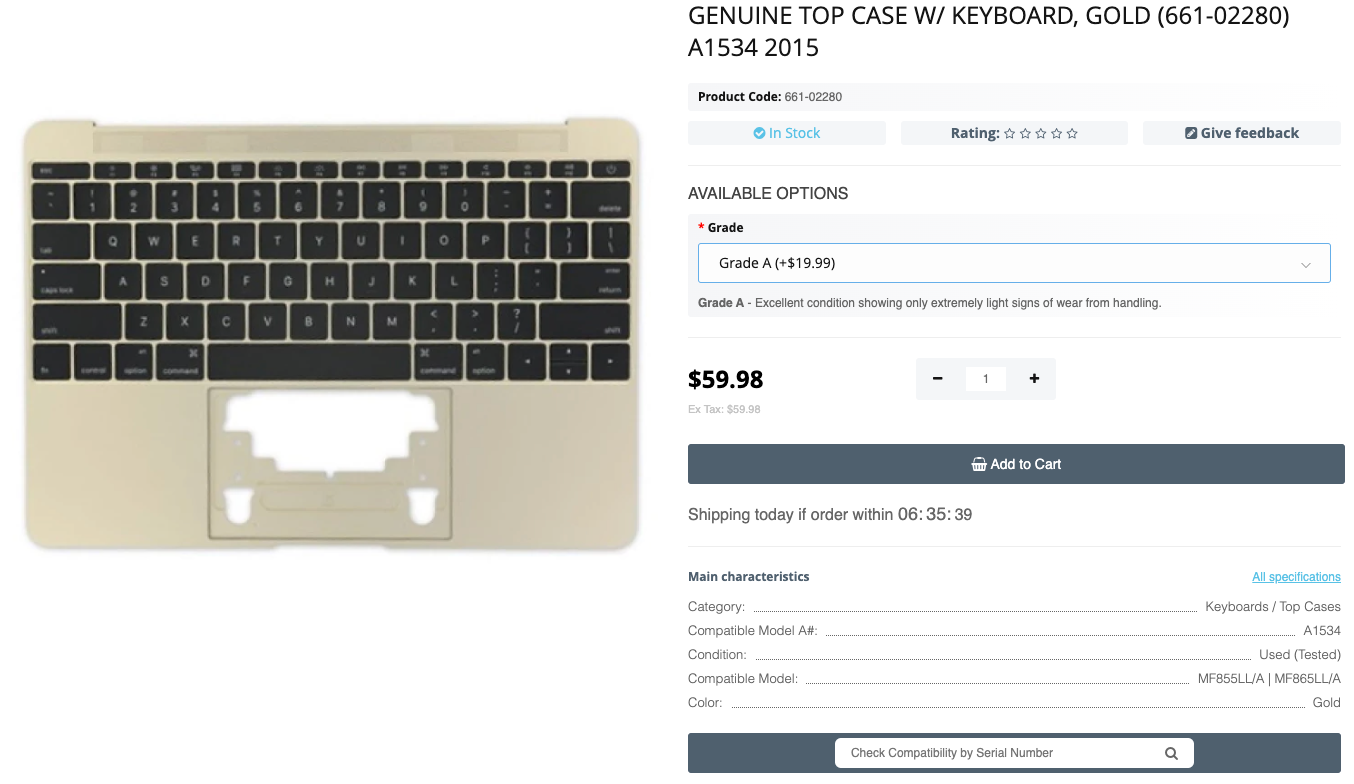
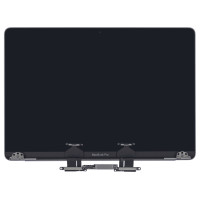
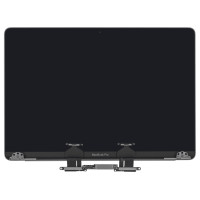
Genuine Top (Upper) Case W/ Keyboard, Gold (661-02280) A1534 2015

FAQ

1. Is it possible to replace the Apple MacBook Retina 12 A1534 2015 keyboard by myself?
Yes, you can replace the MacBook A1534 keyboard by yourself if you have detailed instructions. You will also need special tools and the original top part of the device with the keyboard.
2. What tools do I need for the replacement of the keyboard on MacBook A1534?
To replace your MacBook keyboard, you need an iOpener case opener kit, battery blocker, USB-C to USB-A 2.0 cable, a spudger, and tweezers. You also need to prepare a set of screwdrivers: Phillips #00, P5 Retina MacBook Pro and Air, Y00, Torx T3, and T5.

ABOUT THE AUTHOR

Volodymyr Chubei
Computer Repair Specialist at MacNest.com


Volodymyr was born in Ukraine and has found his passion for electronics from his childhood. At the age of 13, he was capable of soldering some basic elements of a logic board and today he is one of the co-founders of MacNest.com

Latest Posts

When to Replace MacBook: 5 Signs

When to Replace MacBook: 5 Signs

Not sure if your MacBook needs to be replaced with a newer one? In this art...
Read More

28 Dec 2023
How to Fix a Frozen MacBook: 8 Tips

How to Fix a Frozen MacBook: 8 Tips

MacBook users may face a situation when the Apple laptop freezes, slows dow...
Read More

23 Dec 2023
How to Clear System Data on MacBook

How to Clear System Data on MacBook

If you don't store large files on your MacBook, but you've noticed that m...
Read More

05 Dec 2023
MacBook Touch ID Not Working: 6 Steps to Fix It

MacBook Touch ID Not Working: 6 Steps to Fix It

Apple laptops sometimes fail and malfunction when MacBook Touch ID is not w...
Read More

05 Dec 2023